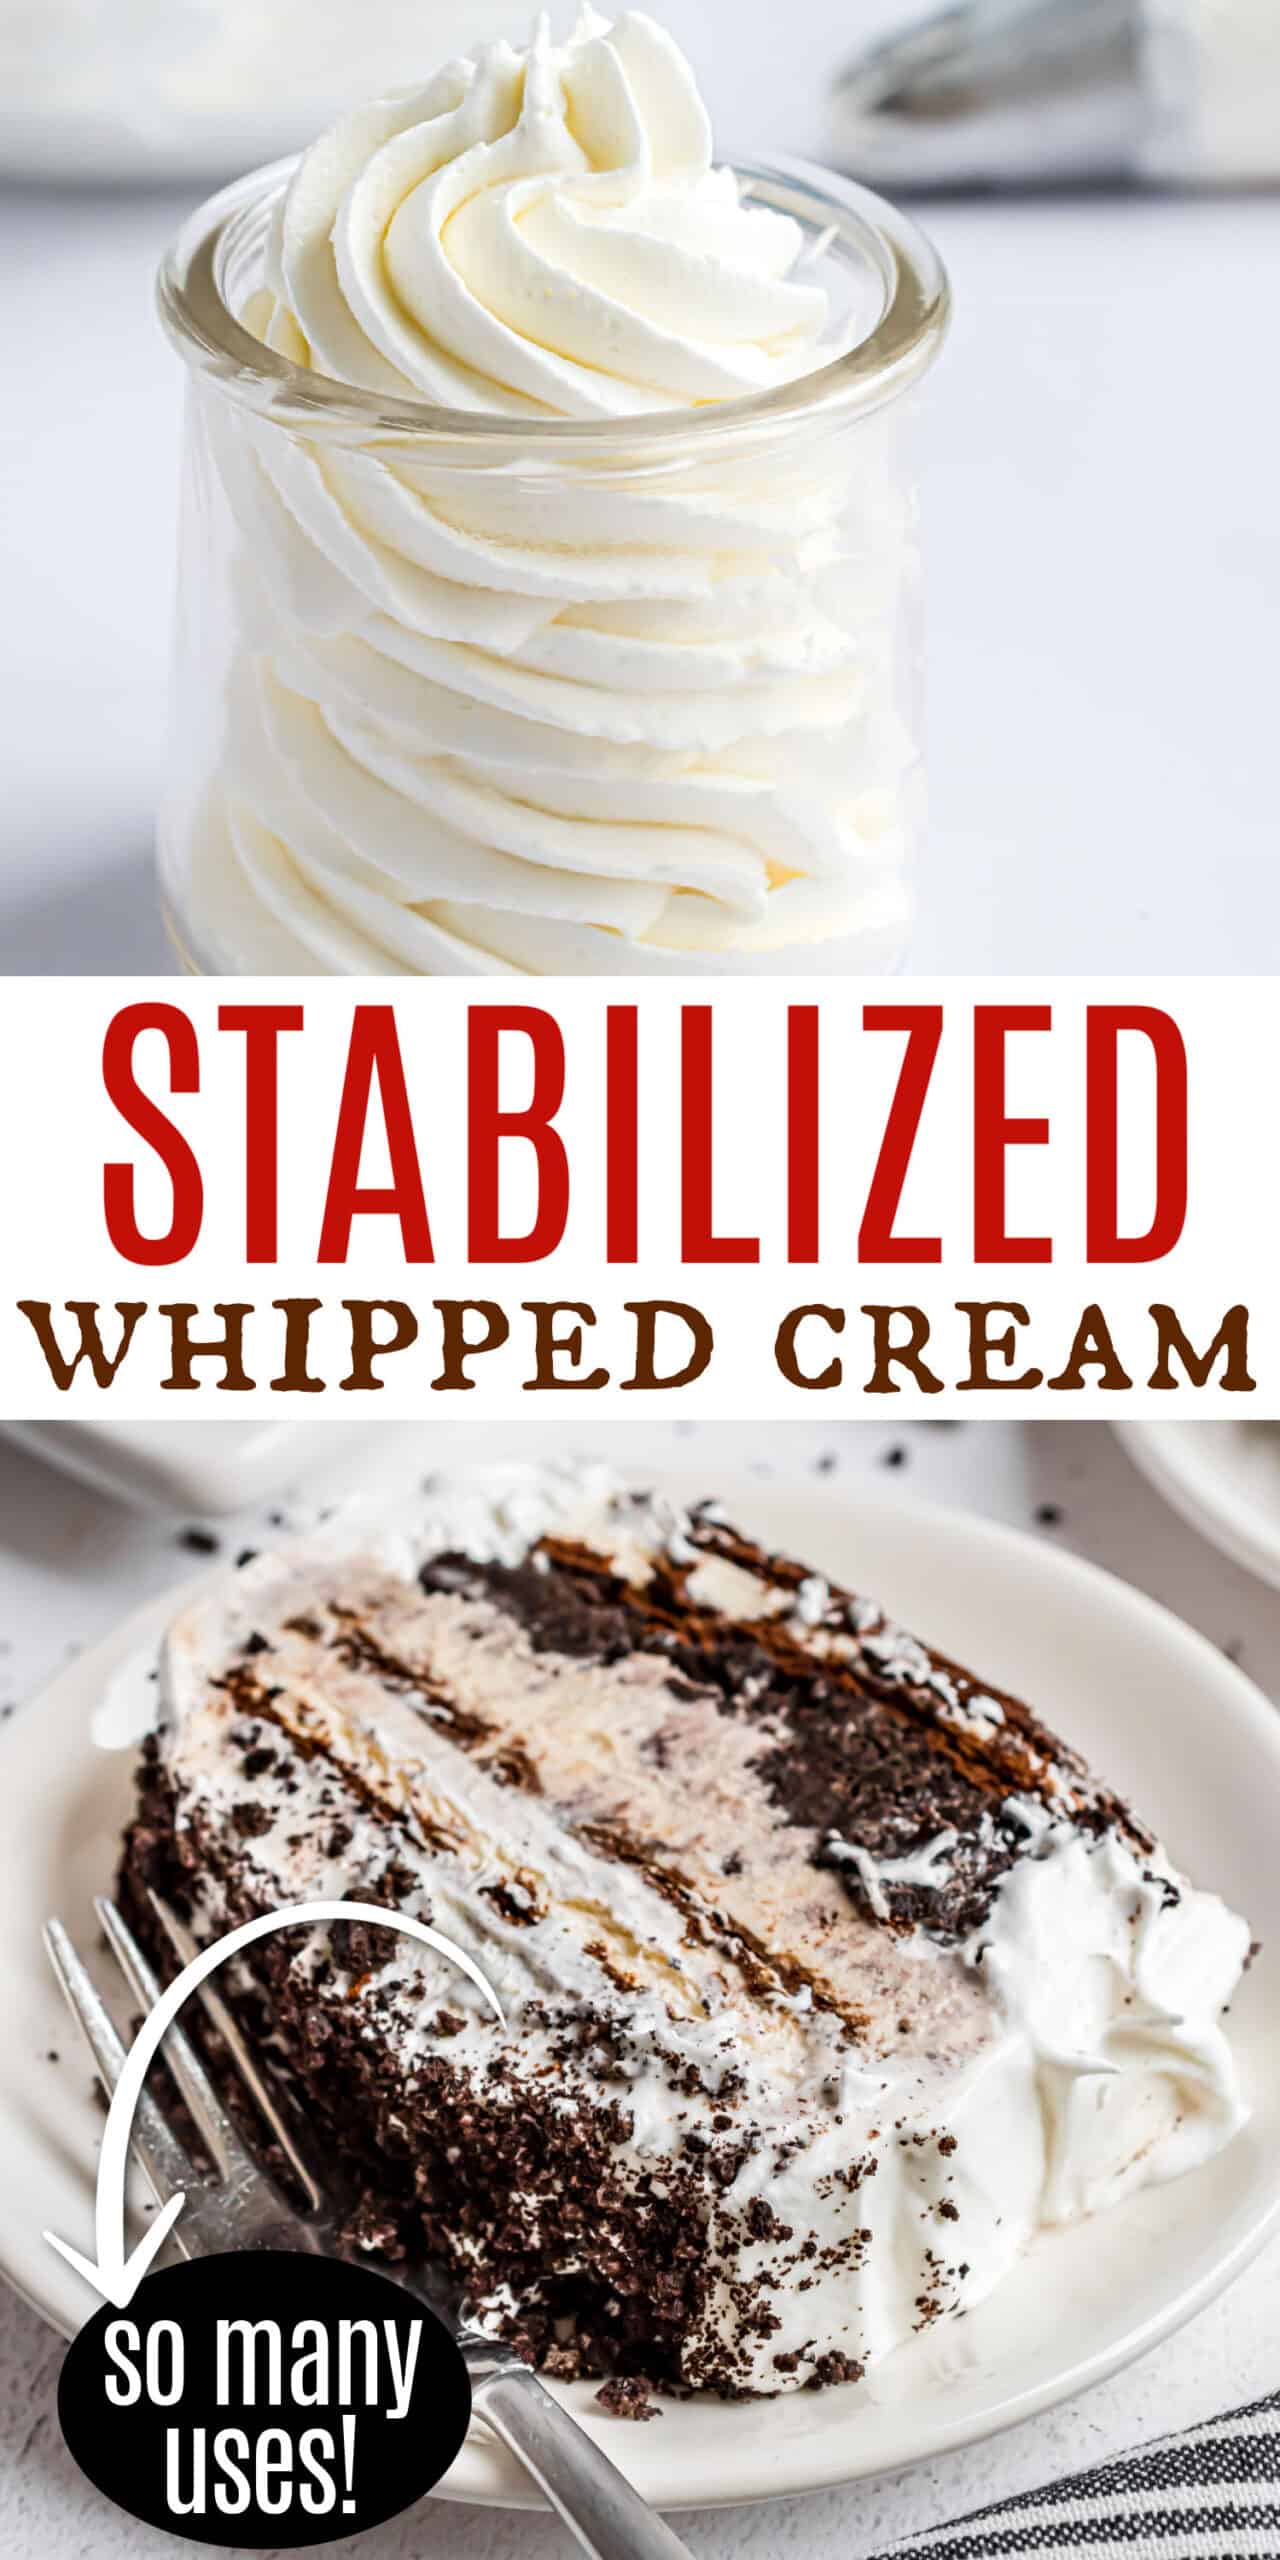
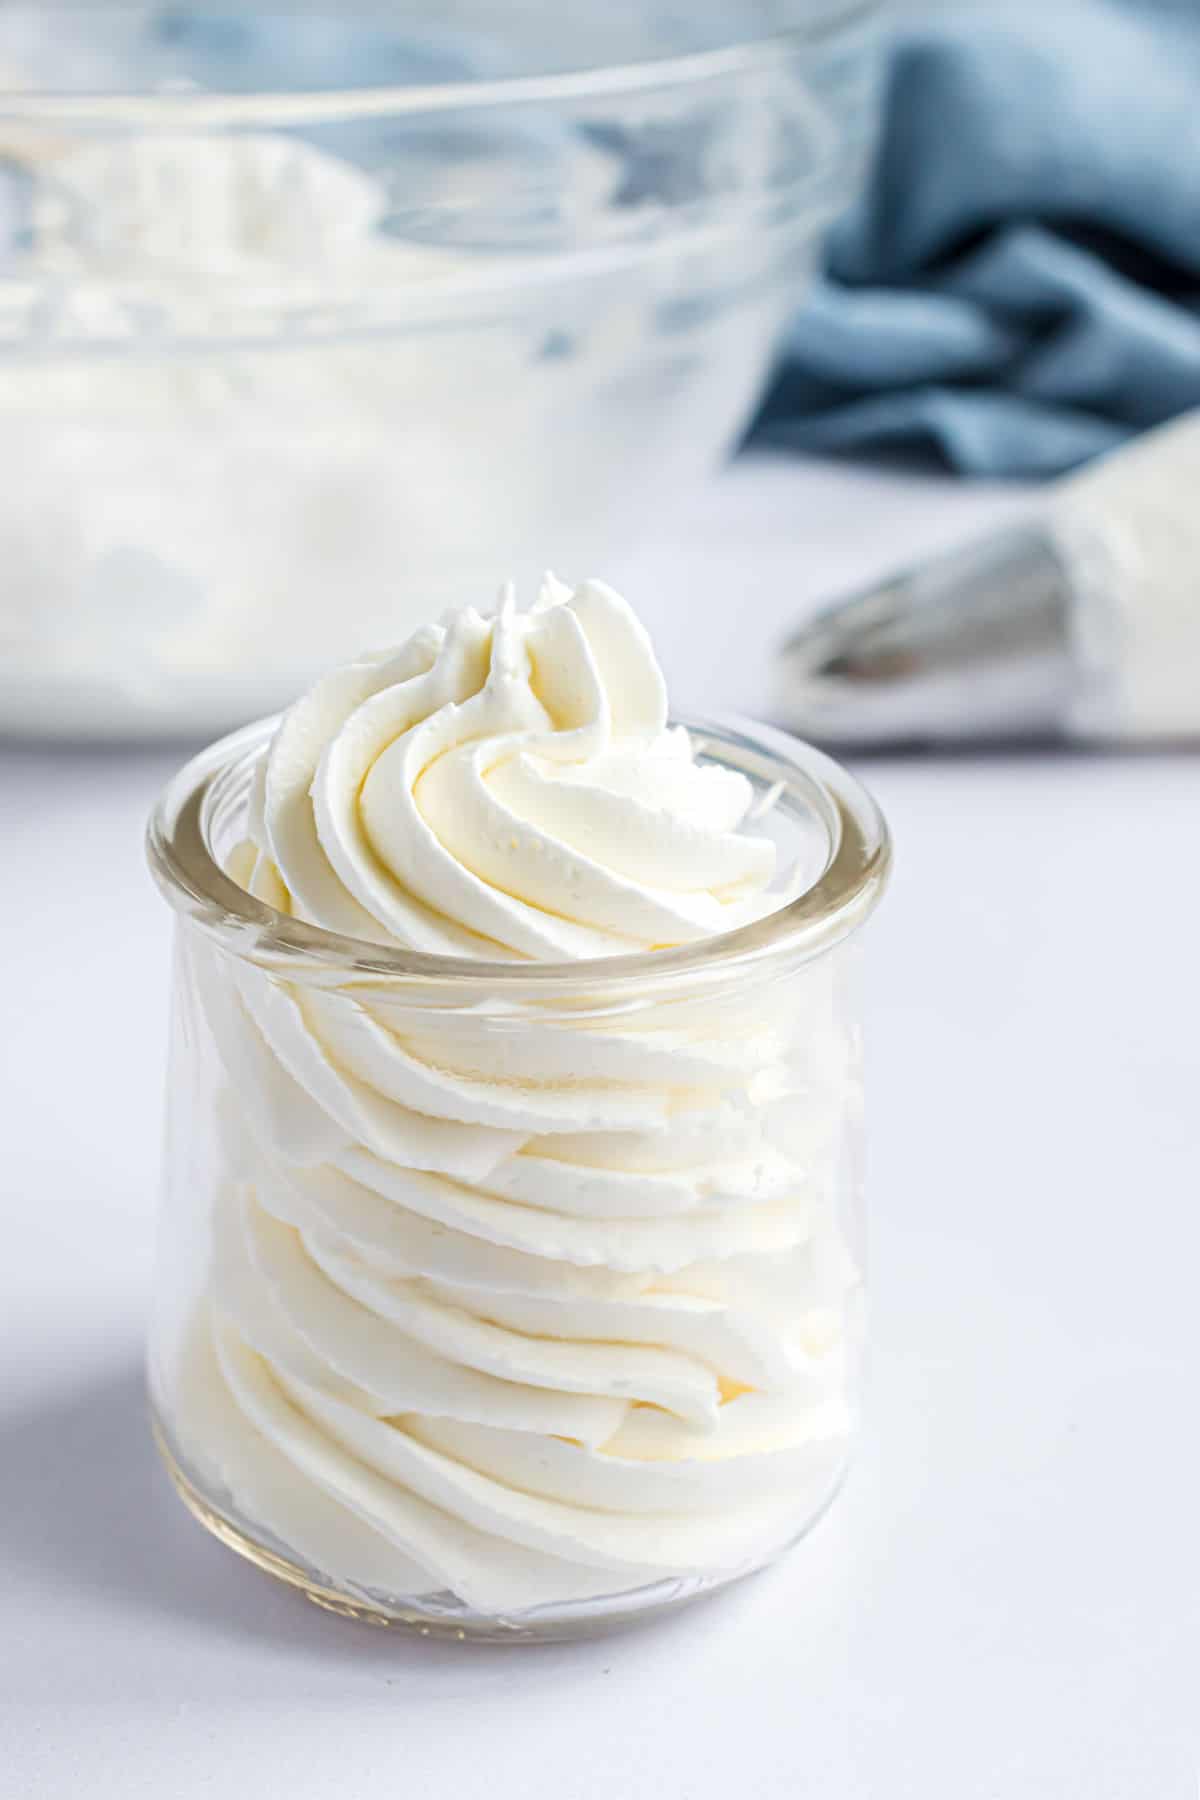
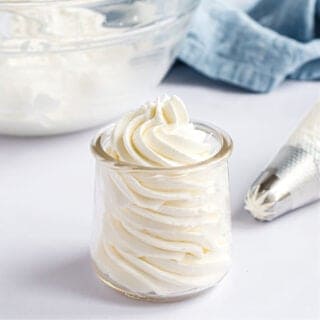
Homemade stabilized whipped cream works just like Cool Whip in all your favorite recipes. Learn how to make a perfect fluffy whipped topping that holds its shape with this step-by-step guide.
Nothing beats the taste of fresh whipped cream. Try my classic homemade whipped cream recipe too. Or give our lemon whipped cream a try for a burst of citrus flavor!
What is Stabilized Whipped Cream
Stabilized whipped cream is a whipped cream that contains additional ingredients to help it hold its shape. If you’ve ever had Cool Whip, you’ve had stabilized whipped cream!
Regular whipped cream tends to deflate quickly—especially in warm, humid climate. If you’ve ever spread homemade whipped cream onto Angel food cake only to watch it turn into a goopy mess after a couple of hours hours, you know what I mean.
While regular whipped cream relies on incorporated air to hold its shape, added stabilizers can help keep it sturdy for up to days at a time in the fridge.
- Stabilized whipped cream is light and airy, yet sturdy enough to be used as a frosting.
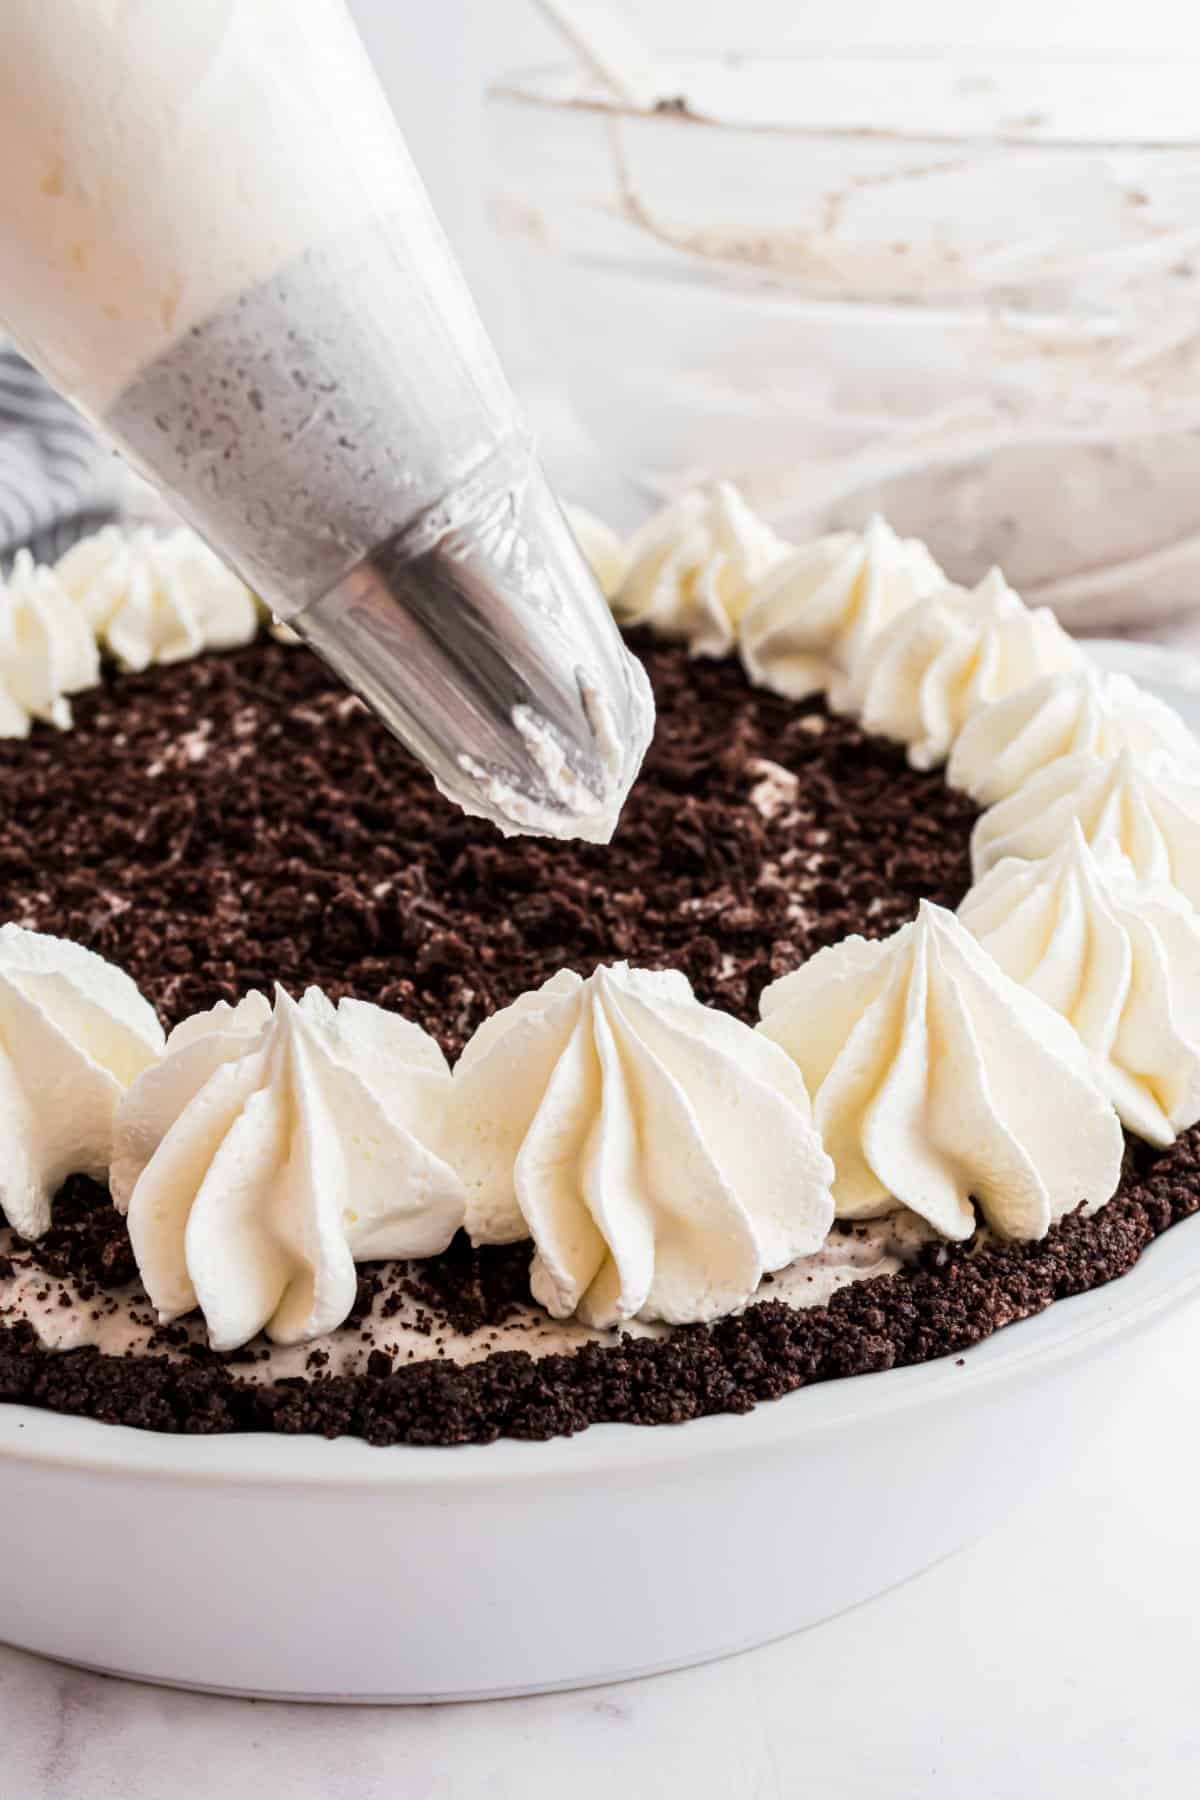
- You can even add it to frosting bags to pipe onto cakes and cupcakes in all kinds of shapes.
- Perfect if you want a frosting that is lighter (to top pound cake or pudding cupcakes).
Tubs of Cool Whip are readily available at every grocery store (at least in the United States). So you might be wondering if it’s worth it to make your own.
I’m glad you asked!
Here are a few reasons to make homemade cool whip:
- Making stabilized whipped cream at home gives you more control over the level of sweetness. This version is slightly less sweet than store bought.
- Store bought Cool Whip is loaded with high fructose corn syrup, preservatives and artificial flavors that you may prefer to avoid.
- Freshly made stabilized whipped cream just tastes so much better!
Perfect to use in our Jello pie recipe and our cool whip cookie recipe too!!
Ingredient Notes
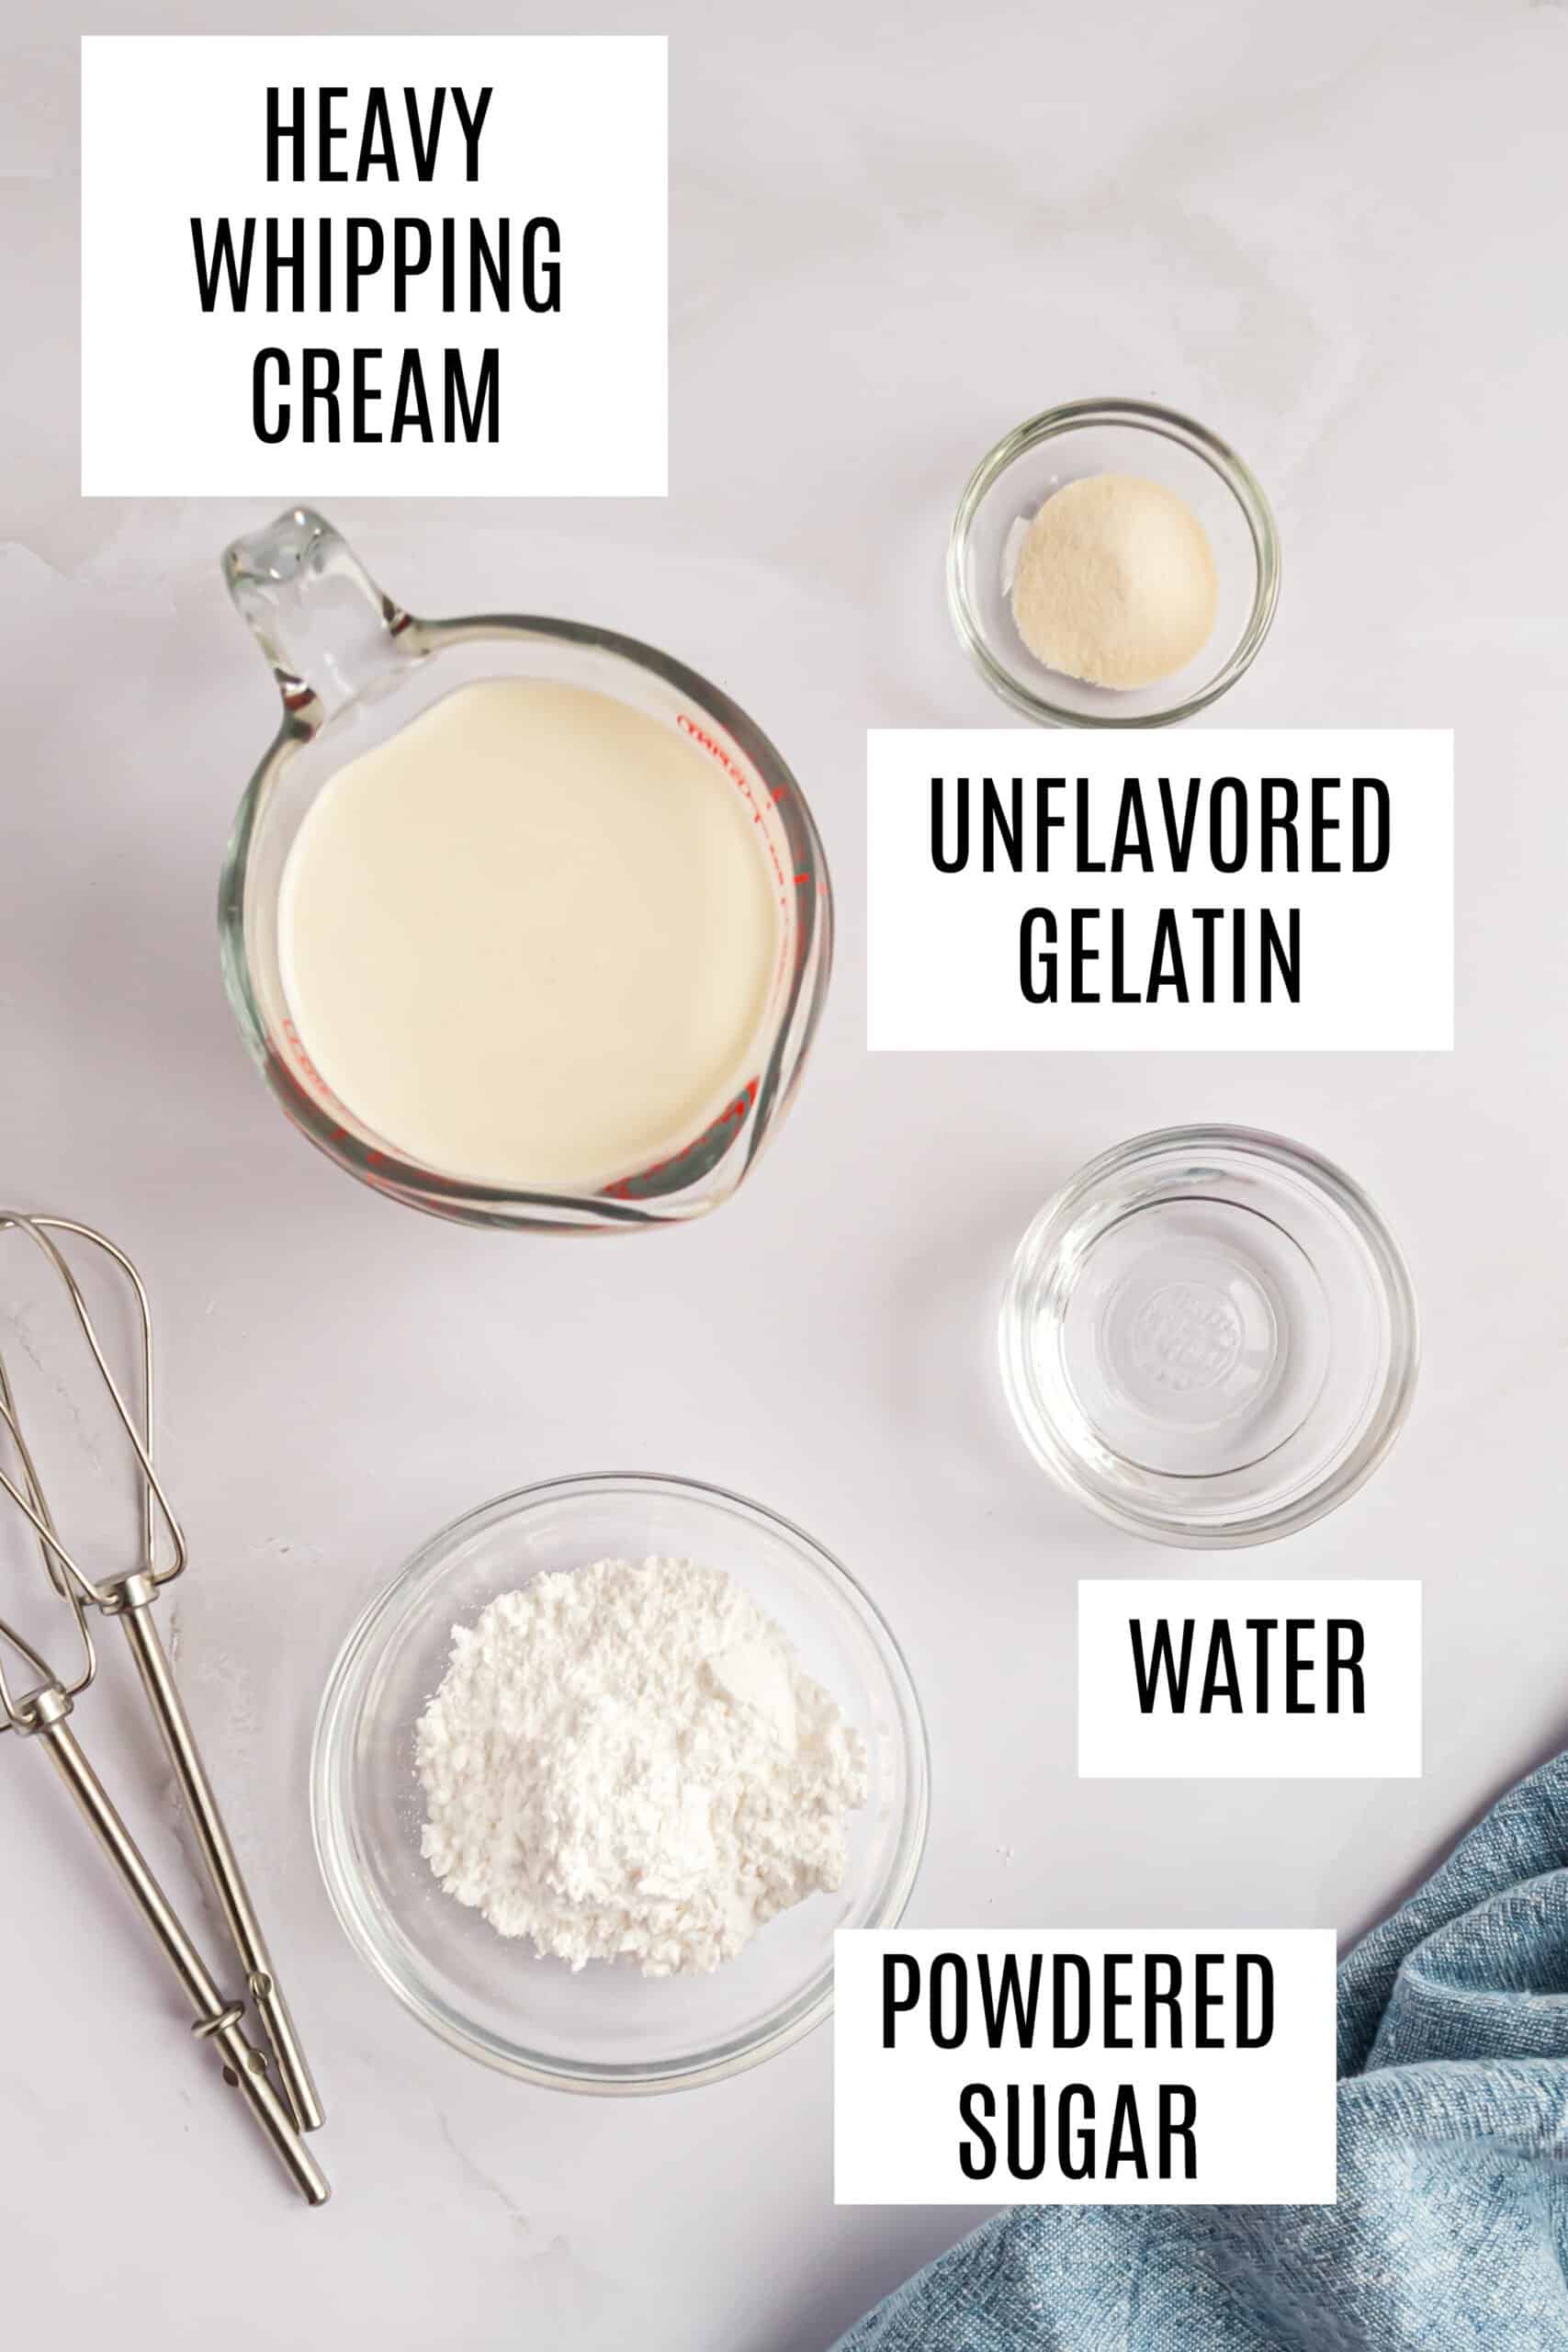
Unlike store bought versions or other recipes, we use just 4 ingredients in this stabilized whipped cream recipe.
- Heavy whipping cream. With a fat content of 36% or higher, heavy cream gets light and fluffy when whipped with air.
- Unflavored gelatin. A small spoonful of this powder mixed with cold water makes the whipped cream stable and sturdy.
- Powdered sugar. It sweetens the whipped cream without affecting the smooth consistency.
- Water. Used to “bloom” the gelatin for the whipped cream.
How to Make Homemade Cool Whip
Bloom the gelatin.
Sprinkling gelatin powder over cold water and letting it sit for a few minutes is called “blooming”. It’s necessary for a smooth whipped topping. If you skip this step you’re likely to end up with lumps in your stabilized whipped cream.
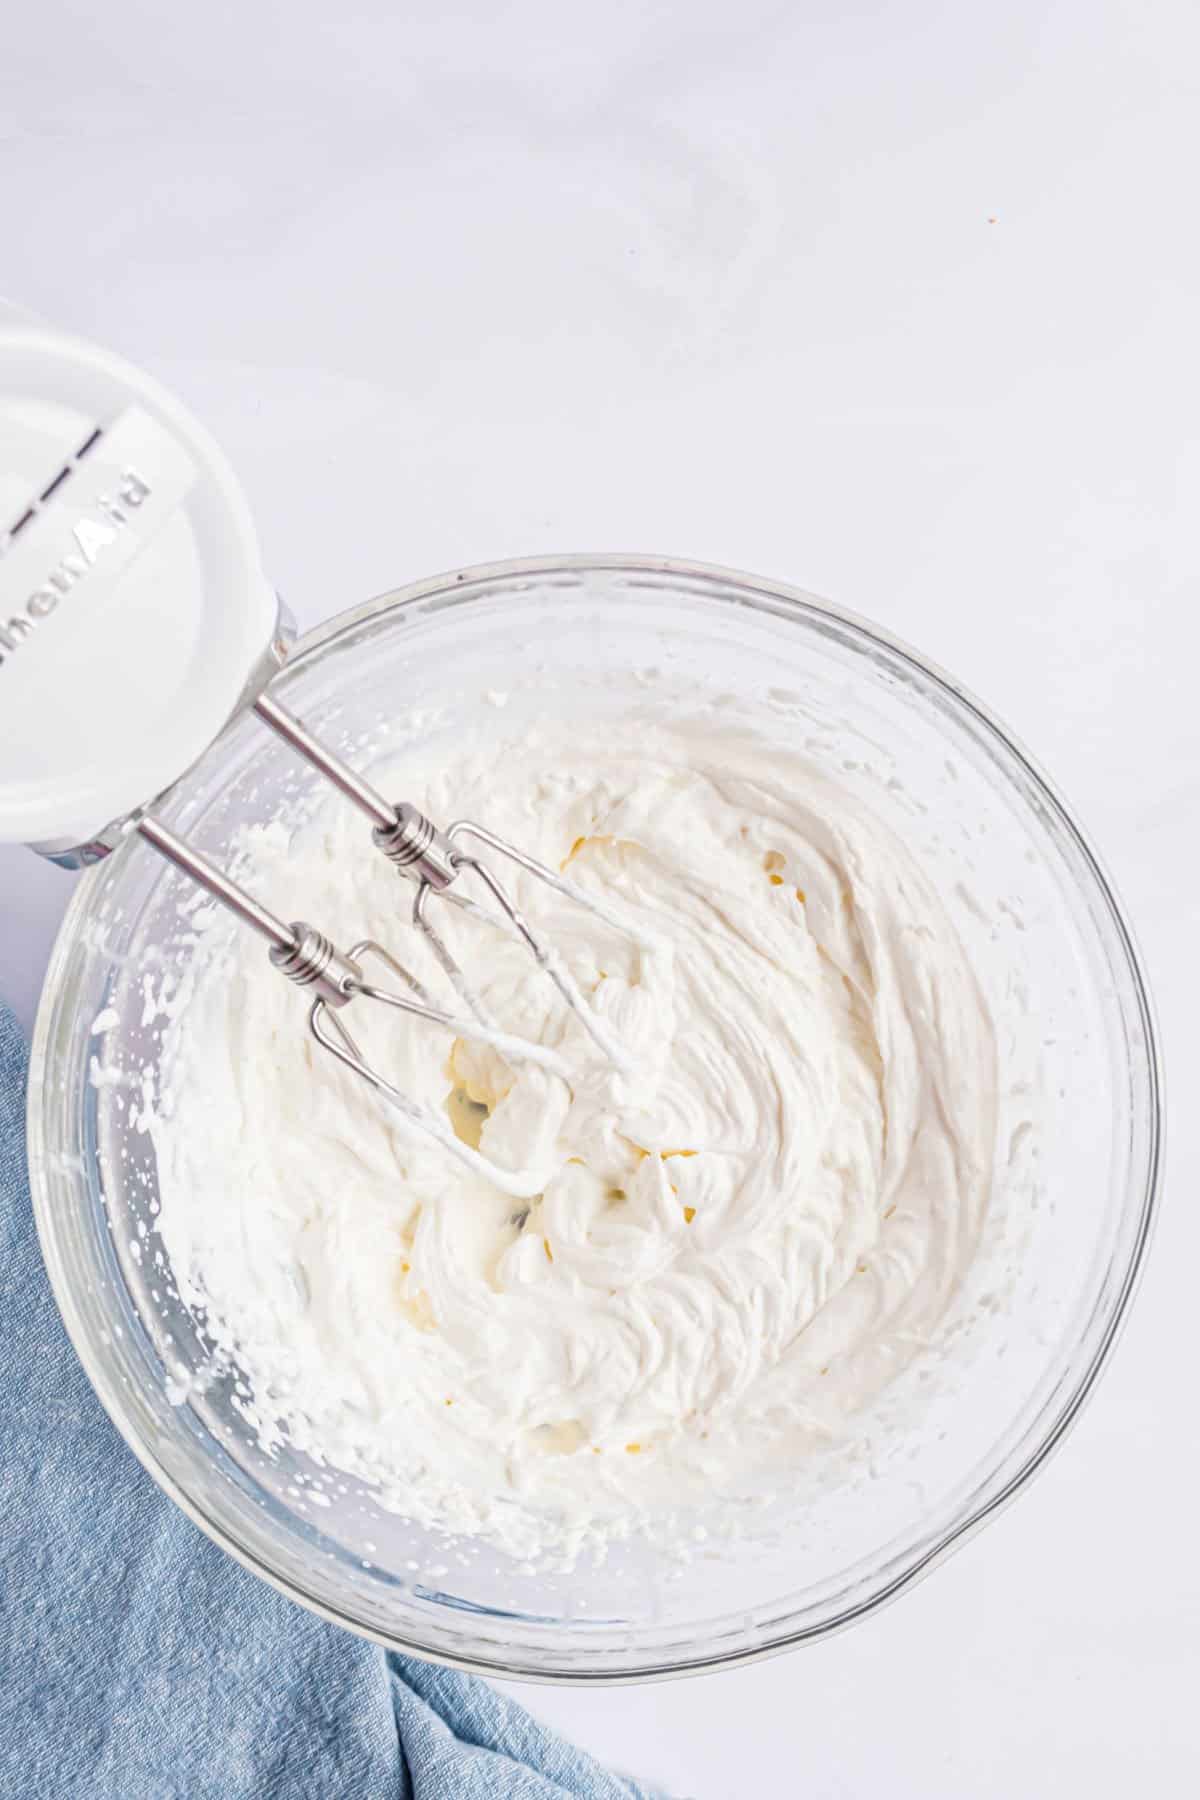
Use a cold mixing bowl and cream.
To make stabilized whipped cream, you need to beat heavy whipping cream with powdered sugar until slightly thickened.
A cold bowl and very cold heavy cream will speed up this process. I like to put my mixing bowl in the freezer for 10-15 minutes before making whipped cream for easiest whipping.
Incorporate the gelatin slowly.
Turning your mixer to a low speed and gradually drizzling the gelatin mixture into the bowl helps evenly incorporate it into the whipped cream.
How To Use Stabilized Whipped Cream
You can use stabilized whipped cream in any recipe that calls for Cool Whip or “thawed frozen whipped topping.”
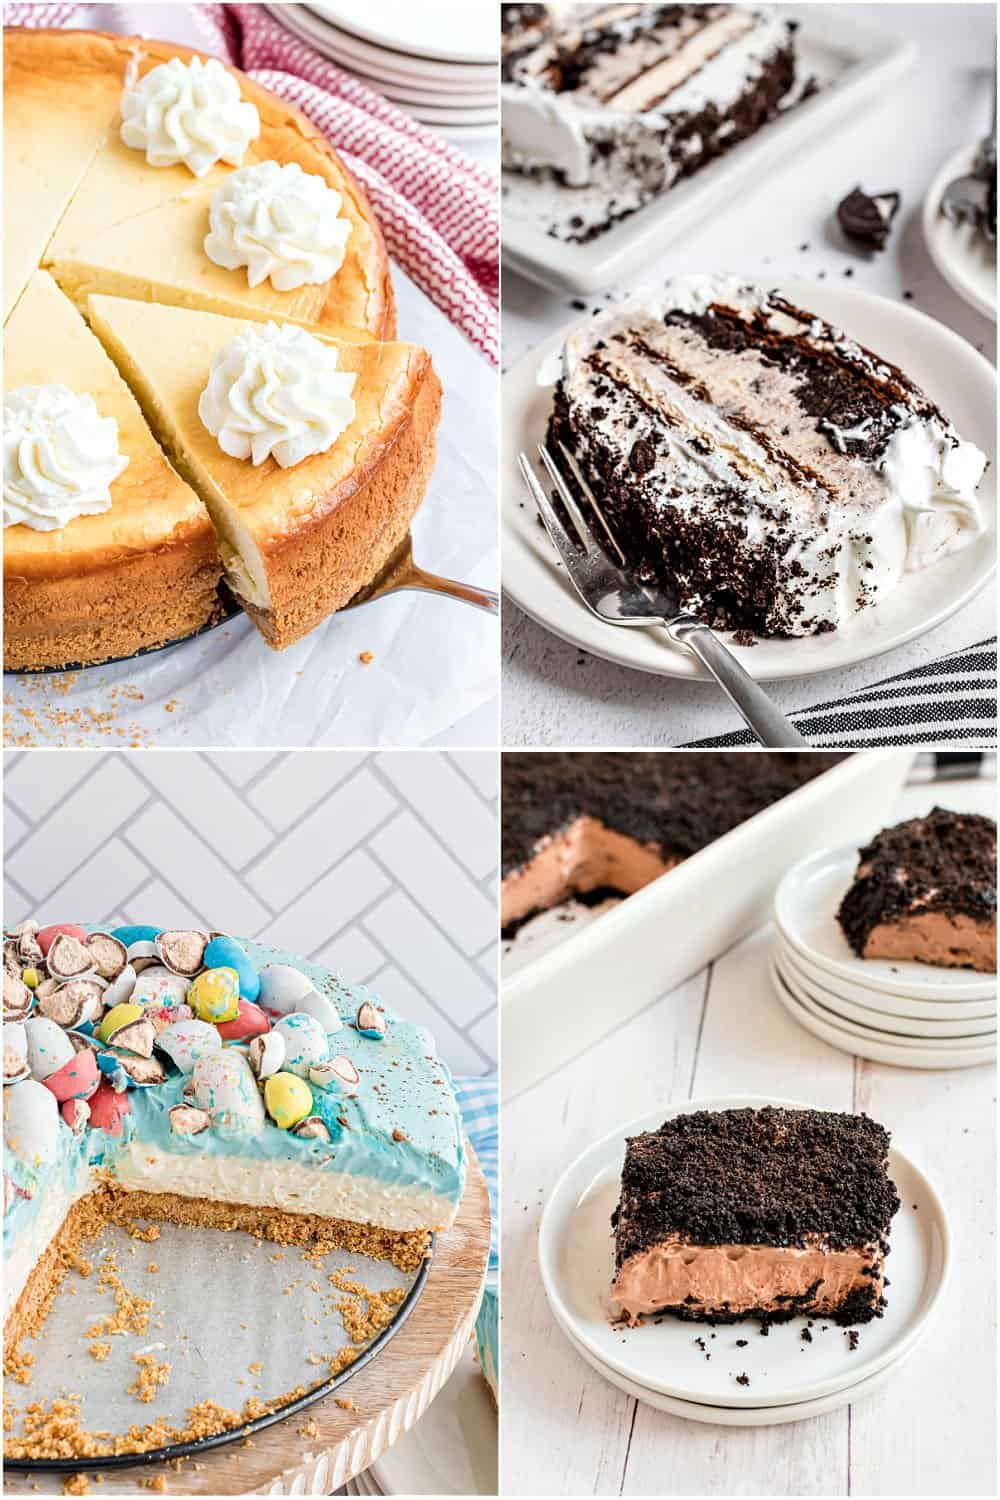
- Use frosting bags to pipe homemade cool whip onto cupcakes and cake. It tastes great on everything from Skinny Pineapple Cupcakes to this Lemon Poke Cake. We love piping it onto our cheesecake.
- You can also mix it with other ingredients to create different flavors of whipped cream frosting. That’s how we made the perfect topping for these Banana Pudding Cupcakes! We added blue food coloring to make our impressive looking Easter cheesecake.
- It’s also delicious anywhere you’d enjoy whipped cream from a can. You’ll love it as a topping for Pumpkin Pie, hot chocolate and oreo ice cream cake!
- Love candy bars? Stabilized whipped cream is the secret to the fluffy center in copycat Three Musketeers bars.
Recipe FAQs
This topping is best used within 24 hours after its made. If needed, you can store it in an airtight container in the fridge for up to 5 days.
I only recommend freezing this AFTER it’s been piped or spread onto your dessert. It’s difficult to use once frozen then thawed.
Yes, you should keep desserts topped with stabilized whipped cream cold in the refrigerator until ready to serve. Even though homemade cool whip holds its shape better and longer than regular whipped cream, it will still soften when it gets warm.
You can absolutely double (or even triple) this recipe to make as much whipped topping as you need!
Heating the gelatin returns it to its liquid form so it can be incorporated into the whipped cream. If you skip this step, you will get stringy strands of gelatin instead of a smooth sturdy whipped cream.
That said, be careful not to overheat the gelatin. It only needs 10 seconds in the microwave to reach the ideal consistency.
More Easy Dessert Recipes
- Cherry Fudge recipe
- Carrot Cake Cookies
- Sopapilla Cheesecake Recipe
- Chocolate Almond Truffles
- Jello Poke Cake
- Dirt Cake
Stabilized Whipped Cream
Ingredients
- 1 teaspoon unflavored gelatin
- 4 teaspoons cold water
- 1 cup heavy whipping cream
- ¼ cup powdered sugar
Instructions
- Whisk the gelatin and cold water in a small bowl until combined. Set aside.
- In a large chilled mixing bowl, beat the heavy whipping cream and powdered sugar until slightly thickened, but not to the soft peak stage.
- Microwave the gelatin and water mixture for 5 seconds or until it returns to a liquid form.
- Slowly drizzle the gelatin mixture into the whipping cream while beating at low speed. Increase the speed to medium-high until stiff peaks form.
- Add whipping cream to a piping bag and decorate dessert as desired.
Notes
- How long does homemade stabilized whipped cream keep? This topping is best used within 24 hours after its made. If needed, you can store it in an airtight container in the fridge for up to 5 days.
- Freeze. I only recommend freezing this AFTER it’s been piped or spread onto your dessert. It’s difficult to use once frozen then thawed.
- Storage. You should keep desserts topped with stabilized whipped cream cold in the refrigerator until ready to serve. Even though homemade cool whip holds its shape better and longer than regular whipped cream, it will still soften when it gets warm.
- Double. You can absolutely double (or even triple) this recipe to make as much whipped topping as you need!
Nutrition
Replace store bought tubs with this easy homemade Cool Whip recipe! It’s ready in 15 minutes with no corn syrup, preservatives or artificial flavors.


This recipe is awesome! So quick to put together and the taste is delicious. I needed a stabilized whipped cream for a dessert that would sit out during a party indoors. It did its job 🙂