Yield: serves 16
Chocolate Peppermint Cheesecake Cake
Prep Time
30 minutes
Cook Time
1 hour 30 minutes
Additional Time
2 hours
Total Time
4 hours
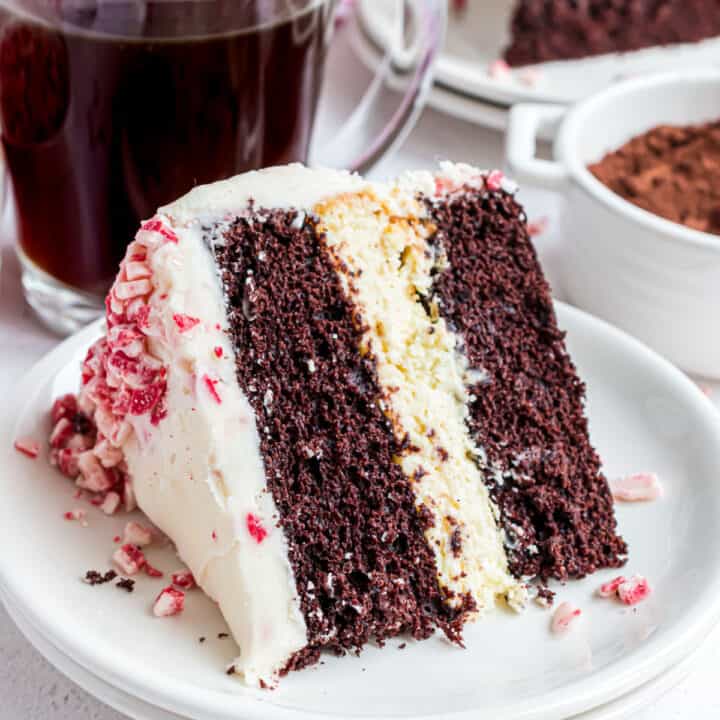
Chocolate Peppermint Cheesecake Cake - Double chocolate layer cake with creamy cheesecake center and peppermint frosting! This rich dessert is sure to steal the show at your holiday celebration!
Ingredients
For the Chocolate Cake Layers:
- 1 ¾ cup all-purpose flour
- ½ cup unsweetened dark chocolate cocoa powder
- ½ teaspoon kosher salt
- 1 teaspoon baking soda
- ½ teaspoon baking powder
- ½ cup brewed coffee, cooled
- ½ cup whole milk
- ½ cup unsalted butter, softened
- 1 ½ cup granulated sugar
- 2 large eggs
For the Cheesecake Layer:
- 2 package (8 ounce each) cream cheese, softened
- ⅔ cup granulated sugar
- pinch of salt
- 2 large eggs
- ¼ cup sour cream
- ⅓ cup heavy whipping cream
- ½ teaspoon peppermint extract
- ½ cup Andes Peppermint Crunch baking chips
For the Frosting:
- 1 cup unsalted butter, softened
- 5 cups powdered sugar
- ½ cup heavy whipping cream
- 1 cup Andes Peppermint Crunch baking chips
Instructions
For the Cakes:
- In a small bowl, mix flour, cocoa, salt, baking soda and baking powder. Set aside.
- In a measuring cup, mix together cooled coffee and milk. Set aside.
- Grease 2- 9inch round baking pans and line the bottom with parchment paper. Set aside.
- IN mixer, beat butter and sugar for 5 minutes, until smooth. Add eggs, one at a time. Slowly add in dry ingredients alternating with the coffee and milk mixture, about 3 additions of each.
- Pour cake batter evenly into the 2 prepared pans.
- Bake in a 350 degree oven for 25 minutes. Remove and cool on wire rack. When completely cooled, you can wrap each layer in plastic wrap and put in the freezer for later assembly!
For the Cheesecake Layer:
- Prepare the cheesecake layer. This can be done early in the day, or the night before. If freezing the cheesecake, can be stored 1-2 weeks in the freezer.
- Preheat oven to 325 degrees. Using a large roasting pan, add 1 inch of water to the pan. Place it on the lowest rack of the oven! Allow it to preheat in the oven.
- Prepare 9-inch springform pan by lining the bottom (inside) with a circle of parchment paper.
- Beat cream cheese with granulated sugar for 2-3 minutes until creamy. Add in salt and eggs, one at a time, beating well after each addition.
- Beat in sour cream, heavy cream, and peppermint extract, until light and fluffy (about 2 minutes). Fold in peppermint baking chips.
- Pour into prepared 9-inch springform pan. Place pan in center of preheated oven, with the roasting pan of water on the lowest rack. The cake will not SIT in the water, but still get the benefit of a water bath by being in the oven with it.
- Bake cheesecake for 45 minutes. Turn oven off and let cheesecake sit in oven for an additional 30 minutes. Remove and cool completely on counter.
- When cooled, remove outside portion of the springform pan and place into the freezer for several hours or overnight. I put it in freezer for about 2 hours. If using within 24 hours, feel free to just refrigerate cheesecake!
For the frosting,
- beat butter for 3 minutes. Add powdered sugar and heavy cream and beat an additional 3-5 minutes until fluffy. Add baking chips.
- To assemble the cake, lay one frozen layer of chocolate cake on cake plate. Top with frozen cheesecake and second layer of chocolate cake. Frost sides and top with a thin layer of frosting to apply a crumb coat. Refrigerate 30 minutes to an hour. Remove from refrigerator and frost remaining cake. I keep the cake covered in the refrigerator until ready to eat.
- Remove and allow to sit about 15 minutes before slicing. ENJOY!
Nutrition Information:
Yield:
16Serving Size:
1 sliceAmount Per Serving: Calories: 588Total Fat: 29gSaturated Fat: 17gTrans Fat: 0gUnsaturated Fat: 10gCholesterol: 113mgSodium: 214mgCarbohydrates: 80gFiber: 1gSugar: 65gProtein: 5g
*Nutrition facts are an estimate and not guaranteed to be accurate. Please see a registered dietitian for special diet advice.