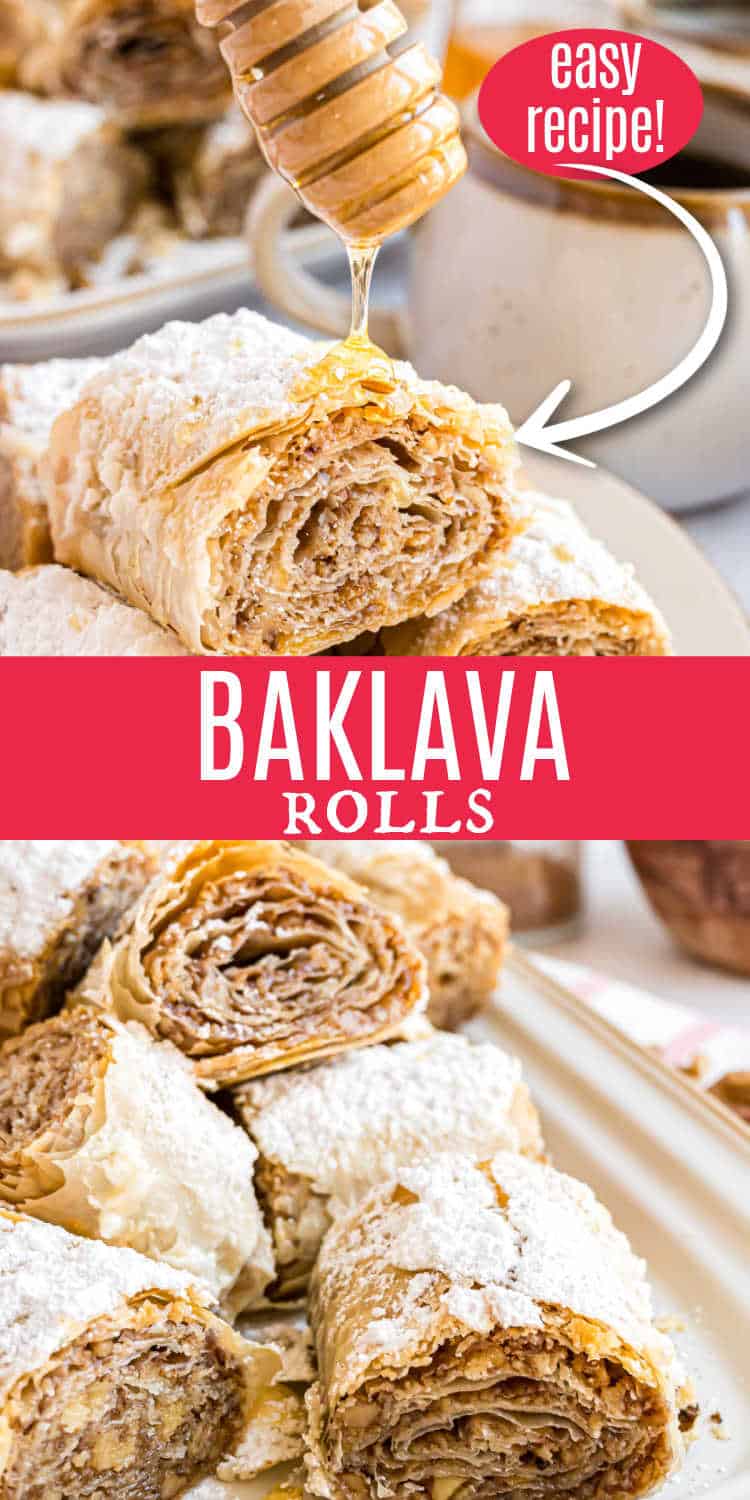
Baklava Rolls are flaky and flavorful and packed with a sweet hearty filling. You’ll love how this easy recipe is to bake and eat!
I first tried rolled baklava in Russia, and I instantly knew I had to create my own version. They turned out fantastic, and are so easy to slice and serve.
This Russian baklava recipe was originally published in July 2017. I updated the recipe notes and published new images in June 2025.
Aimee’s Recipe Notes

Taste & Texture: Flaky phyllo dough pastry paired with a crunchy cinnamon nut filling.
Ease to Make: I use ready made phyllo dough for this recipe.
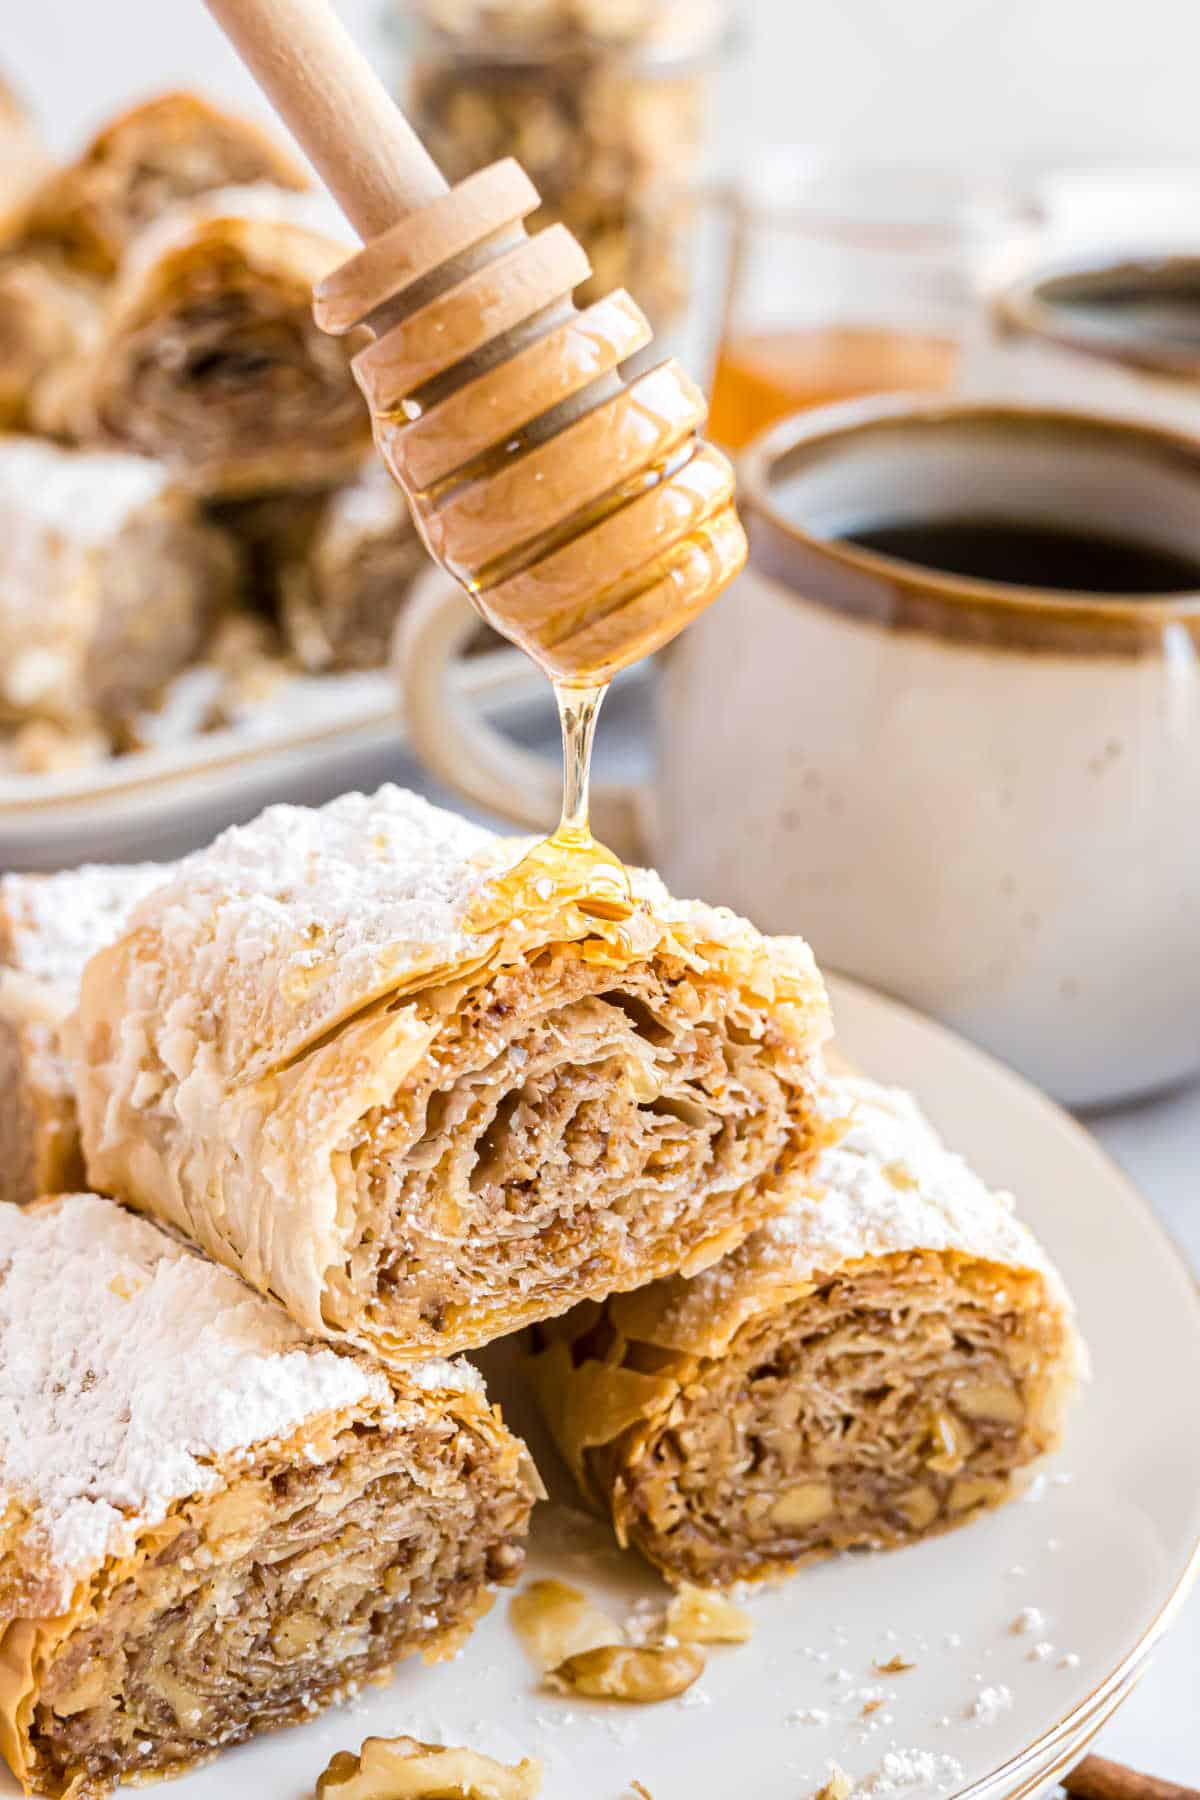
Serve: After baking, slice the rolled baklava into two-bite pieces. Dust with powdered sugar and drizzle with extra honey.
Baklava is a traditional Turkish pastry with layer upon layer of flaky dough and a sweet, nutty filling. With all those layers, you might think making this at home would be time consuming and difficult. Nope!
It always seemed a little intimidating to me, but your recipe is very approachable! Thank you for sharing.
– Erin
Baklava Ingredients
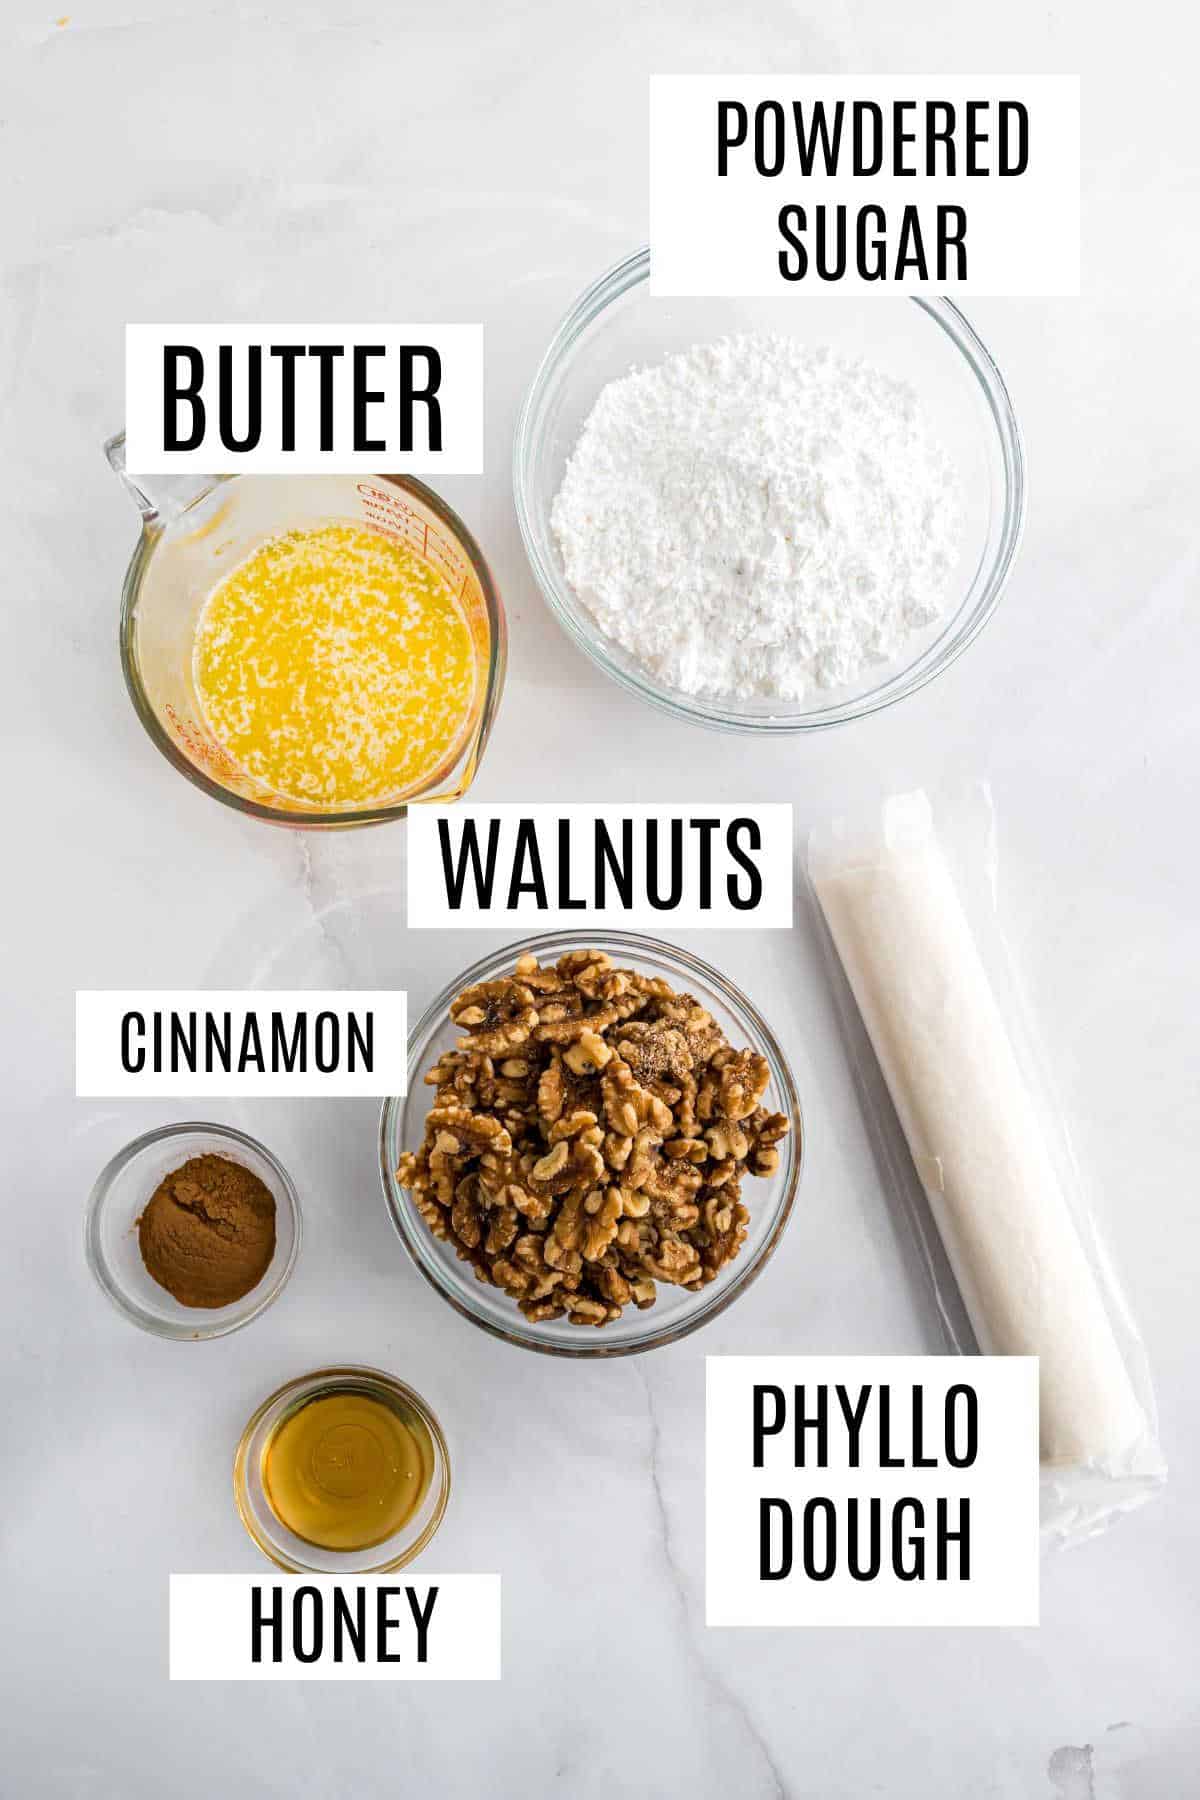
I keep things simple with the ingredients list. Only 6 ingredients needed, scroll down to the recipe card for full measurements.
- Phyllo dough – Make sure the phyllo pastry is thawed before using. I buy mine frozen then immediately place it in the refrigerator to thaw.
- Unsalted butter – This is melted and brushed over the dough to make it rich and flaky.
- Powdered sugar – I use confectioners sugar (powdered sugar) to sweeten the baklava filling, as well as dust the top when serving.
- Cinnamon – Adds a hint of spice to the nutty layers. You can use cinnamon and ground clove together if you like that flavor profile.
- Walnuts – You can’t have traditional baklava without nuts!
How to Make Baklava Rolls
Ready to roll the perfect baklava? This is a beginner recipe!
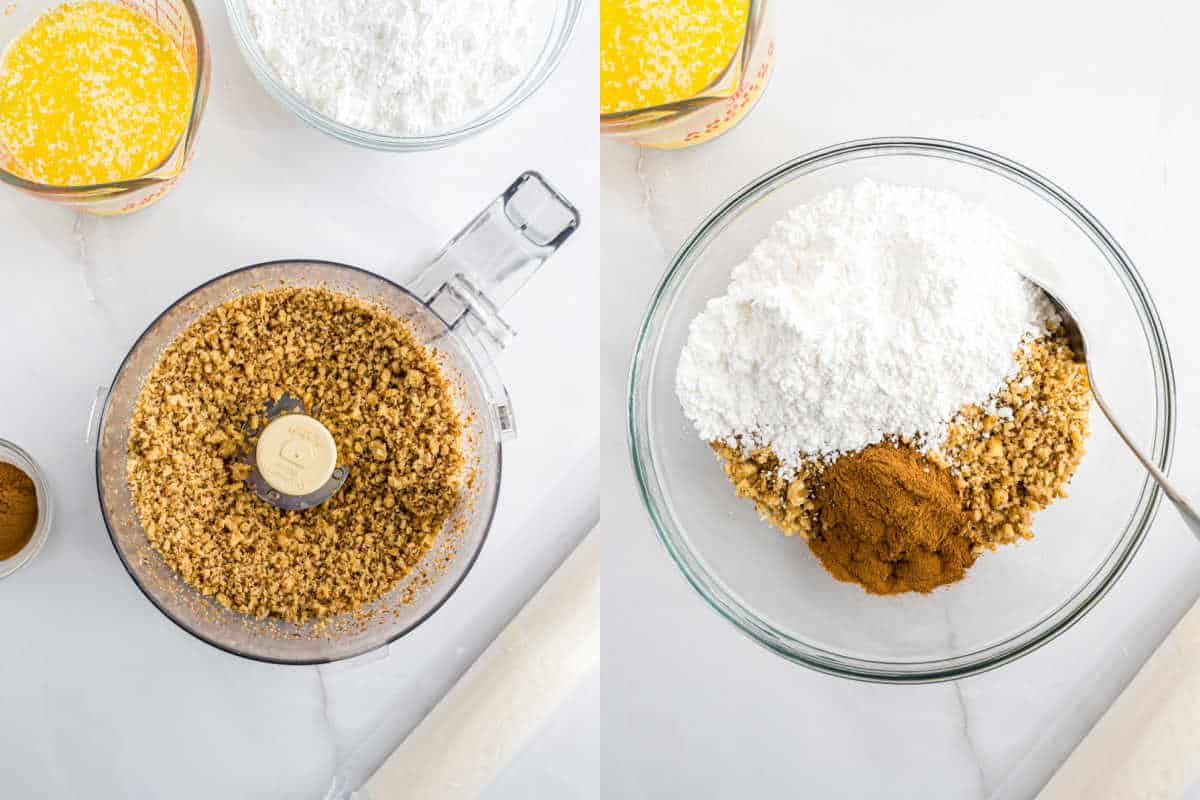
Make the Filling.
- Before assembling the baklava rolls recipe, pulse the walnuts in the food processor.
- Add powdered sugar and cinnamon. Save half a cup of powdered sugar for sprinkling on top of the baked baklavas.
Add the Filling.
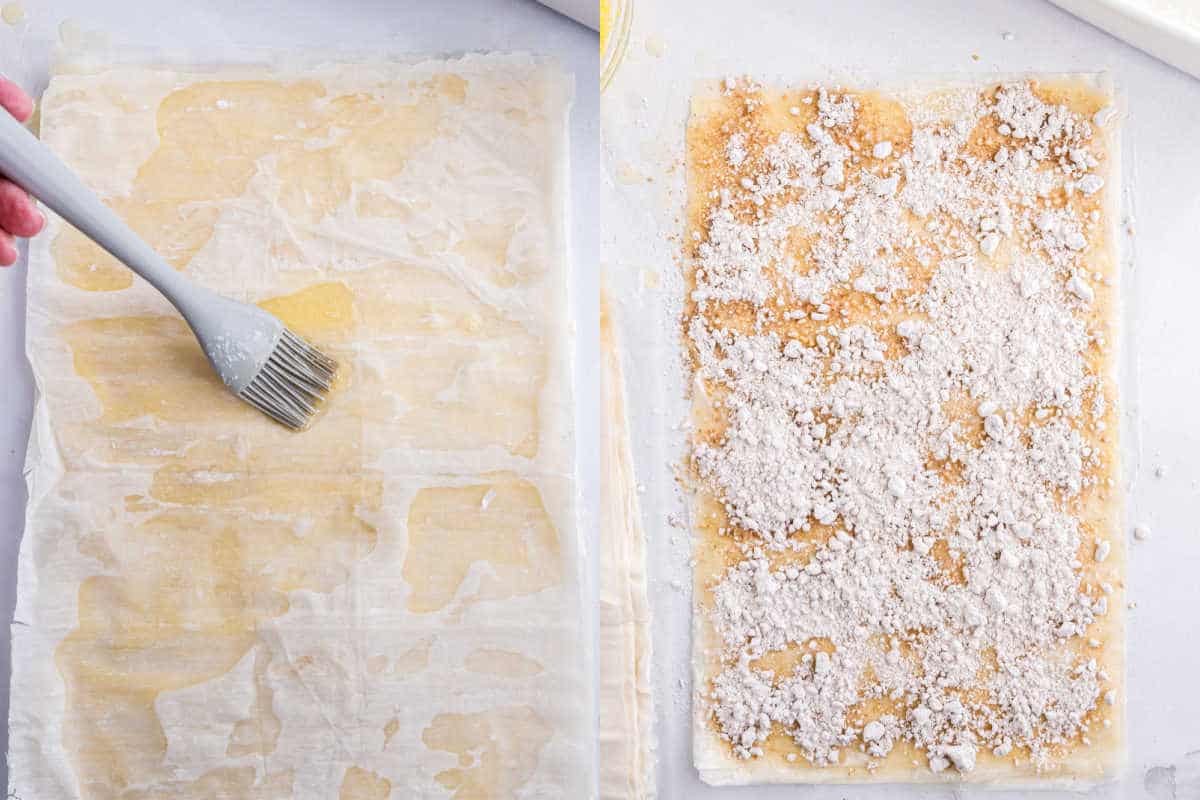
- Lay out a sheet of phyllo dough on a clean work surface. Use a pastry brush to GENTLY brush melted butter over the dough.
- Cover it with another sheet of pastry dough. Brush with butter and repeat until you have 5 stacked sheets. Spread the walnut nut mixture over the top.
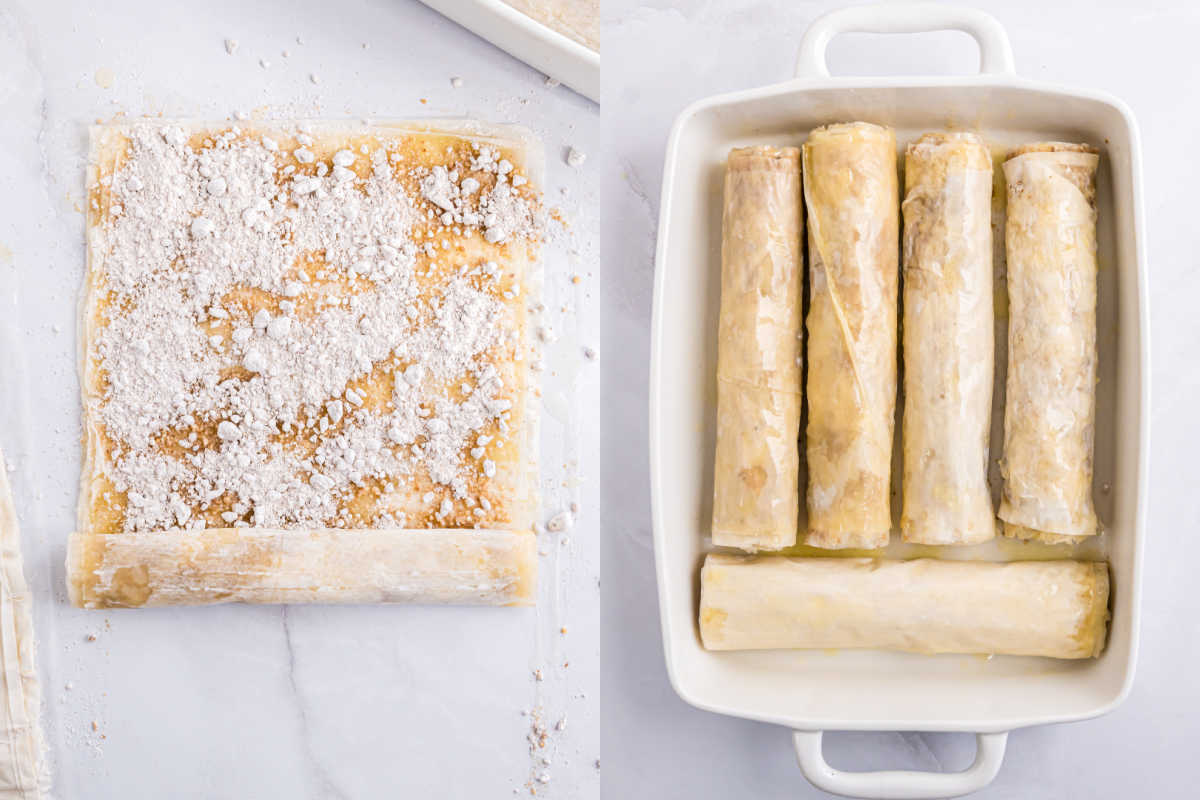
Roll it Up.
- Use your hands to roll the phyllo dough up tight from short end to short end. Place the rolled log in a baking pan.
- Repeat the steps above until you have 5 logs of baklava. Drizzle with the remaining butter and bake.
How to serve Walnut Baklava.
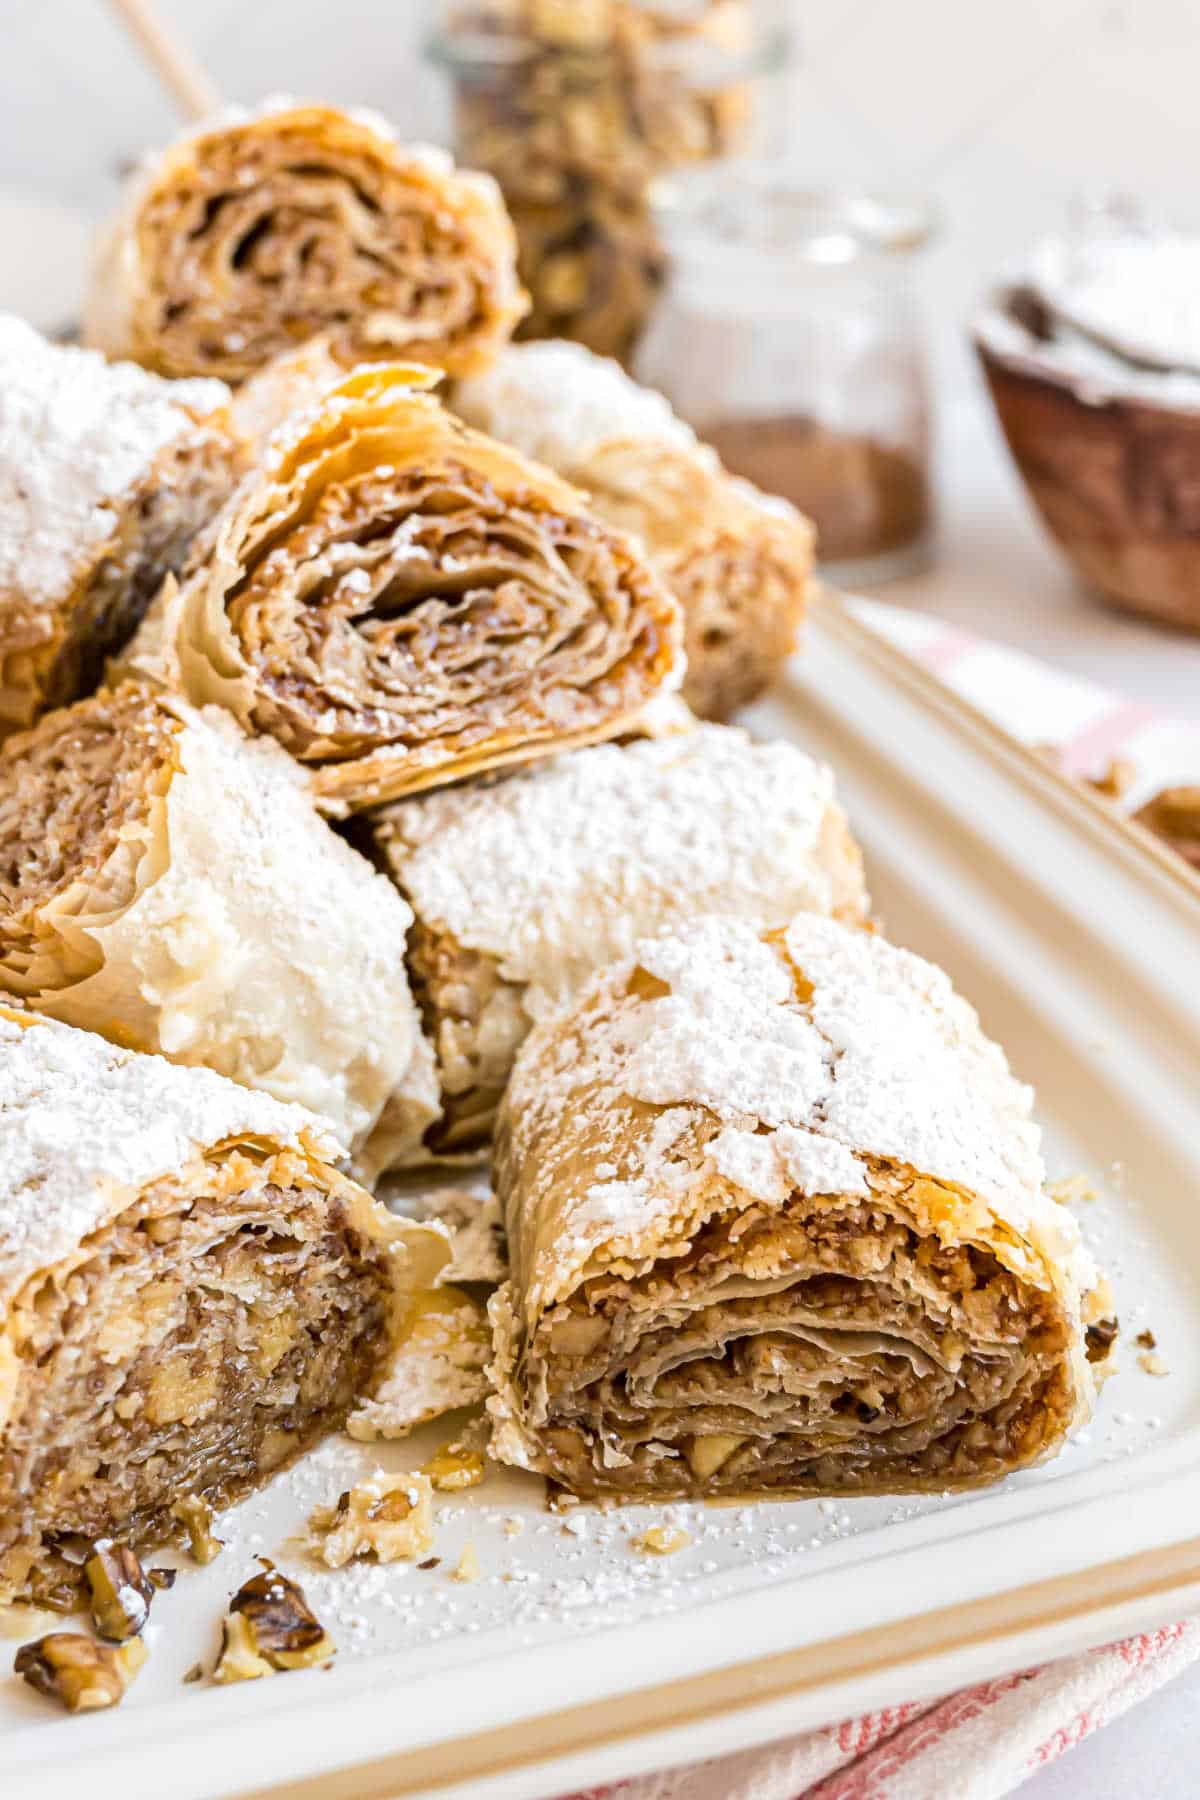
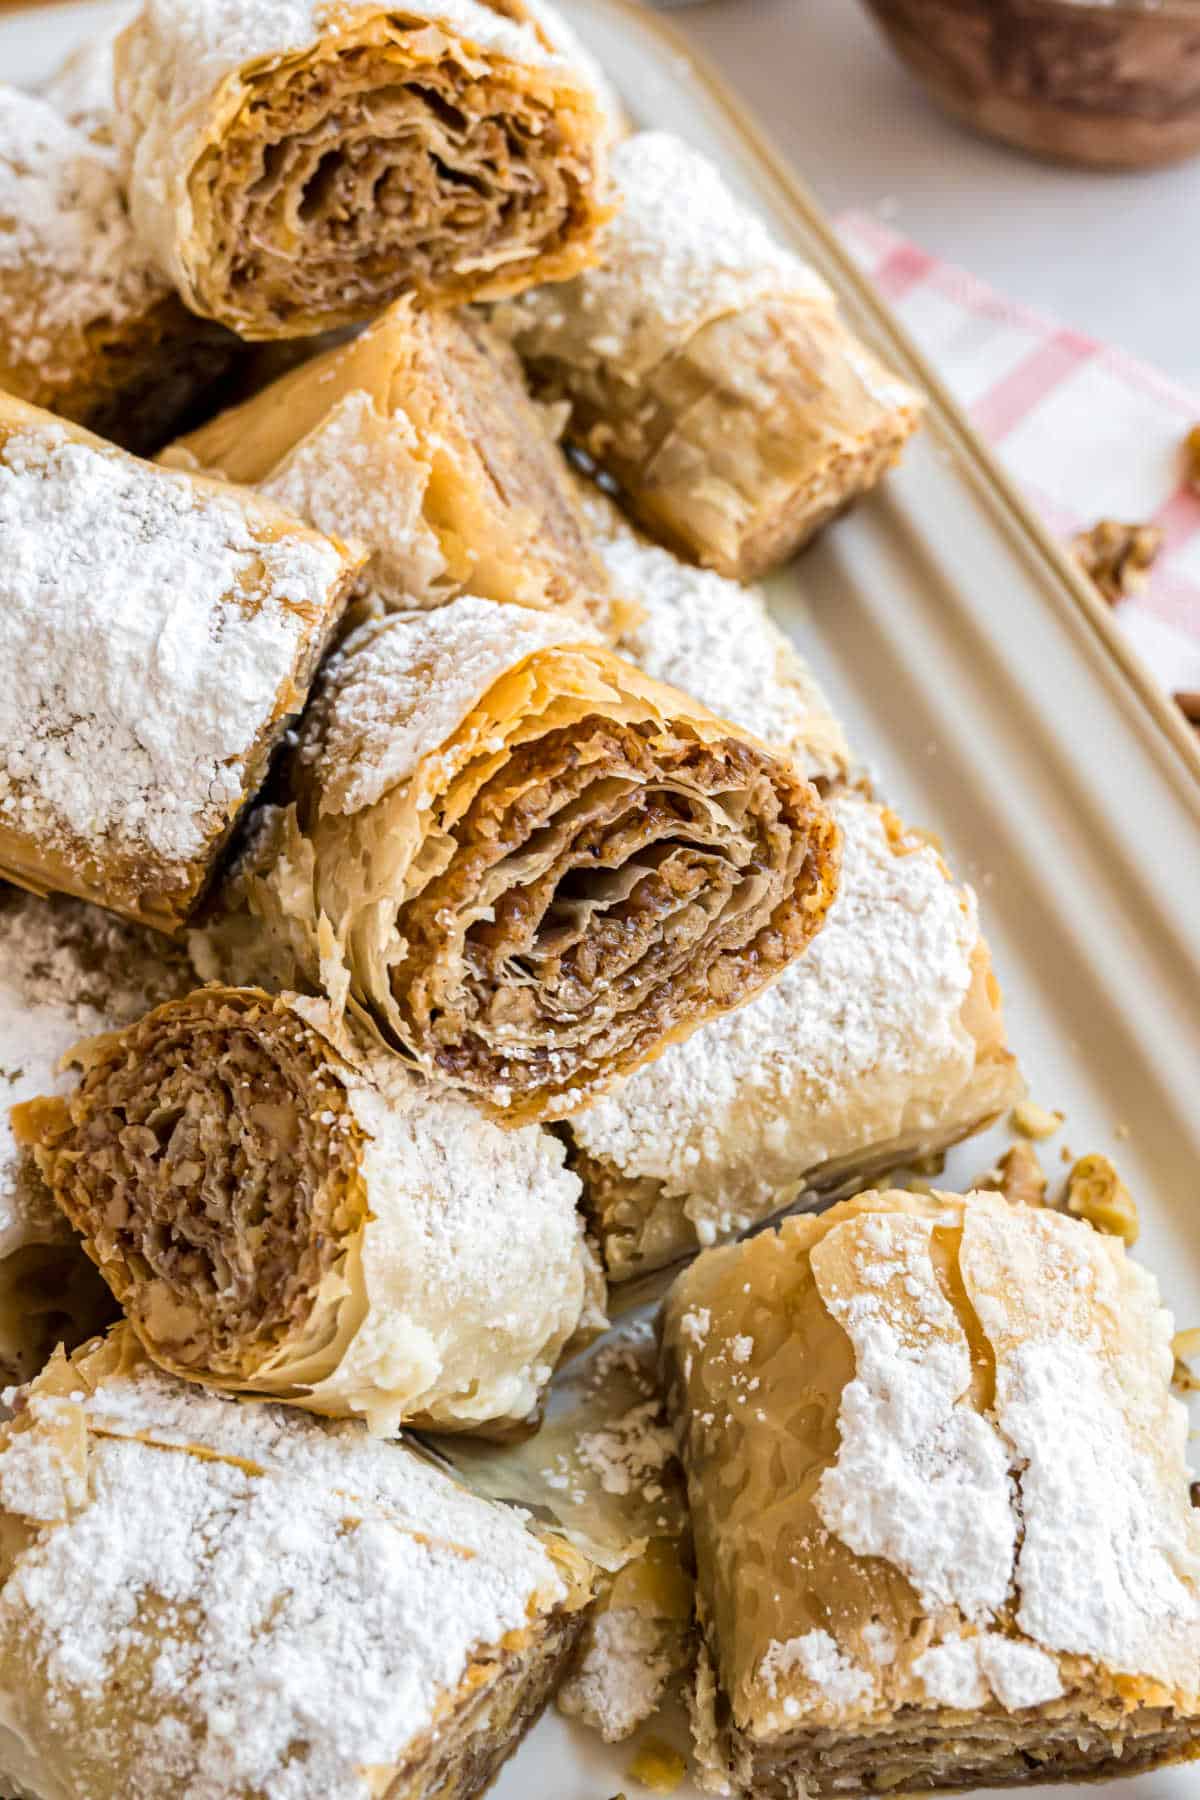
- Sprinkle the baked baklava immediately with powdered sugar. Let cool completely, then slice each rolled baklava into 4 pieces to serve.
- Sprinkle the rest of the powdered sugar over the sliced baklava. Serve with a drizzle of honey for more sweetness!
Aren’t they stunning with their golden-brown and crispy appearance? Looking for an easy snack? Try these mini baklava for a sweet dessert idea!
Recipe FAQs
Homemade baklava tastes best when you enjoy it the same day you bake it. If you have leftovers, cover them loosely with plastic wrap on the countertop and eat them the next day.
Phyllo sheets are THIN which makes them easy to tear. Be gentle with your phyllo to prevent tearing. Work slowly and gradually.
Don’t worry if your phyllo sheets rip a little as you make this recipe. When you roll it, you won’t know the difference! Just place the dough where it should be and brush with melted butter.
Since this recipe uses 25 sheets, you will end up with about half a box of phyllo dough leftover. You can double the baklava recipe to use the rest. Or try this Crab Puffs recipe and use phyllo sheets instead of puff pastry.
More Easy Dessert Recipes
- Love traditional recipes? My rugelach is flaky and flavorful. First to go off the cookie plate!
- Or give my delicious alfajores cookies a try this year. Shortbread with caramel is a win!
Pin this now to find it later
Pin It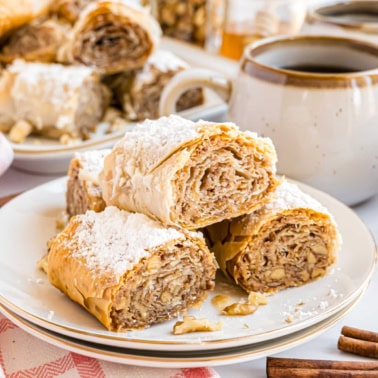
Baklava Rolls Recipe
Ingredients
- 25 sheets phyllo dough about 1/2 box, thawed completely
- 1 cup unsalted butter melted
- 2 cups powdered sugar divided
- 2 cups walnuts
- 1 Tablespoon cinnamon
- honey optional
Instructions
- In a food processor, pulse walnuts until crumbs. Pour into a bowl and add 1 1/2 cups of the powdered sugar and cinnamon. Mix and set aside.
- In a small bowl, add the melted butter, set aside.
- Lay out one sheet of phyllo dough. Brush gently with melted butter using a silicone pastry brush. Cover with another sheet of phyllo dough. Brush with melted butter. Repeat until you have 5 sheets of phyllo dough stacked. On the last buttered sheet of phyllo dough, sprinkle about 1/2 cup of the walnut mixture. Spread gently with fingers.
- Using your hands, roll the dough up tight (rolling from the short end to the short end). Place in a 13×9 baking dish that has been sprayed with baking spray.
- Repeat for remaining sheets of phyllo dough.
- Drizzle the remaining butter over the top. Bake in a preheated 375°F oven for 28-30 minutes, until edges are brown and crispy.
- Sprinkle immediately with 1/4 cup of the remaining powdered sugar. Cool for about 1 hour. Remove from baking dish and slice each log into 4 pieces and sprinkle with the remaining 1/4 cup powdered sugar. Add honey if desired upon serving. ENJOY!
Notes
- Make sure your phyllo dough is completely thawed. I bought mine from the store frozen and placed it immediately in my refrigerator for several days.
- Be very careful separating the layers of dough. They are very thin! If they rip, just lay the ripped pieces where they are supposed to be and brush GENTLY with melted butter.
- The more powdered sugar the better. I first douse mine with some right out of the oven, and then again after I cut them. You can even roll the whole log in powdered sugar after they have cooled and then cut your slices.
- These are best on day one. However, cover loosely on the counter to enjoy the next day.
- See blog post for step by step photo tutorial.


merci
Can I do it without the walnuts? In case of a nut allergy
other email is wrong.
How do you store after baking. do you need to keep in the fridge
I’m Greek Cypriot , born in Australia Melbourne , made baklava many many times, From bought phylo pastry to home made pastry, my mum was a keen baker, and I was always intrigued when I was younger, I had to be near her and write step by step and draw pictures to follow her recipes, because mum never wrote recipes down, when I would ask her , she would say ” a bit of this and a bit of that” no measurements or quantity
, and I took after her , God rest her Soul, my baking is my time out very theraptic,, when my husband sees me baking he knows I’m having a good day Due to multiple illnesses
It is currently in my oven! Do you think it could freeze well? I’ve got a whole other roll left and Im thinking for the future…
Oh my I made Baklava years ago what a disaster, but in the end was good. This one looks cool and easier to make thank you. Oh Amy, what a trip that looks like, lucky you. I would love to do that but…. I am so glad I found you, your site is yummy always…lol
Never liked Baklava, but this sounds more like Hungarian pastries- not too sweet. We went on this Princess cruise ,loved seeing each country- one of my favorites!!!!
This definitely is NOT crazy sweet like a traditional gooey baklava!!! And that cruise was absolutely amazing, glad you got to experience it as well 🙂
Baklava is a Turkish or Greek dish, but not Russian.
Could very well be true 🙂 But I called it Russian because that’s where we ate it and I was inspired by it from there 🙂
Your photos are amazing. The dessert would be a great end to anything! Thank you for sharing. I’ve never made balavak but I am tempted to try this.
Wishes for tasty dishes,
Linda
Awww thank you so much!!!
Do you not separate the milky part from the melted butter? . . . When I work with Middle Eastern padtries, I always scope off the milky residue.
Nope. Didn’t even know that was a thing, LOL!! Guess that makes this dish even easier 🙂
Your trip looked like heaven though I’m not a big traveler. I’m doing the recipe this week for hungry boys!!
Enjoy the treats 🙂
This looks like it would melt in your mouth! Yum! Your trip looked like it was so much fun!!!
They really are delicious. And the trip was BEYOND fun 🙂
So, I confess that I checked out the baklava when I saw the picture from St. Petersburg. I took a small group of students to Russia for 10 days in 2003…best spring break ever. Next time, try to get to Moscow too because it is more Russian than European. I agree with you about the food & I never saw this baklava. I fell in love with baklava after living in Turkey & this recipe definitely looks easier than others. Thanks for posting it.
Unfortunately, the excursions to Moscow booked up FAST! However, spending two days in St.Petersburg was amazing, especially being able to see all the castles and churches! You’ll have to try this baklava, it’s so good!!!!
Oh my goodness. I love baklava and always get it when I see it on a dessert menu. I might just have to make it at home now. It always seemed a little intimidating to me, but your recipe is very approachable! Thank you for sharing. Your trip looked wonderful. 🙂
This recipe is fool proof, especially since you just roll the baklava up!!