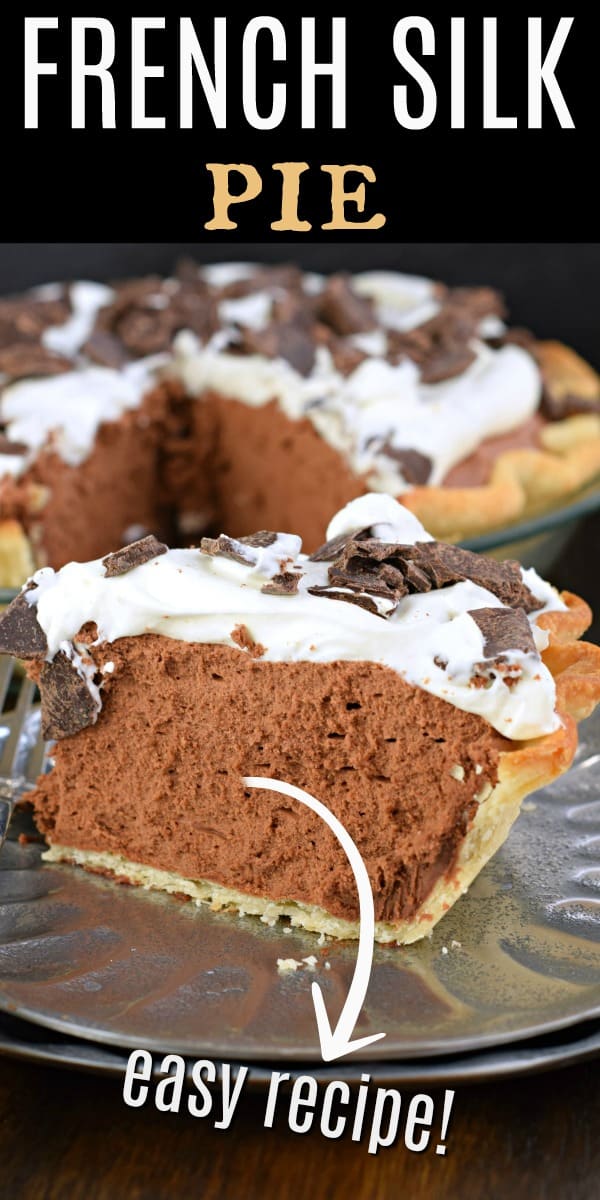
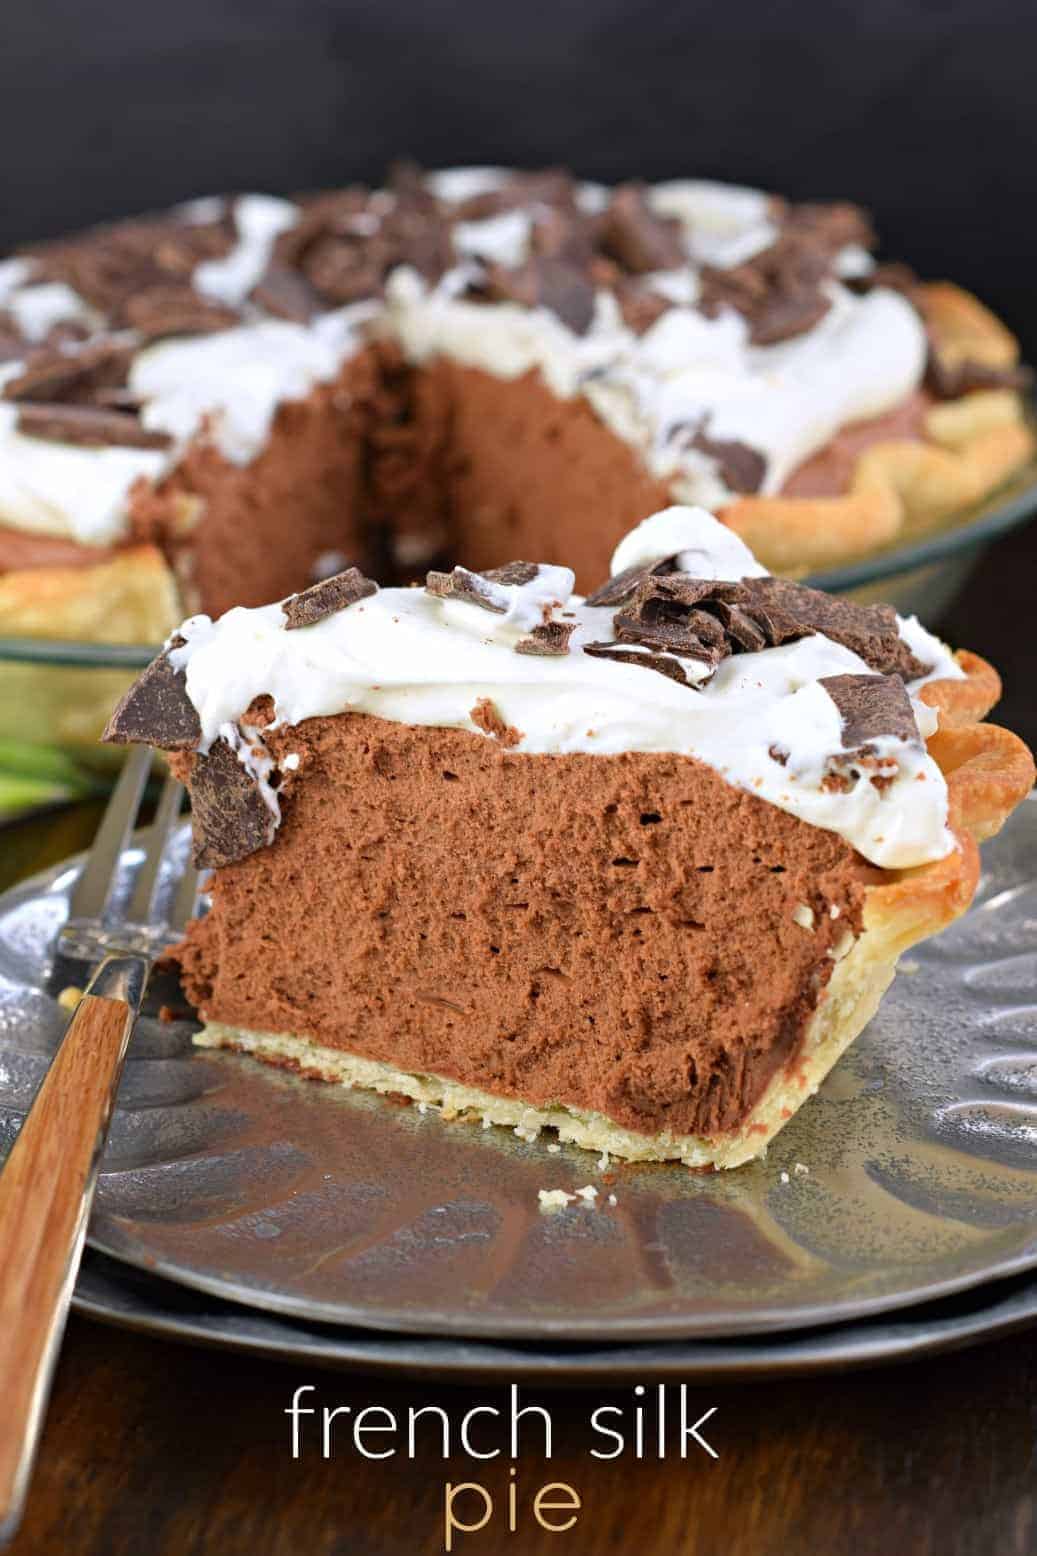
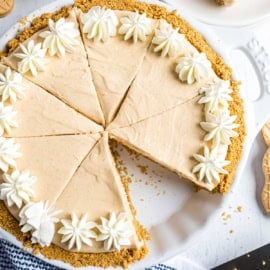
Smooth and decadent, French Silk Pie is a chocolate lovers dream! You’ll love the flaky pie crust, topped with smooth and silky chocolate!
Love pie? Be sure to add my homemade Cherry Pie to your dessert list. Or give these Peach Hand Pies a try this year!
The Perfect Chocolate Pie Recipe
Growing up we always had French Silk Pie at holiday get togethers. It usually came from Bakers Square (anyone remember this restaurant?)!
That fudgy, creamy chocolate pie is still to this day one of my favorites! Most Thanksgivings we still serve a French Silk Pie along with the traditional pumpkin pie and pecan pie desserts!
If you prefer a homemade pie crust, you can totally go that route!
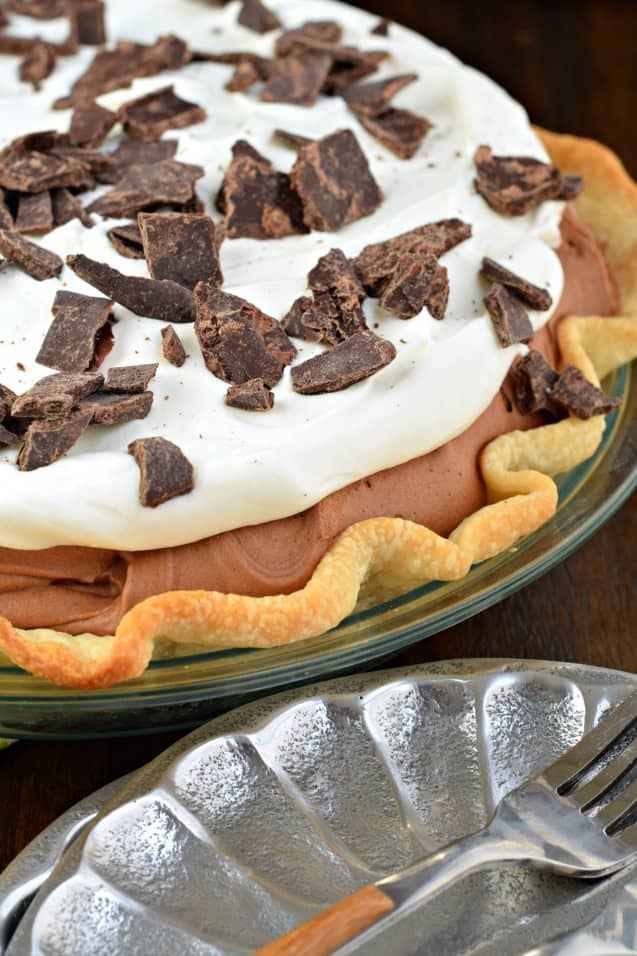
I did go the extra steps and make a homemade whipped cream to top this pie (but Cool Whip would work too if you prefer).
If you love french silk pie, our french silk brownies need to go on top of your baking list. Layers of brownies, mousse, and whipped cream for the ultimate dessert.
How to make French Silk Pie
There is one thing to remember when making this pie. All chocolate is NOT created equal. Do not lick your fingers after melting the baking chocolate…it’s very bitter, haha!
STEP 1: Prepare a baked pie crust in a deep pie plate according to package directions (for a single baked pie shell). Allow pie crust to cool completely.
STEP 2: In a small microwave bowl, melt unsweetened baking chocolate on high heat for one minute. Stir and heat again in 15 second intervals until melted and smooth. Set aside to cool.
STEP 3: In a large bowl of an electric mixer, beat butter with sugar until fluffy (about 3 minutes). Slowly drizzle in the cooled chocolate and beat the mixture on medium speed. Add in vanilla extract.
Because this recipe uses RAW EGGS, make sure you purchase the pasteurized eggs. These are found in most large grocery stores and safe for your family!
STEP 4: Add eggs, one at a time, beating with the whisk attachment on high speed for about 5 minutes after each egg. DO NOT RUSH. This is what creates a light and fluffy texture to your pie! Once all the eggs have been added (about 20 minutes later, this is why you MUST have a KitchenAid stand mixer or handheld mixer), pour this into your prepared pie pan!
STEP 5: For the garnish, beat the heavy cream for 3 minutes until it begins to form stiff peaks. Slowly add in the powdered sugar and beat until fluffy! Spread over the top of the pie. Cover with plastic wrap and refrigerate pie for at least two hours (or overnight).
How to make Chocolate Curls
An easy trick for making chocolate curls (if you don’t want to scrape the curls into pretty pieces) is to spread your melted chocolate for the topping onto a piece of parchment paper, very thin!
Then roll that parchment paper into a tight “tube” and place in refrigerator. When you are ready to garnish your pie, remove the chocolate from the refrigerator and unroll your parchment.
The chocolate will break off into pieces, giving you the perfect chocolate chunk garnish without having to do any extra work!
Want to skip it? Just add mini chocolate chips instead (like in my video below)
For a creamy chocolate treat, without all the work, try my homemade chocolate pudding recipe!
ENJOY!

Recipe FAQs
French Silk Pie got it’s name from it’s creamy silk texture.
Adding your eggs too quickly or taking too long could result in either a runny consistency or too thick of a consistency. Be sure to follow the recipe exactly as directed.
Using PASTEURIZED eggs means that during the pasteurization process, heat was used to destroy bacteria. Be sure to choose the pasteurized version.
More Dessert Recipes
- Make some ooey gooey Rice Krispie Treats that are the perfect chewy treat!
- These zesty Lemon Brownies are just as thick and fudgy as a Classic Brownie!
- Try this rich, and decadent Red Velvet Cheesecake Cake that is a picture-perfect show stopper!
- 7 Layer Bars are like 7 layers of heaven! All your favorite flavors and mix ins, in bar form!
- A classic Pumpkin Pie for your Thanksgiving dinner table is exactly what you need!
Pin this now to find it later
Pin It
French Silk Pie
Equipment
Ingredients
For the Chocolate layer:
- ½ box refrigerated pie crust for one pie
- 4 oz unsweetened baking chocolate 100% cacoa
- 1 cup unsalted butter
- 1 ½ cup granulated sugar
- 2 teaspoons pure vanilla extract
- 4 large eggs pasteurized
For the garnish:
- 1 cup heavy whipping cream
- ⅔ cup powdered sugar
- 1 cup milk chocolate chips
Instructions
- Prepare pie crust according to package directions (for a single crust pie). Allow pie crust to cool.
- In a small microwave bowl, melt baking chocolate on high heat for one minute. Stir and heat again in 15 second intervals until melted and smooth. Set aside to cool.
- In a large bowl, beat butter with sugar until fluffy (about 3 minutes). Slowly drizzle in the cooled chocolate and continue beating on medium speed. Add in vanilla extract.
- Add eggs, one at a time, beating for about 5 minutes after each egg. DO NOT RUSH. This is what creates a light and fluffy texture to your pie! Once all the eggs have been added (about 20 minutes later, this is why you MUST have a KitchenAid stand mixer), pour this into your prepared pie crust shell!
- For the garnish, beat the heavy cream for 3 minutes until it begins to form stiff peaks. Slowly add in the powdered sugar and beat until fluffy! Spread over the top of the pie. Refrigerate pie for at least two hours (or overnight).
- For the chocolate curls (or pieces), melt chocolate chips in microwave dish for one minute. Stir until smooth, heating by additional 15 second increments until fully melted. Spread over a large piece of parchment paper, until very VERY thin. Roll parchment paper up into a tube shape (like a paper towel tube). Refrigerate until ready to add the garnish, at least 30 minutes. Unroll parchment paper and the pieces will break off into shards. Place on top of pie when ready to serve. ENJOY!
Notes
- Pasteurized Eggs- this recipe calls for pasteurized eggs which means they have gone through the heat process to remove bacteria.
- Regular Eggs: if you can’t find pasteurized eggs, no problem. In a saucepan, on low-medium heat, add eggs with sugar. Whisk until the temperature reaches 160 degrees F (you’ll need a thermometer for this). Remove from heat and add in melted chocolate. Beat for about 5 minutes. Set aside. IN a mixer beat butter until fluffy, about three minutes. Add in chocolate egg mixture and vanilla extract. Pour into prepared pie crust shell. Skip ahead to Step 5.
Video
Nutrition
Smooth and decadent, French Silk Pie is a chocolate lovers dream! You’ll love the flaky pie crust, topped with smooth and silky chocolate!


Love, love this recipe… the pie comes out perfect every time. It’s now our go to treat for birthdays instead of birthday cakes. Yum!
Could you freeze the pie, if you don’t put the cream topping on ? Than put the topping on after you take it out of the freezer ? Or could you freeze it complete ?
Thanks
You could freeze it either way!
Love your recipes. Thank you for sharing.
Fantastic pie! I used liquid egg since I couldn’t find pasteurized eggs at my grocery and it came out perfect and the thick texture that I was looking for. The only thing I didn’t make was the whipped cream since it was just me eating the pie and not for a party or anything.
I made this for thanksgiving and got rave reviews. I did not change anything in the recipe as I have never made this pie before. It turned out perfect. I am back at Christmas time and making it again!
I made this twice and the granulated sugar never dissolved down. Flavor tastes right, but its gritty from the sugar.
I use bakers sugar. Comes out perfectly, every time!
I followed the recipe to the letter, to the extent that I used a timer to whip the butter and sugar, timed each egg addition and used the best quality ingredients I could find- the filling went from a gritty but French silk consistency to a thick gooey glue- like pudding that has the consistency of a stiff brownie batter- any suggestions?
Great tasting pie! I made it for my husband’s birthday with safe ingredients for our family! A huge win! Thanks for the clear directions and the advise about pasteurized eggs.