Take your pie game to the next level with this Homemade Pie Crust recipe. If you’re looking for the perfect flaky pie crust, call off the search and start baking! This is it.
Pie Crust
What’s homier than a homemade pie? As you may have noticed from the abundance of pie recipes I’ve shared over the years, pie has a special place in my heart (and, by extension, my kitchen.)
I cannot think of one single occasion where pie isn’t appropriate.
It’s a holiday? Make a french silk pie.
It’s a birthday? Make a Lemon Meringue pie.
It’s a church potluck? Make an Apple pie.
It’s a Tuesday? Make a chocolate chip cookie pie!
You get my point.
You can have all the delicious fillings in the world, from dutch apple pie to creamy pumpkin pie, but the real ticket to pie heaven is in the crust.
I love a light and flaky pie crust that bakes up golden brown.
Long time readers will know that I’m not shy about my love for refrigerated pie crusts. They’re convenient, delicious and make it easy for me to bake up a fresh pie at a moment’s notice.
But there’s something special about making pie crust from scratch. It’s ultra satisfying to pull a hot pie out of the oven knowing you made every bit of it yourself, from the crust to the pie filling.
Ingredient Notes
I used to believe I’d never be able to make a homemade pie crust that matched my preferred store bought crusts in flakiness and taste.
Previous pie crust recipes I tried resulted in pie shells that tore when filled or became too dense when baked.
This pie crust recipe, though? This one was perfect. Flaky, a bit buttery and oh-so-light while still being sturdy enough not to crumble under the filling.
Just as importantly, it was EASY! The hardest part was letting the pie crust rest for 30 minutes before baking (because I’m impatient when it comes to pie). The wait, I’m happy to say, was well worth it.
Here’s what you need to make flaky pie crust:
- All purpose flour
- Unsalted butter, chilled
- Ice water
- Egg yolks
- Salt
How to Make Pie Crust
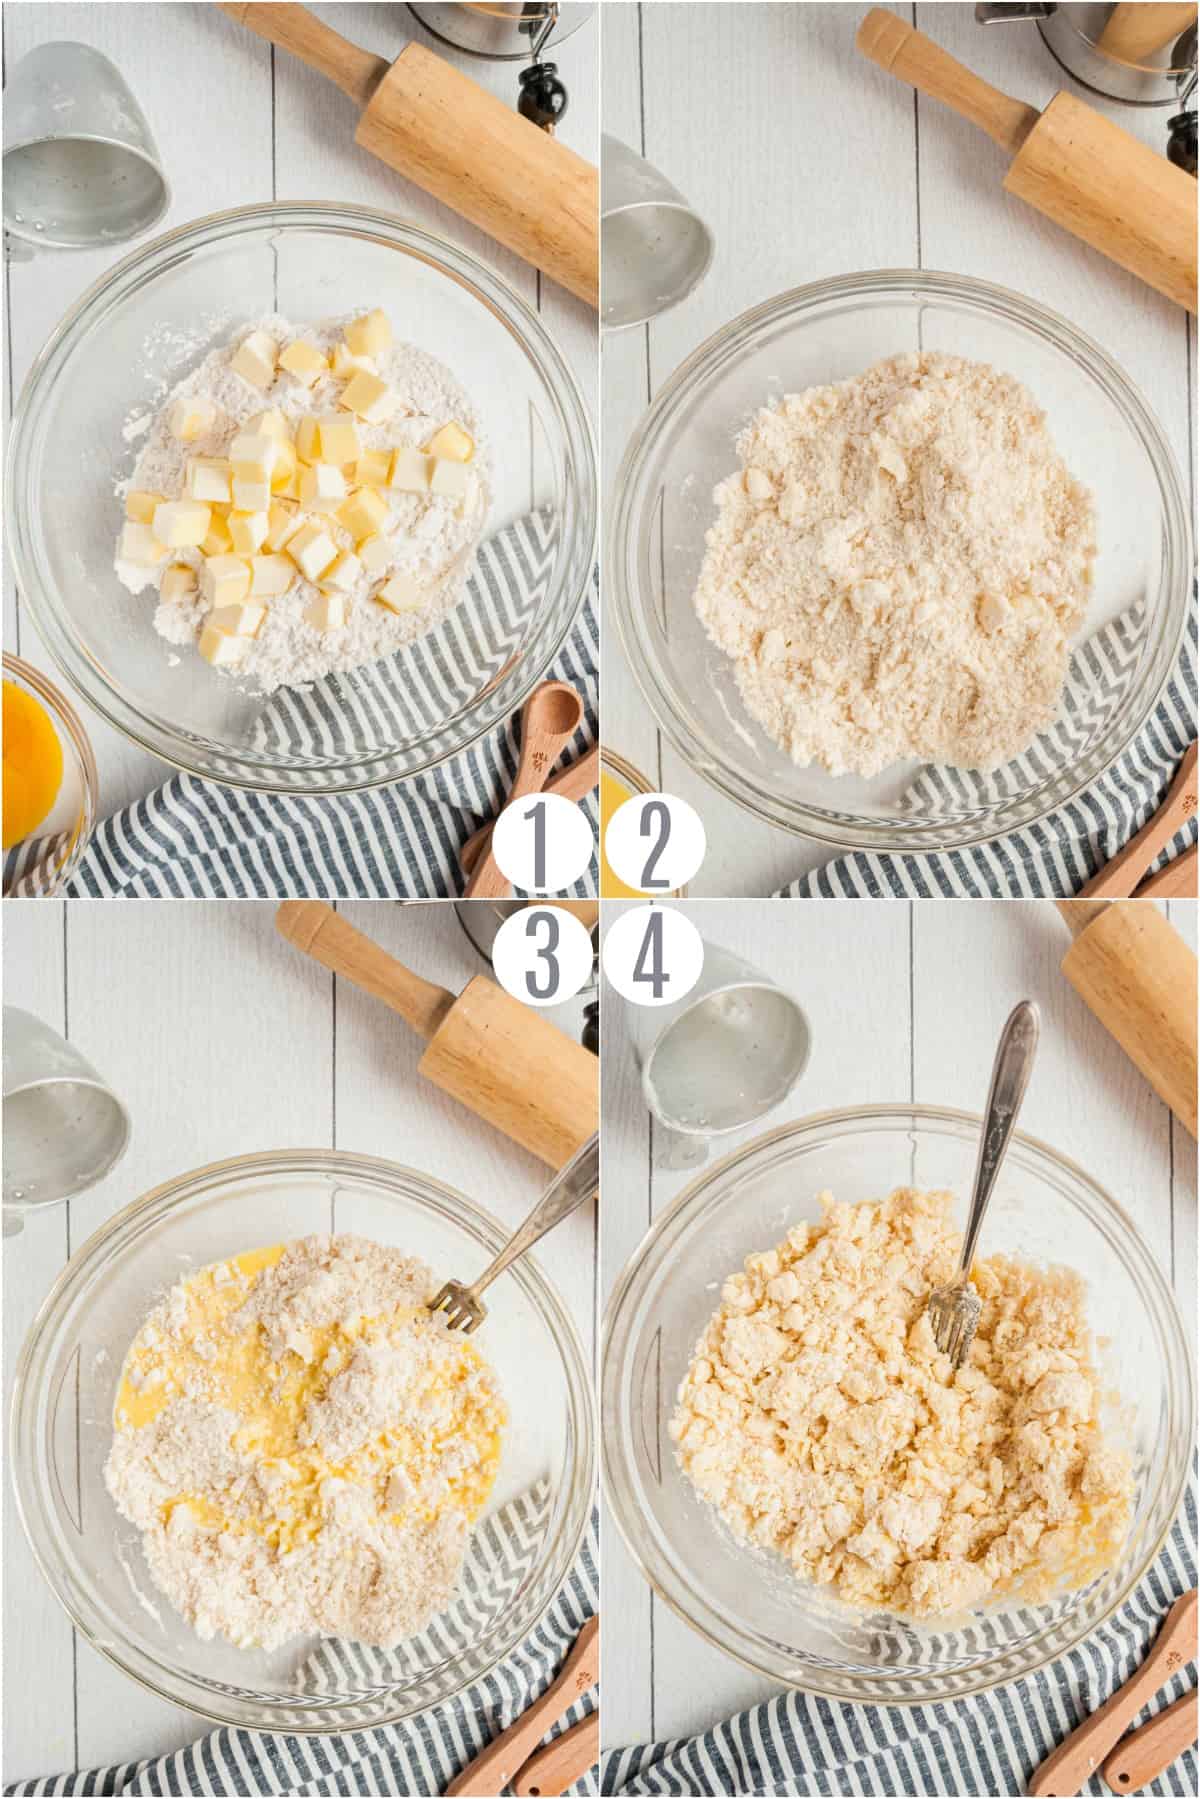
STEP 1. Cut butter and flour
n a large bowl, sift flour and salt together. Cut the chilled butter into pieces and add to the bowl of flour. Using your fingers, pinch the butter and flour together to combine. Continue until no large clumps of butter remain.
STEP 2. Make the dough
In a small bowl, combine the egg yolks and ice water. Add the egg and water mixture, a little at a time, to the flour and butter, mixing quickly with a fork. Once all the liquid has been added, you should be able to squeeze a portion of dough in your hand, and it should hold together.
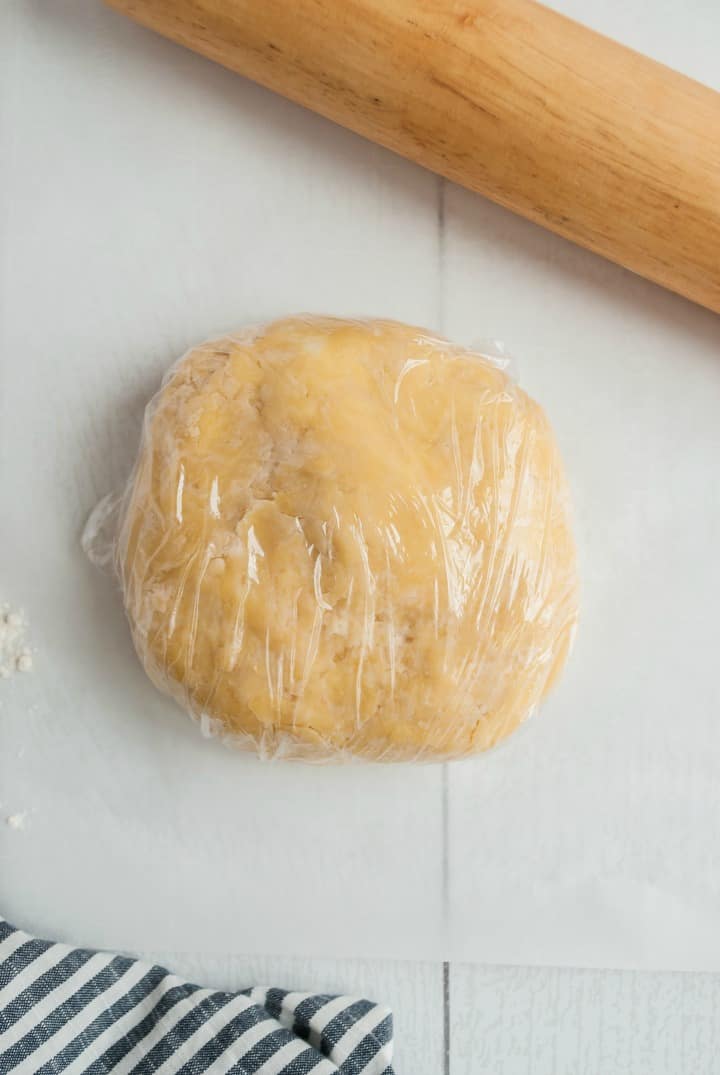
STEP 3. Let it rest
Transfer the dough to a clean work surface and continue to form the dough into a flat disc. Shaping it like this will make it easier to roll out later.
Cover the dough with plastic wrap and place it in the refrigerator to rest for approximately 30 minutes.
STEP 4. Roll out the crust
When the dough is done chilling, lightly flour your work surface and unwrap the dough.
Flour the top of the disc of dough and, using a rolling pin, begin to push down (do not roll) and flatten the dough. To ensure that the dough isn’t sticking to your work surface, periodically turn the dough, about a quarter turn.
Once your disc has been flattened to a diameter of about 8 inches, begin rolling out the dough. If any cracks start to form along the edges, seal them back together with your fingers.
You can use a little bit of water to aid in this. However, if you add too much water, it can make your dough very sticky and hard to work with. If you leave the cracks, they will only get larger.
Continue to roll the dough until it is about ⅛ inch thick.
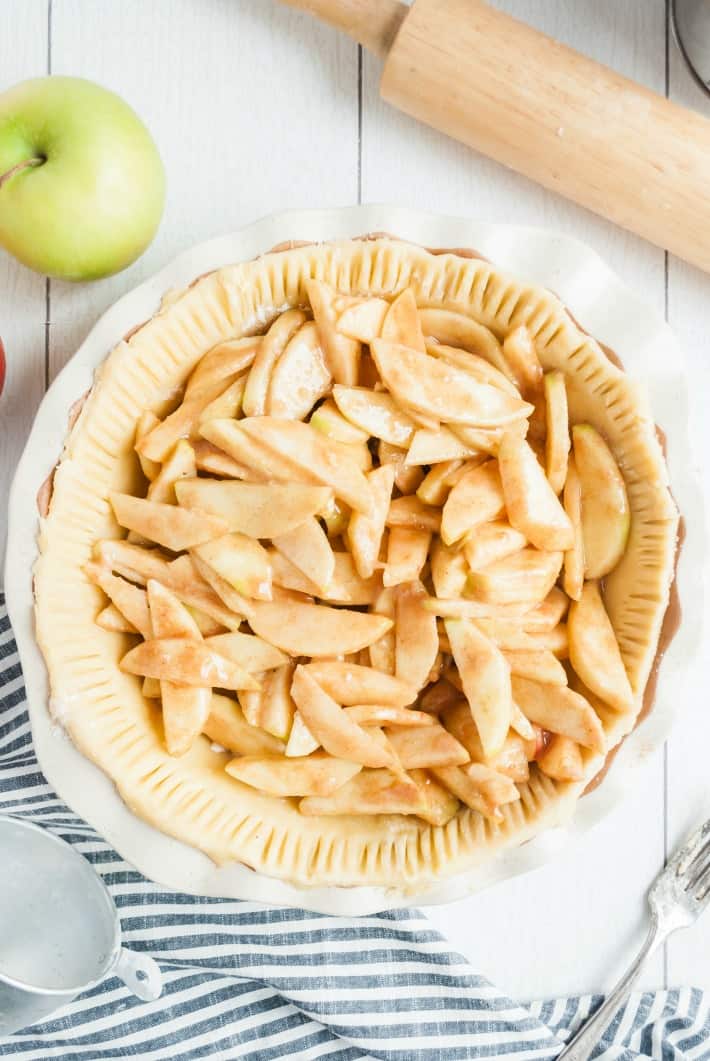
STEP 6. Transfer to the pie plate
It’s the moment of truth! This is the step where crusts most commonly tear.
Here’s how I transfer my pie crust to the plate without tearing: Roll the dough back onto your rolling pin in an even layer. Carry it to the pie plate, then carefully roll it back out to cover the plate.
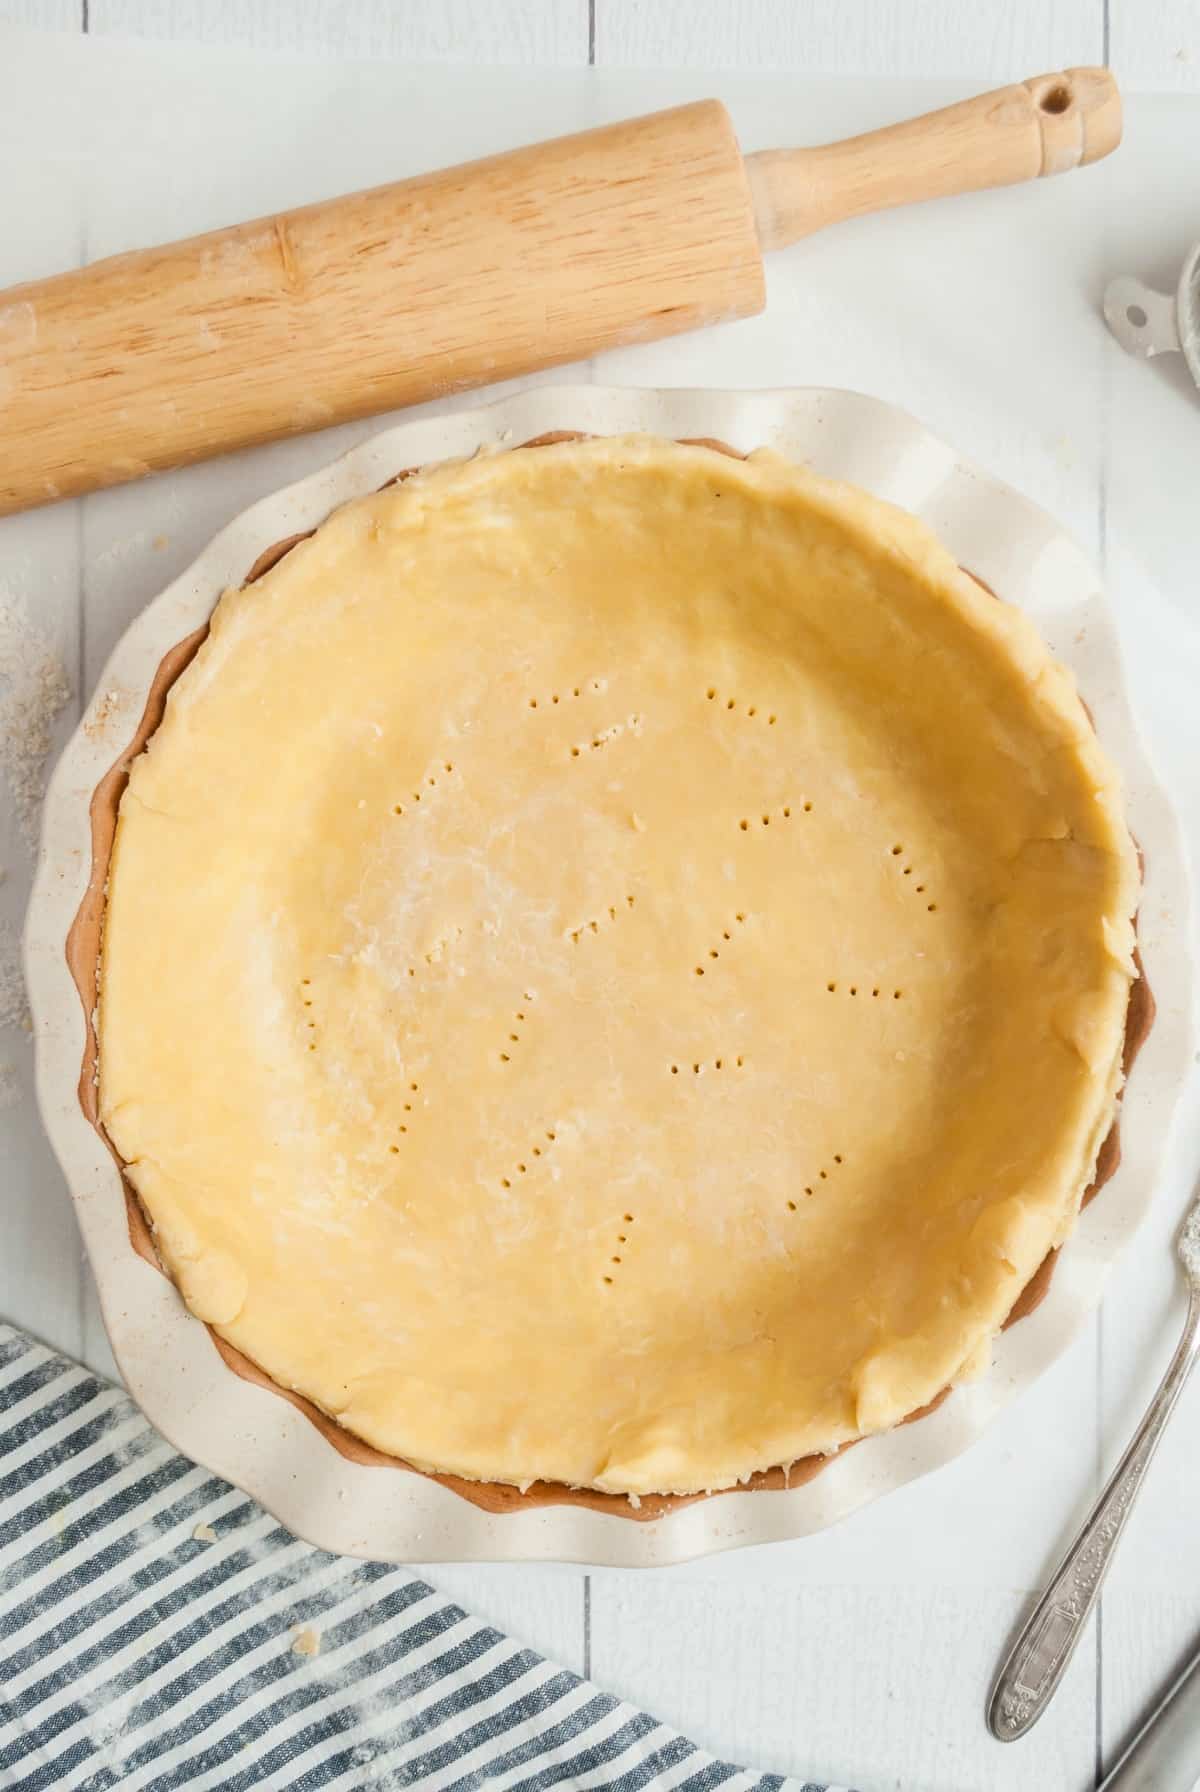
Push the crust down into your pie plate gently and trim off the excess dough that hangs over the edge.
Using a fork, poke holes in the bottom of the crust. Use in all your favorite recipes!
How to Blind Bake a Pie Crust
Some pie recipes call for the crust to be “blind baked.” For instance, Pecan Pie!
This means you bake it before adding the filling.
Here’s my fool proof method for blind baking. It works for both store bought crusts and homemade!
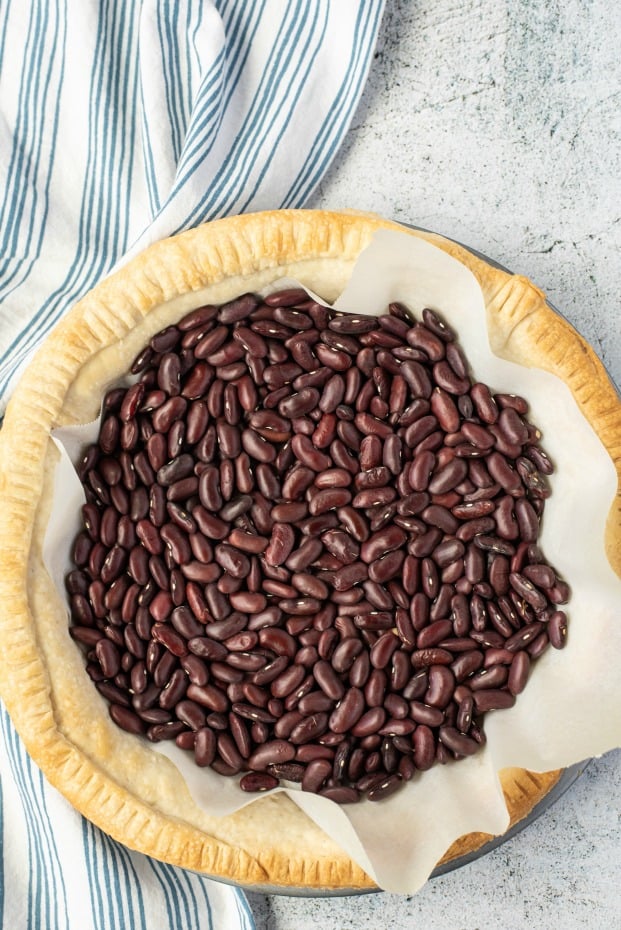
- Use parchment paper to line the inside of the crust, shaping it around the inner edges to form a mold of the crust.
- Fill the parchment paper lined bottom of the crust with pie weights or dried beans. Bake immediately at 400°F for 15 minutes.
- Remove the pan from the oven, and carefully lift out the parchment paper with weights. If the bottom crust has started to bubble up, poke it with a fork a few times.
- Return the crust to the oven for 11-13 minutes for a partially baked pie crust (it should be lightly browned), or 15-17 minutes for a fully baked pie crust (it should be a deep golden brown).
Tips and Tricks
- Make sure your butter is COLD! I like to put mine in the freezer for 10 minutes before using it in the pie crust recipe.
- If the butter melts or softens into the flour before baking, you’ll miss out on the super flaky pastry texture.
- Chilled dough is easier to work with than room temperature dough. Don’t skip the chilling step! If you aren’t going to bake a pie immediately with the pie crust dough, you can store it in the fridge for up to 4 days (covered in plastic wrap).
- Keep some ice water nearby while you roll out the dough! If it becomes crumbly and dry, sprinkle a small amount of ice water onto the disk to make it workable, being careful not to get the dough too sticky.
- DON’T OVERWORK THE DOUGH! The more you fiddle with the dough, the more the gluten in the flour will activate resulting in a tough and dense crust. Use a light touch and try to work with the dough as little as possible.

More Easy Dessert Recipes
- Make these easy, handheld Berry Hand Pies! Don’t like berry? Try these Peach Hand Pies instead!
- Try out this sweet Raspberry Shortbread Crumble Bars recipe that will impress your friends and family!
- Make this creamy dreamy Banana Cream Pie that the whole family will love!
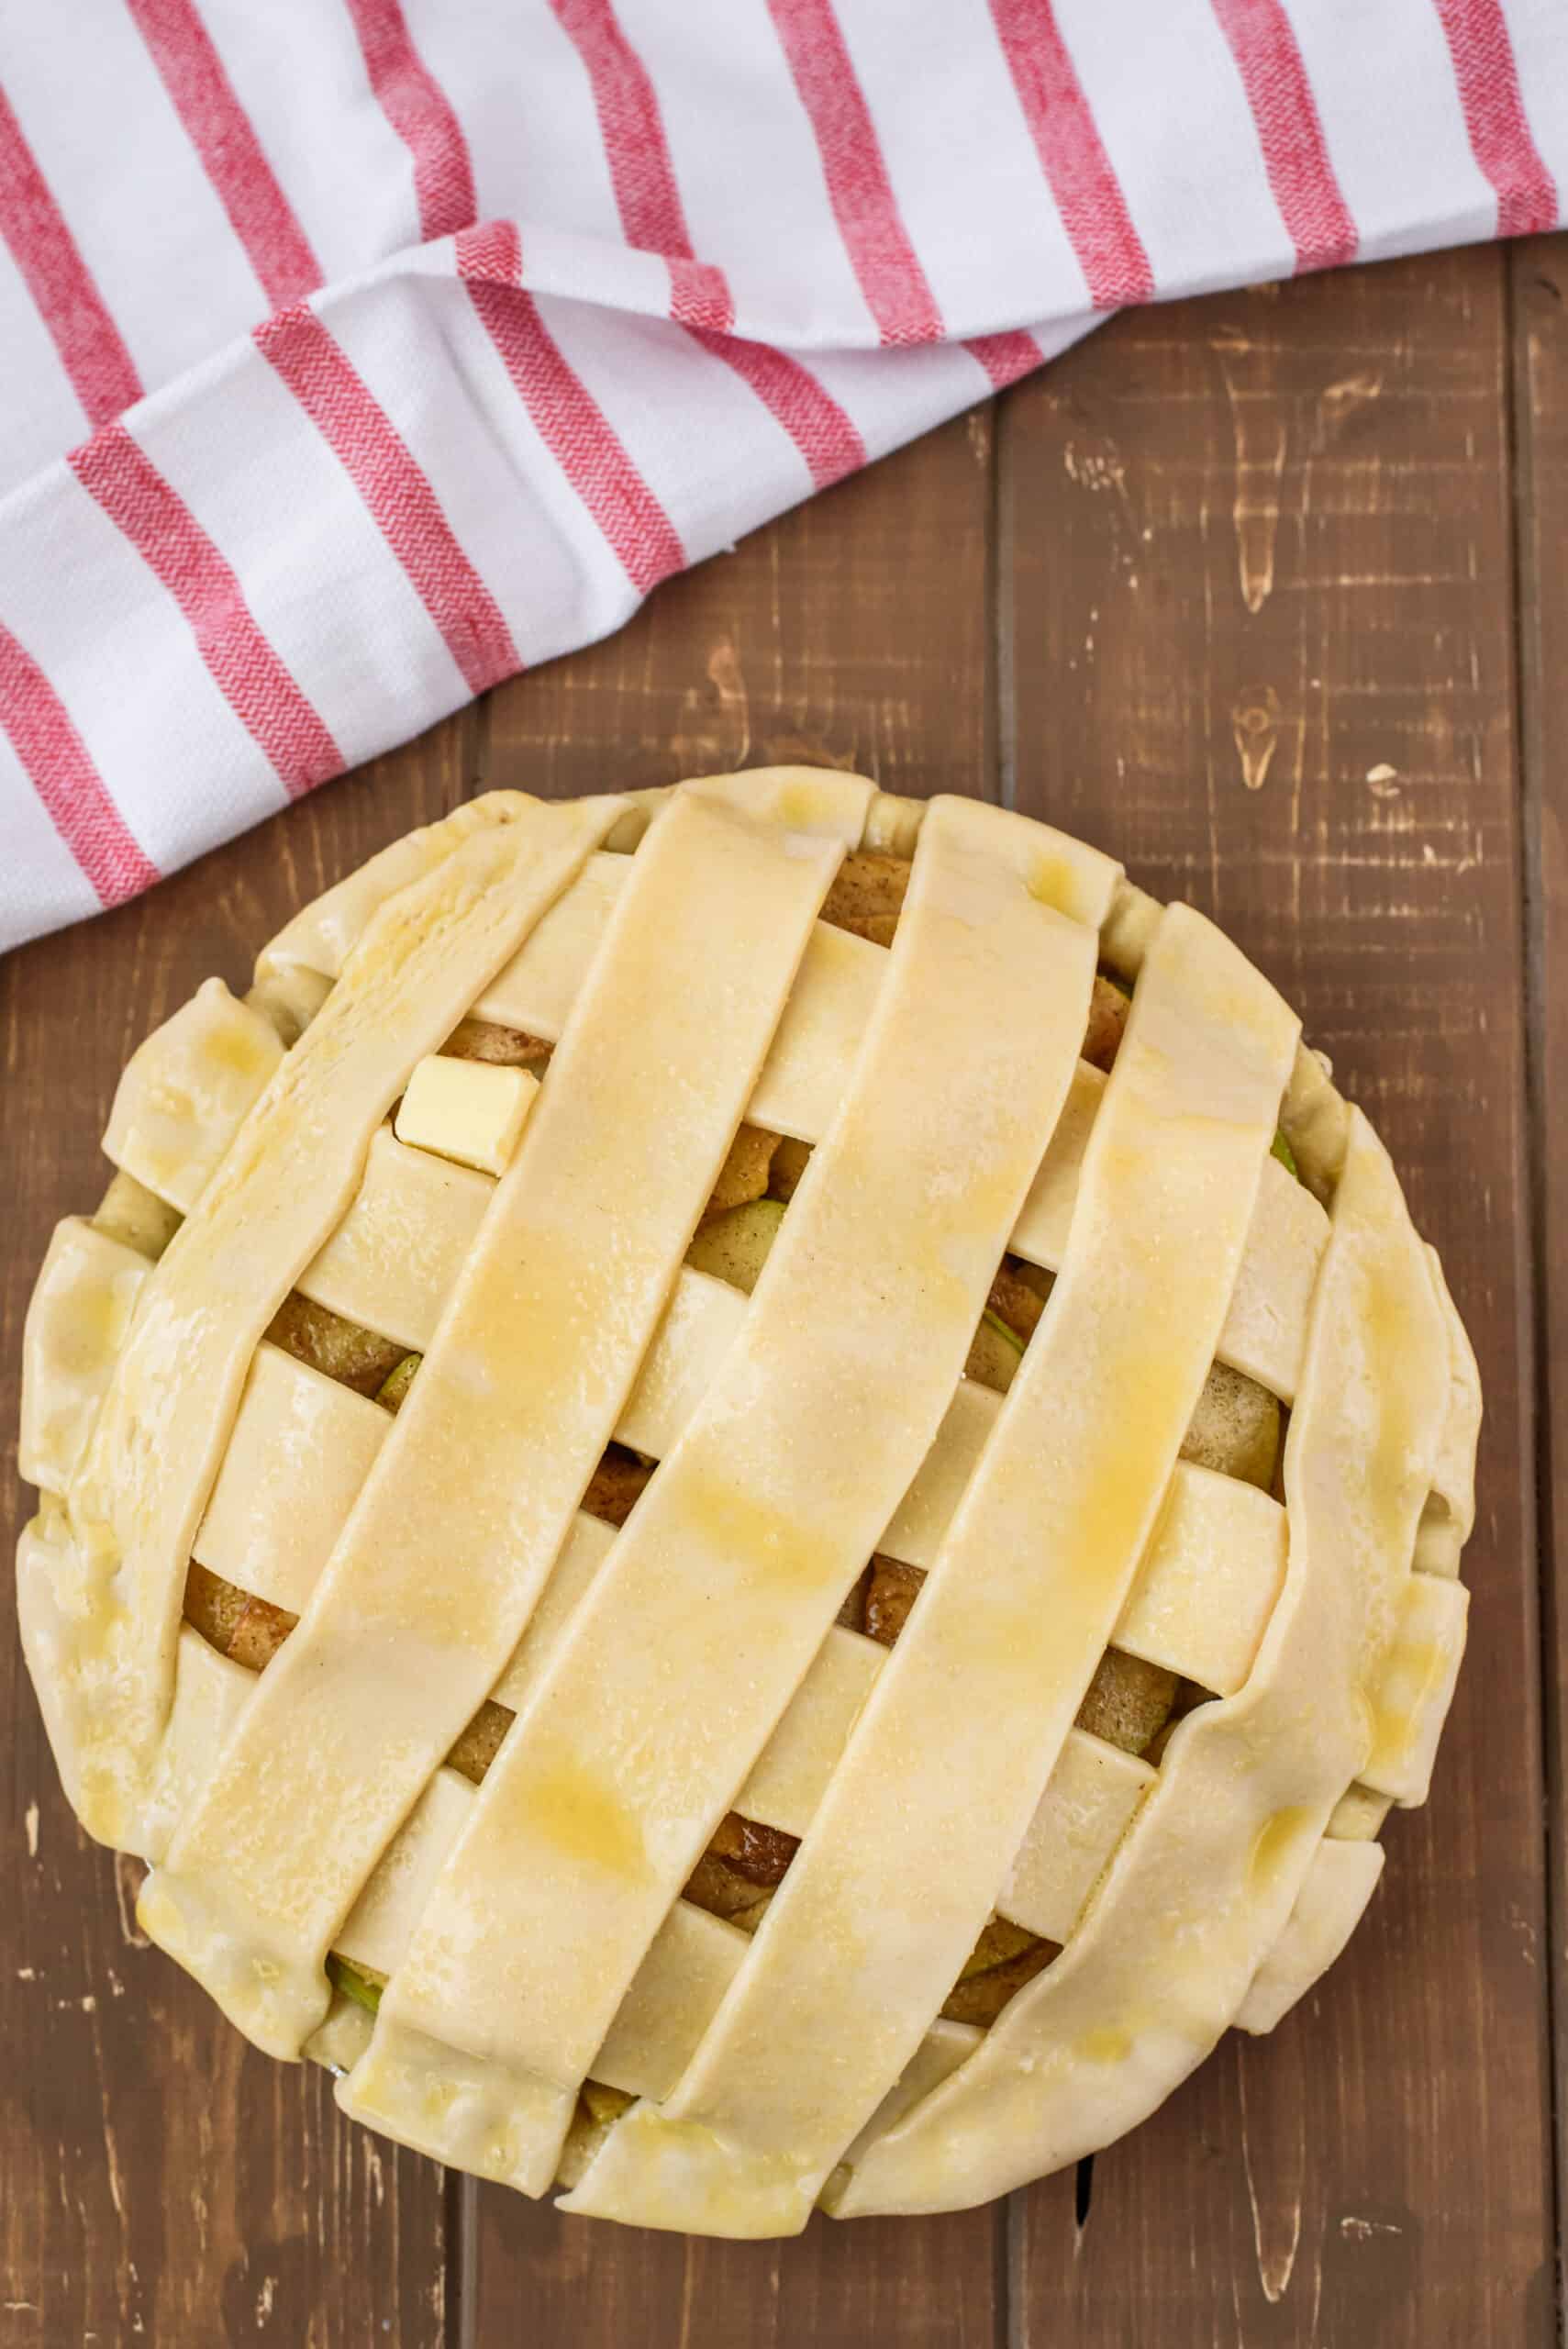
- Use this post recipe to make this Cherry Pie, Apple Pie, or Blueberry Pie!
Pin this now to find it later
Pin It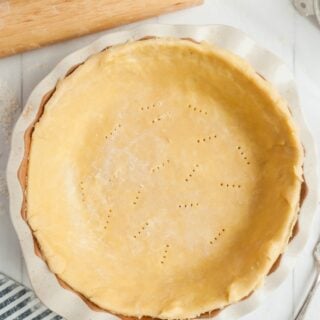
Pie Crust Recipe
Ingredients
- 2 cups all-purpose flour
- Pinch of salt
- ¾ cup unsalted butter chilled
- 2 egg yolks
- 4 tablespoons of ice water
Instructions
- In a large bowl, sift flour and salt together. Cut the chilled butter into pieces and add to the bowl of flour. Using your fingers, pinch the butter and flour together to combine. Continue until no large clumps of butter remain.
- In a small bowl, combine the egg yolks and ice water. Add the egg and water mixture, a little at a time, to the flour and butter, mixing quickly with a fork. Once all the liquid has been added, you should be able to squeeze a portion of dough in your hand, and it should hold together.
- Transfer the dough to a clean work surface and continue to form the dough into a flat disc. Shaping it like this will make it easier to roll out later. Cover the dough with plastic wrap and place it in the refrigerator to rest for approximately 30 minutes.
- When the dough is done chilling, lightly flour your work surface and unwrap the dough.
- Flour the top of the disc of dough and, using a rolling pin, begin to push down (do not roll) and flatten the dough. To ensure that the dough isn’t sticking to your work surface, periodically turn the dough, about a quarter turn.
- Once your disc has been flattened to a diameter of about 8 inches, begin rolling out the dough. If any cracks start to form along the edges, seal them back together with your fingers. You can use a little bit of water to aid in this. However, if you add too much water, it can make your dough very sticky and hard to work with. If you leave the cracks, they will only get larger.
- Continue to roll the dough until it is about ⅛ inch thick.
- To transfer the crust to your pie plate, roll it up onto your rolling pin. And then roll it back out so that it covers your plate.
- Push the crust down into your pie plate and trim off the excess dough that hangs over the edge.
- Using a fork, poke holes in the bottom of the crust.
- Use in your favorite pie recipes!
To Blind Bake a Pie Crust:
- If your recipe calls for a blind-baked crust (or a pre-baked crust), use parchment paper to line the inside of the crust, shaping it around the inner edges to form a mold of the crust.
- Fill the parchment paper lined bottom of the crust with pie weights or dried beans. Bake immediately at 400°F for 15 minutes.
- Remove the pan from the oven, and carefully lift out the parchment paper with weights. If the bottom crust has started to bubble up, poke it with a fork a few times.
- Return the crust to the oven for 11-13 minutes for a partially baked pie crust (it should be lightly browned), or 15-17 minutes for a fully baked pie crust (it should be a deep golden brown).
Notes
- Chilled dough is much easier to roll out and work with. If you aren’t going to make the crust immediately, it can rest in the refrigerator for up to 4 days.
Nutrition
Ready for pie? Give this easy homemade pie crust recipe a try and let me know how you like it!


Perfect pie crust recipe…easy to follow.
So glad it was a hit for you 🙂
I’ve had such a hard time with gluten free crust., wish I had one I could count on..you have made gluten free crust….thks
Is this your version of crust for a single or double crust ed pie?
Wish it was gluten free
You can use King arthur flour measure for measure gluten free flour in this recipe 🙂
I lovefried pies but i might try these.
If I make the crust a day or two in advance for your blueberry lemon hand pies, do I refrigerate it in the plastic wrap before I roll it out?
Yes!
I have always struggled making pie crust so this post was so helpful. Thanks for the great tips and inspiration to try making one again.
Is this top and bottom crust or just bottom crust