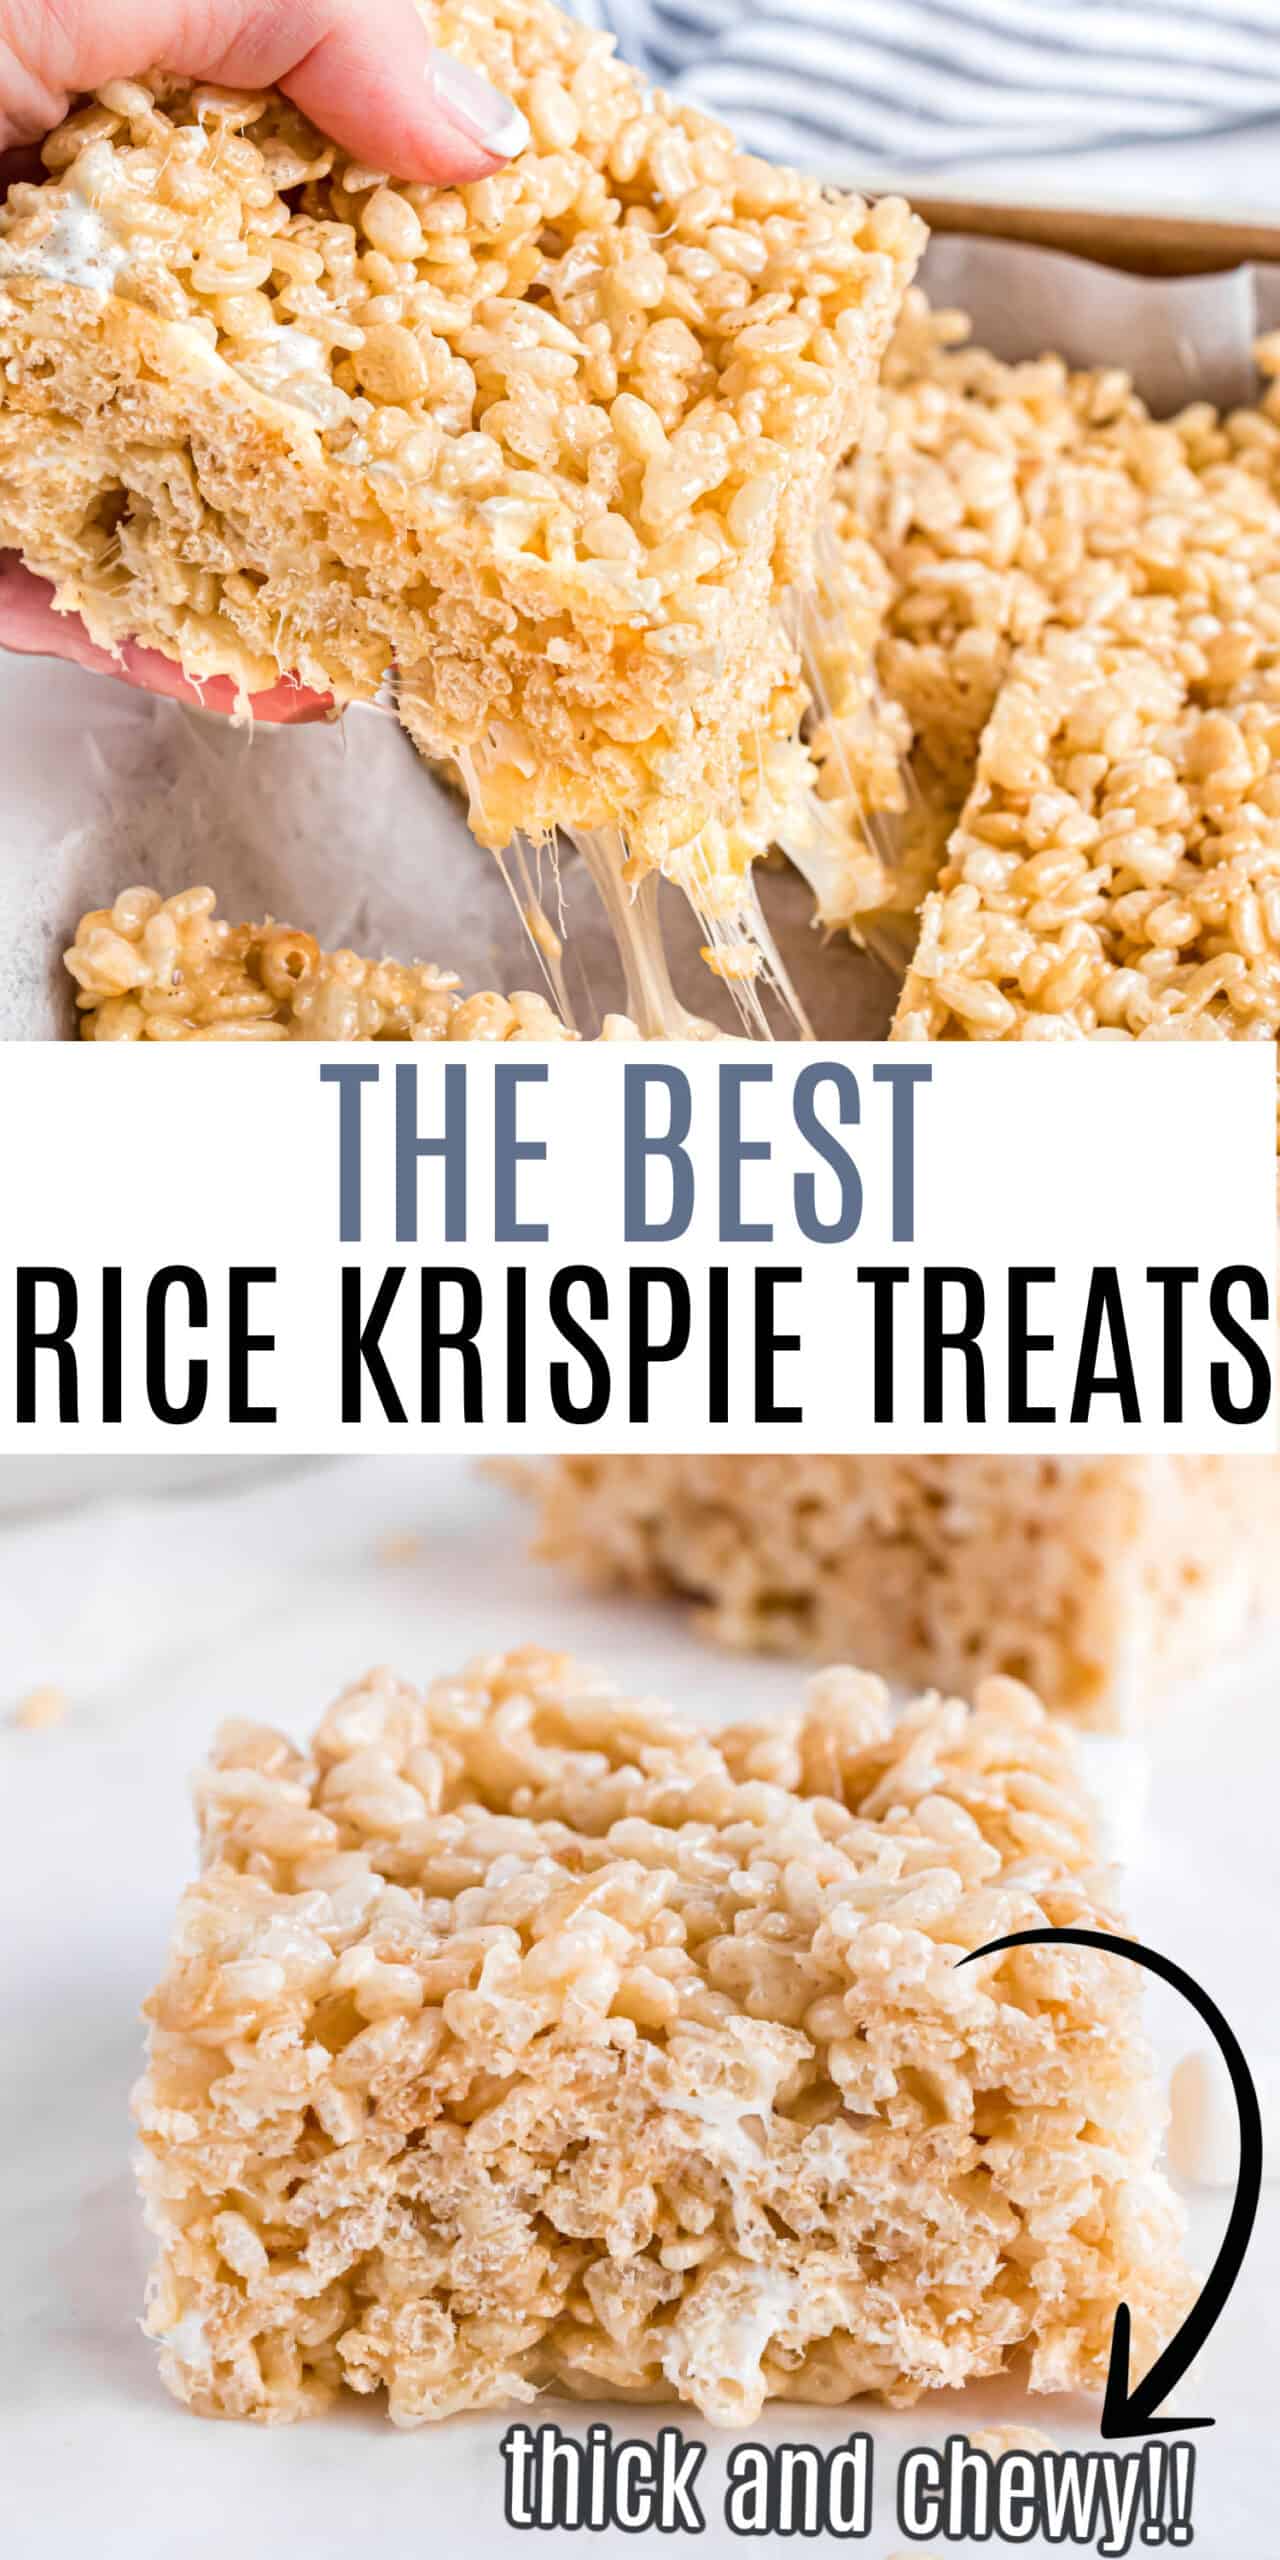
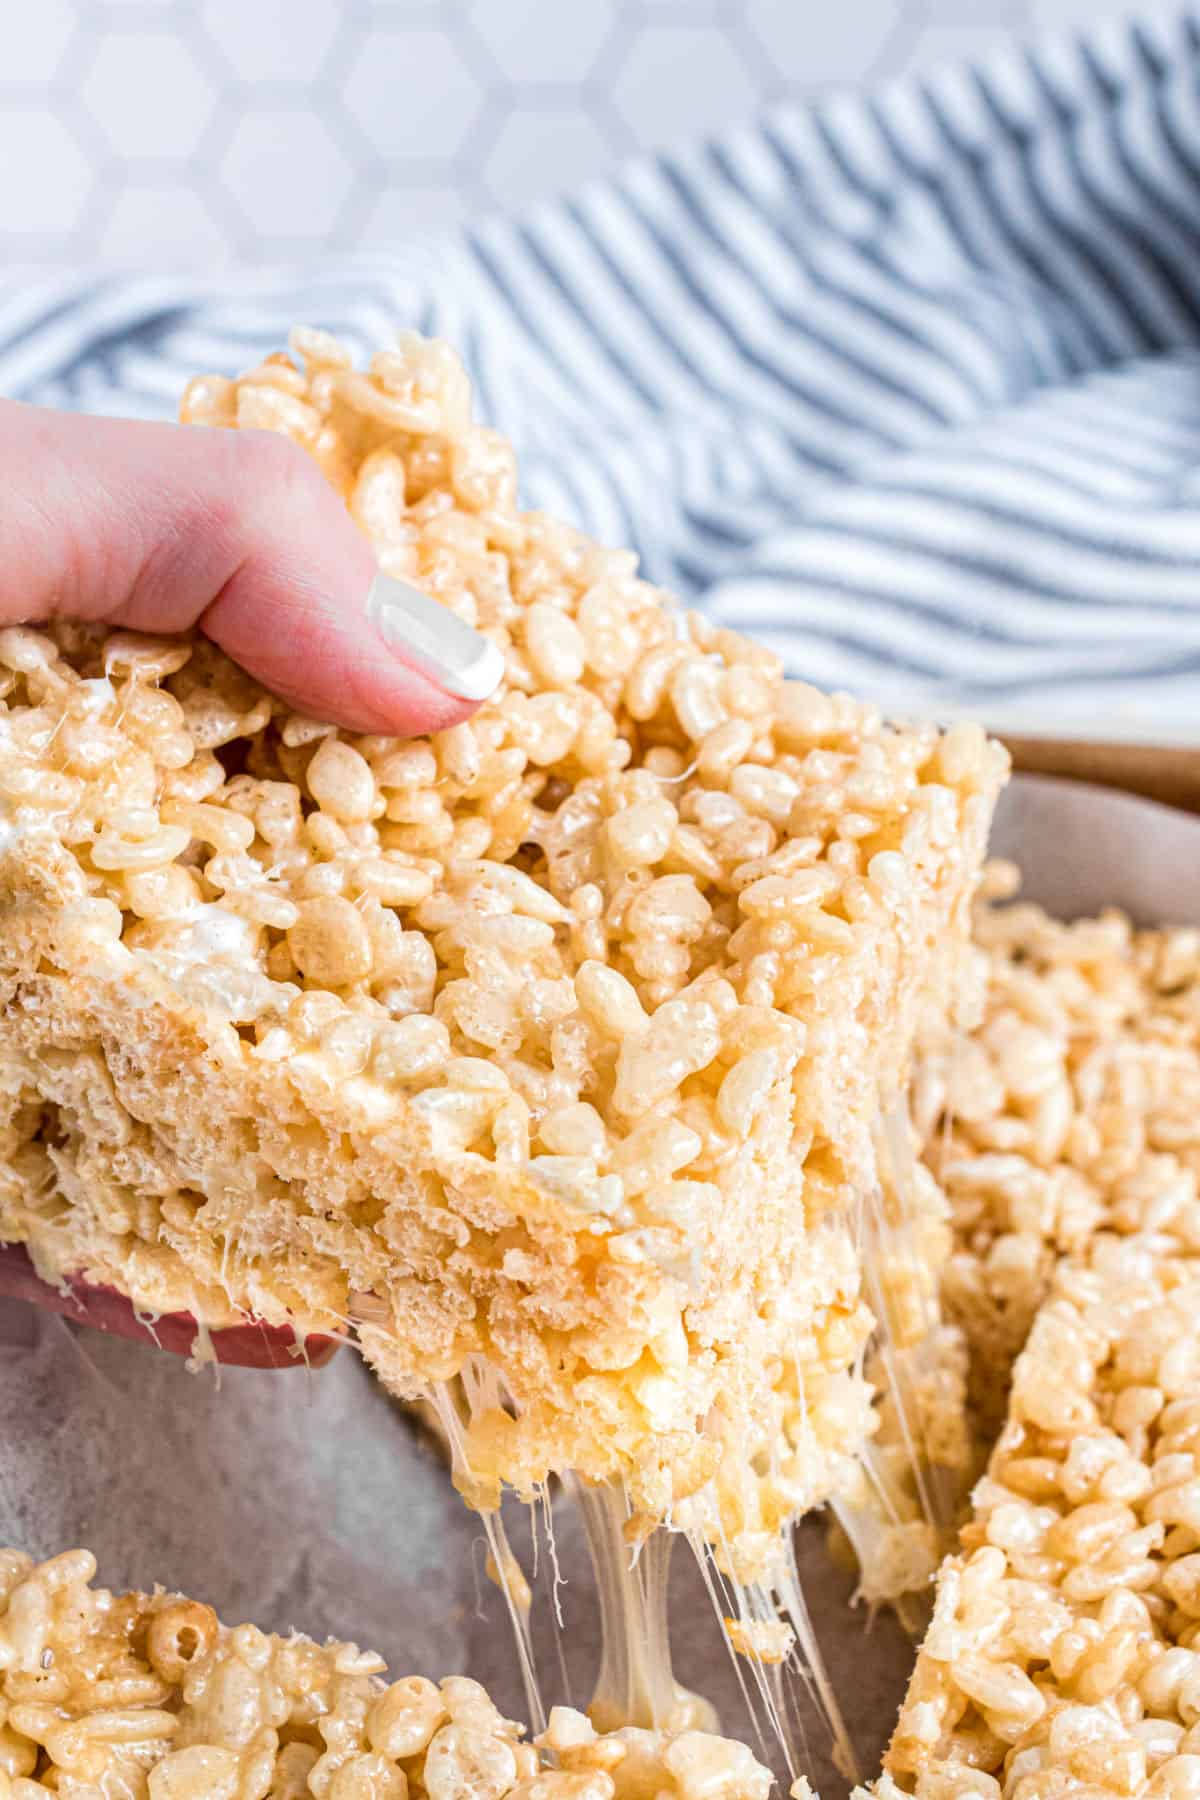
These homemade Rice Krispie Treats are perfectly soft and chewy every time, thanks to one secret ingredient. Ready in minutes with just 4 ingredients!
I’ve become known as the rice krispie treat expert. Once you’ve mastered my original version, get creative with flavors!

This recipe for homemade rice krispie treats was originally published in October 2016. It has been updated with new photos in February 2021 and updated recipe notes in July 2026.
Aimee’s Recipe Notes

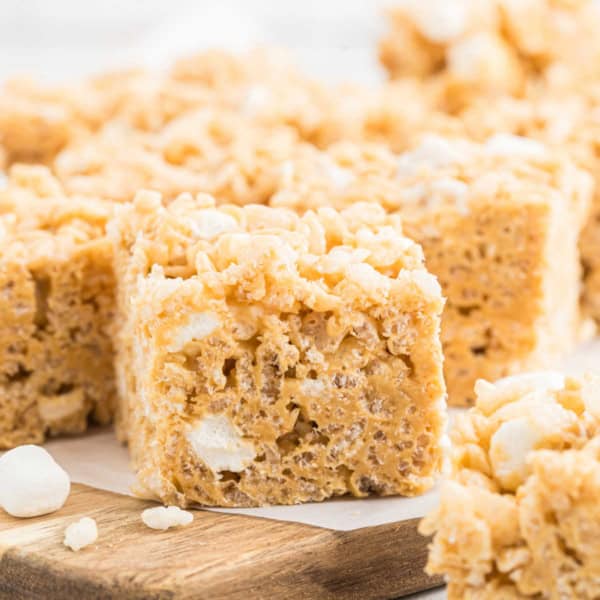
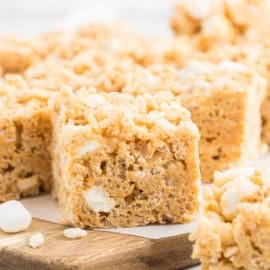
If you’ve been searching for the best rice krispie treat recipe, you’ve landed in the right place. These are buttery, gooey, and just the right amount of chewy. Everything the classic treat should be, with a little bit of a secret that makes them even tastier.
Taste: Sweet, buttery, and vanilla flavored.
Texture: Gooey, and chewy with a light crispiness from the cereal.
Ease to Make: Simple and quick, perfect for beginners or busy bakers.
Cooking Method: Stovetop, no-bake; just melt, mix, and set in a pan.
These are FANTASTIC and worth the time to refresh your rice Krispy teat skills.
-Sew
Homemade Rice Crispy Treats Ingredients
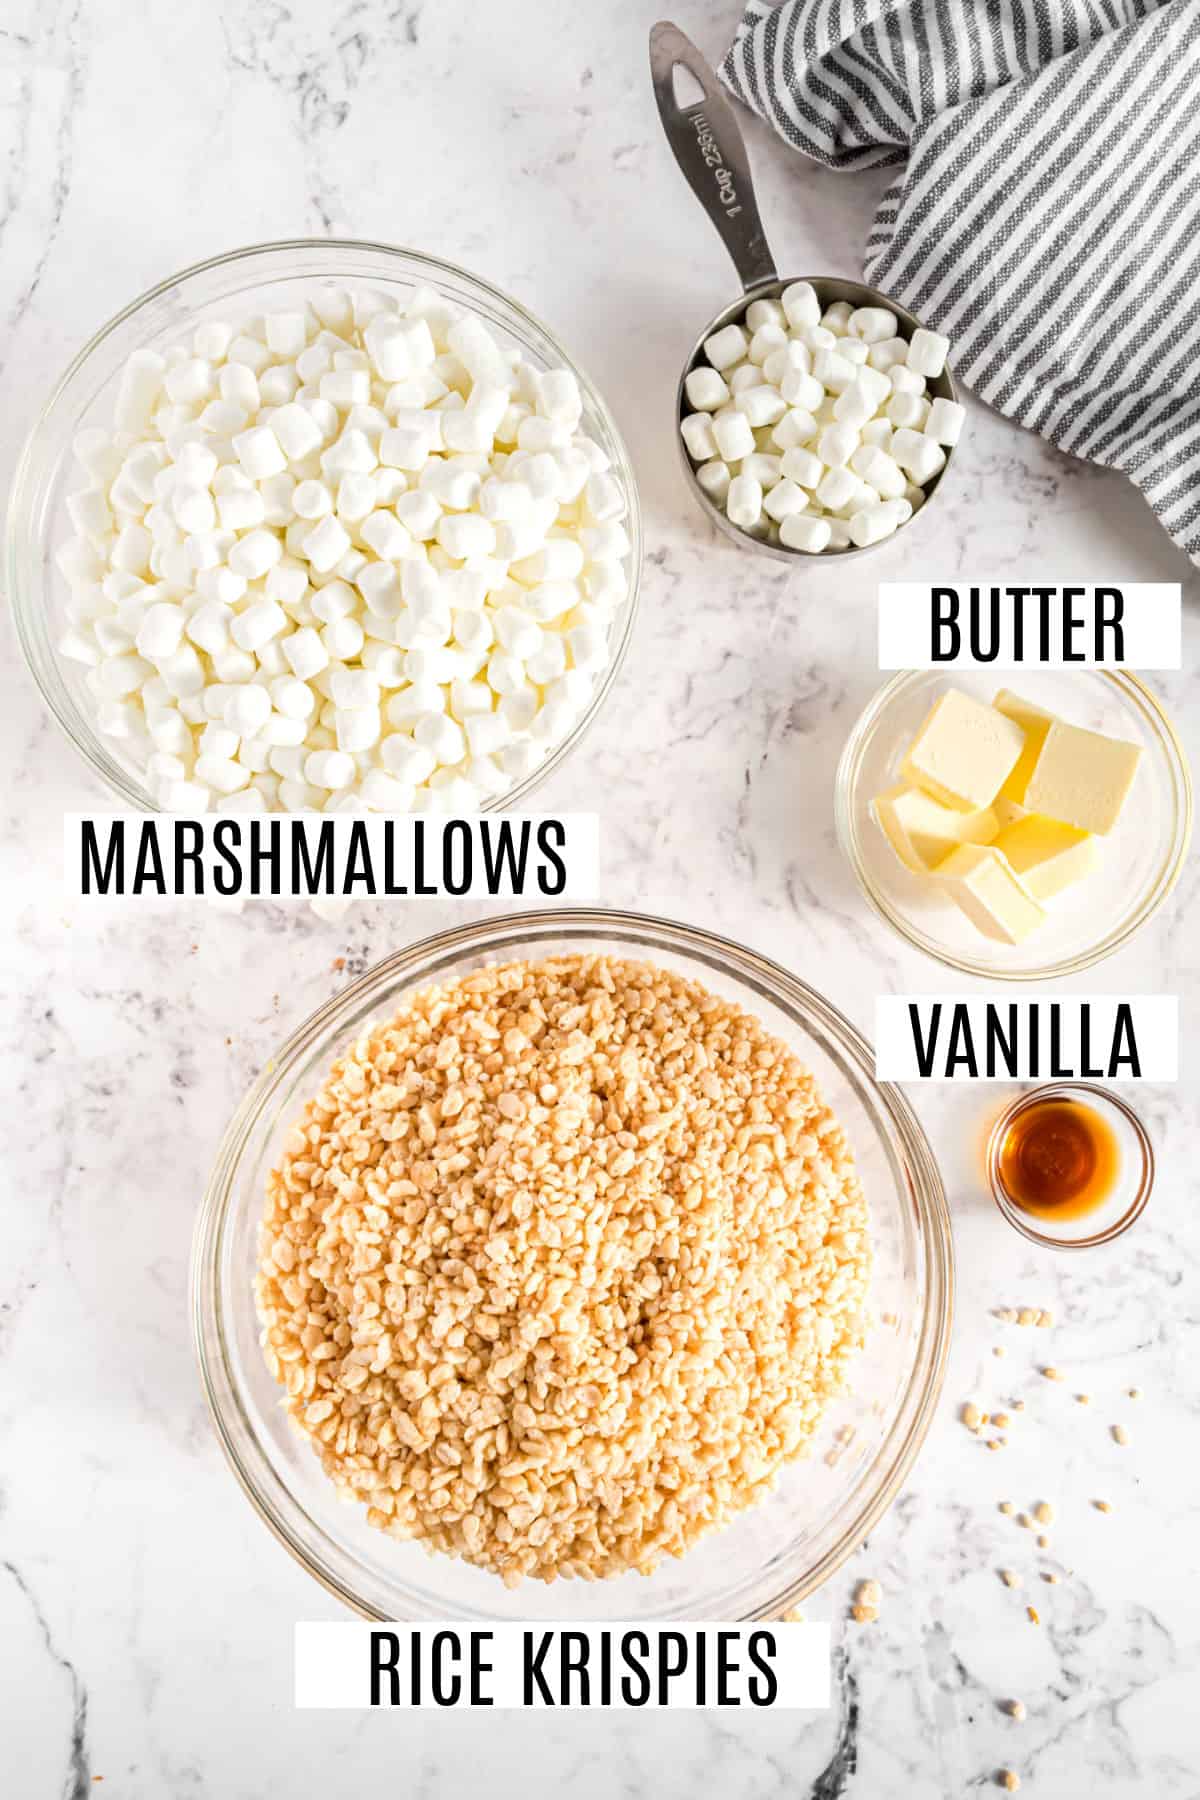
My recipes for rice crispy treats is so easy. Scroll down to the recipe card for full ingredient list and measurements.
- Butter- use salted butter for this recipe. Just trust me! Don’t have any on hand? Use unsalted butter and a pinch of salt while melting. DO NOT use margarine.
- Marshmallows- you’ll need 8-9 cups of mini marshmallows, keeping about 1 cup aside to add in at the end!
- Rice Krispies Cereal- any brand of crispy rice cereal will work, just make sure it’s FRESH.
Aimee’s Secret Ingredient
Adding my homemade vanilla extract or any pure vanilla extract takes this recipe over the top. Or make it lemon flavored using our easy lemon rice krispie treat recipe.
How to Make Rice Krispie Treats
Scroll down after the recipe card to see more tips and tricks as well as variations that I’ve created off this classic rice krispie treat recipe.
Quick Tips for the Best Rice Krispie Treat Recipe
- Use fresh marshmallows. Using stale marshmallows will result in stale treats. Trust me, I’ve learned the hard way.
- Brown the butter. Learn how to brown butter and make a batch of my flavorful brown butter rice krispie treats next!
- Add my secret ingredient. VANILLA EXTRACT. Not imitation vanilla, but Pure Vanilla extract. It makes a difference in creating the illusion that you’re using homemade marshmallows.
- Kelloggs is wrong. DO NOT press these bars into your pan firmly. Using your fingertips and gentlypress them in just until they are spread out. The harder you pack them in, the harder they are when it’s time to eat them!
- The trick to pressing them in your pan without sticking to your hands is to run your fingers in water. Dip in water, shake off the excess, and press. Voila. No sticking!
- Store in an airtight container for two days. If they last that long, I’d be shocked!
- Make these gluten free by choosing a crispy rice cereal labeled Gluten Free (and check your marshmallow labels too just in case).
Why are my rice crispy treats hard?
As mentioned above, you’ll get hard rice krispie treats a number of ways.
- Using stale ingredients will results in stale, hard treats. So always use fresh marshmallows and fresh cereal too.
- Avoid pressing your bars too firmly into the pan. The harder you press, the more firm the rice krispies treats will be.
Storing Leftovers
Rarely is this the case in my house, as we all know I can eat an entire pan of homemade rice krispie treats. But, should you find yourself with leftovers, you can store them in an airtight container at room temperature. I usually just slide them into a ziploc bag.
Or you can freeze rice krispie treats. I was skeptical for a long time, and finally tried it out. I slide my leftovers into a ziploc freezer bag and placed them in the freezer.
Surprisingly, they thaw pretty quickly on the counter and they taste super fresh too!
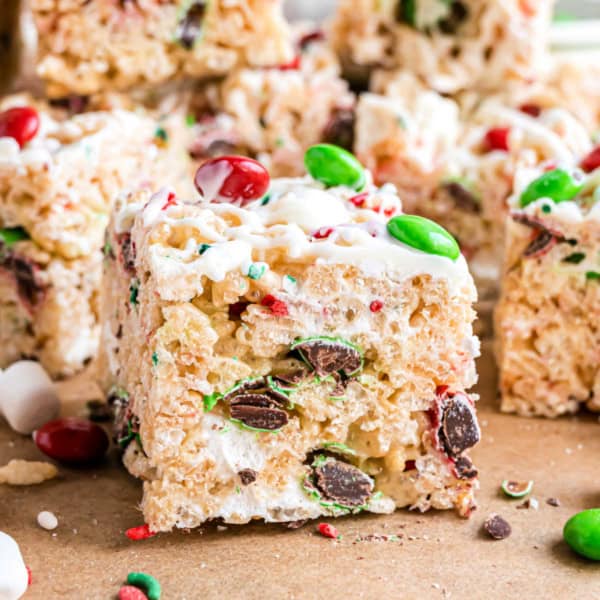
More Rice Krispie Treat Flavors
Add in some flavored gelatin (or pudding mix) to the melted marshmallow for a unique twist! Cherry Krispie Treats!
Make Lucky Charms Treats for a St.Paddy’s Day dessert idea.
- For best results, name brand cereal stays fresher longer and can hold up to the melted butter and marshmallows better
- Always start with fresh marshmallows. If you use stale marshmallows in hopes that melting them will give you good results, you’ll be disappointed!
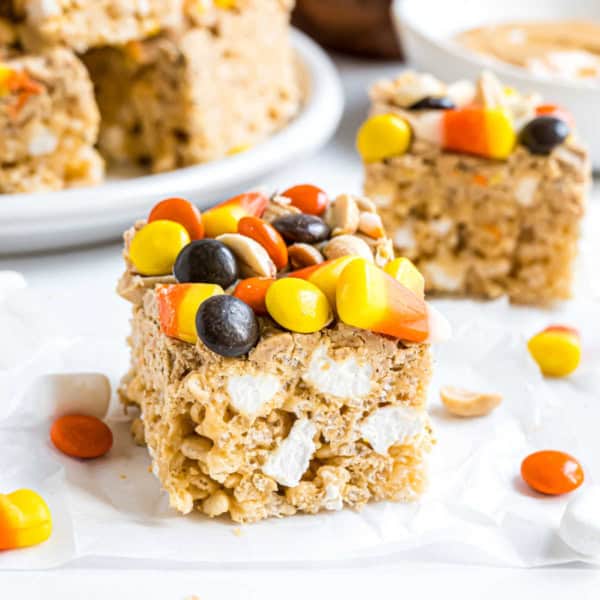
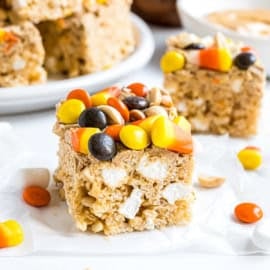
- More mix-ins: fold in some m&m’s or Reese’s peanut butter cups for a delicious dessert idea.
There are thousands of recipes for showing how to make rice crispy treats, and I’m putting it out there that my recipe is BEST. You may see some similar nowadays, but they all stem from my original add-ins.
- Only 4 ingredients
- Thick and chewy
- Vanilla flavor
- Perfect ratio of cereal to marshmallows
We love that this classic treat can be changed up using different cereals too!
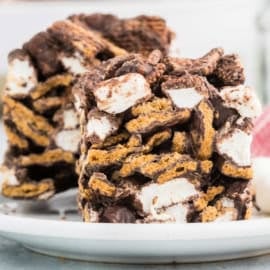
- Chocolate– Cocoa Krispie Treats
- Fruity– Fruity Pebbles Treats
- S’mores– Golden Grahams Treats
- Cheerios– Cheerio Treats
Basic, original, homemade rice krispie treats that captures my taste buds.
The biggest question is how to spell it. Some people say Rice Crispy treat, Some say Crispy Rice, some say Rice Crispies. Either way, you get the point! This rice crispy treats recipe is the best you’ll find.
Best Rice Krispie Treats Recipe

Pin this now to find it later
Pin It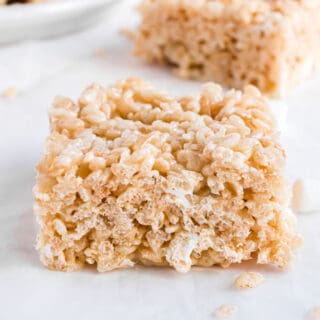
Rice Krispie Treats Recipe
Ingredients
- 6 Tablespoons salted butter
- 16 ounce bag mini marshmallows divided
- 1 teaspoon pure vanilla extract
- 6 cups rice krispies cereal
Instructions
- Line a 9-inch square baking dish with parchment paper. Set aside.
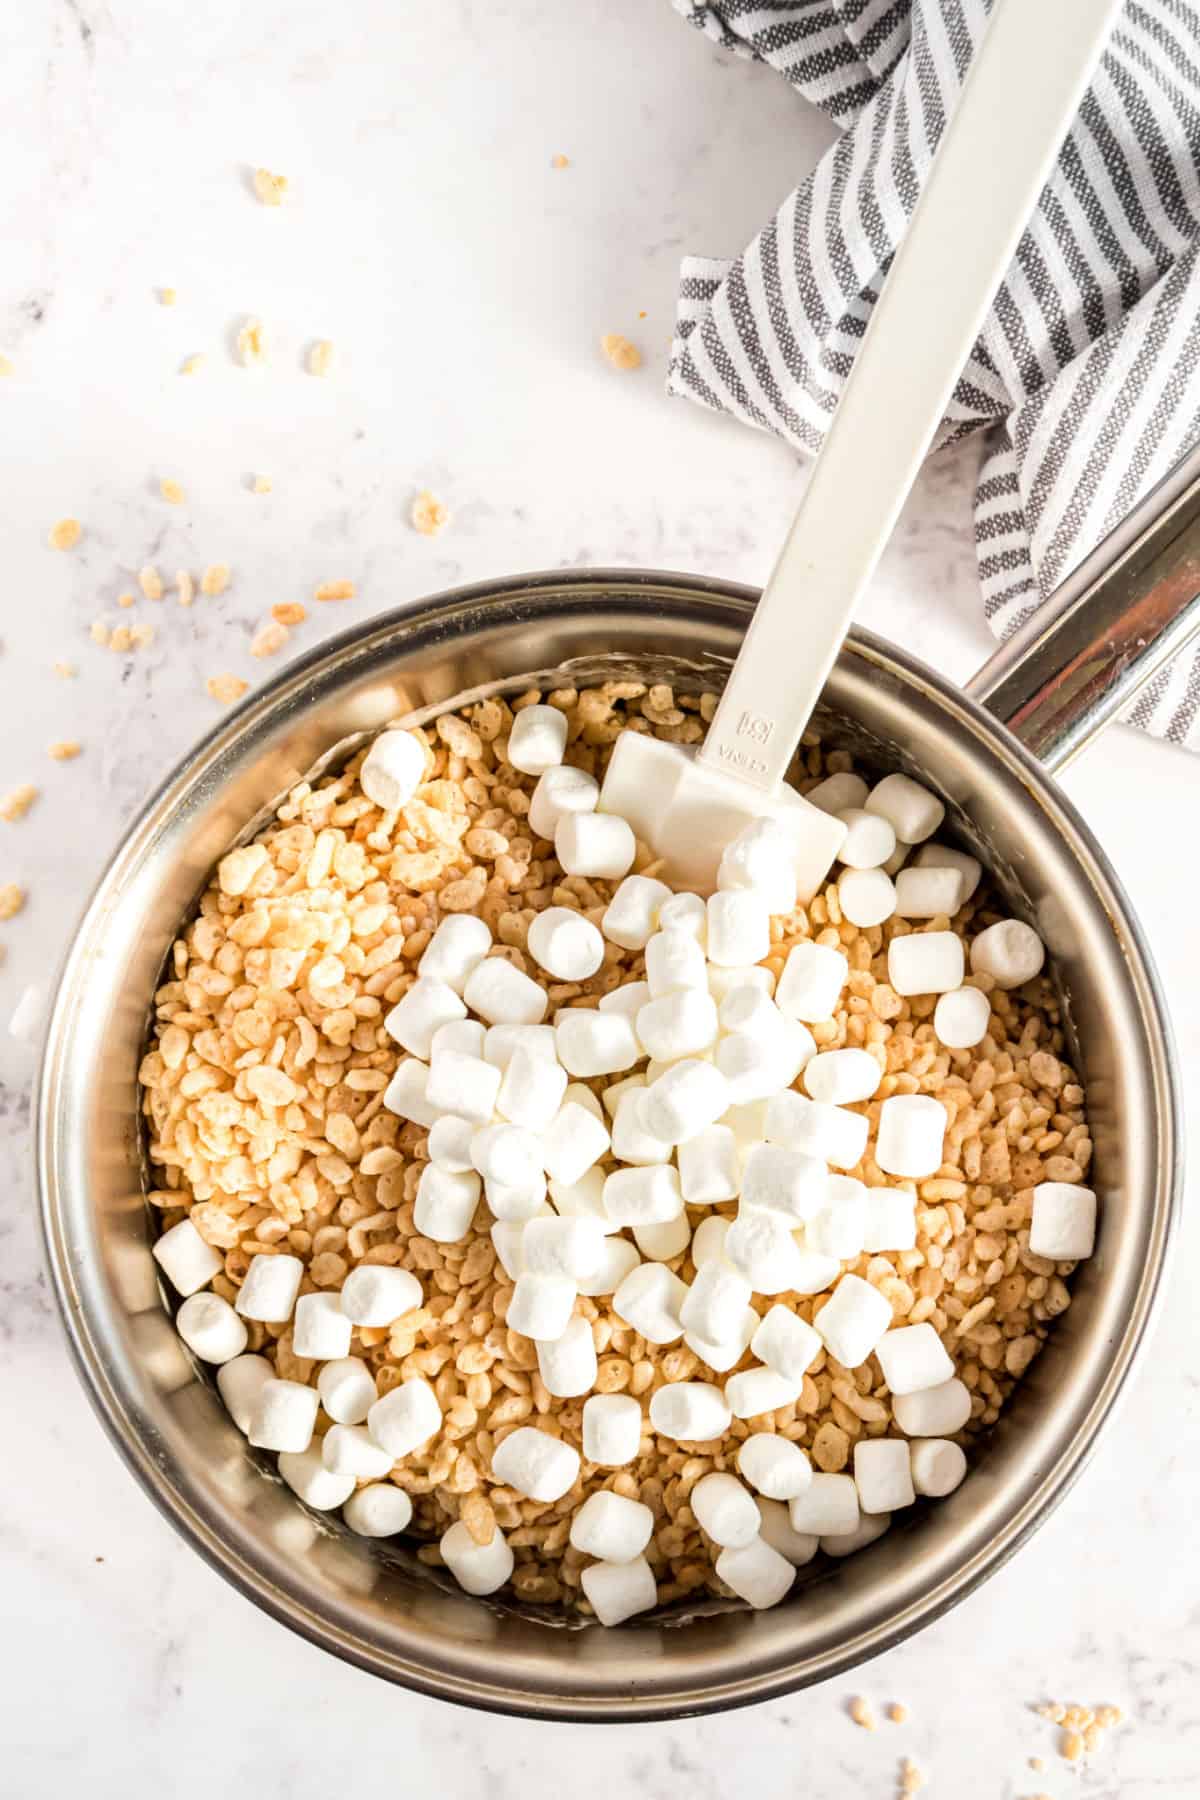
- In a large saucepan, melt butter over medium heat. Once melted, add in all but 1 cup of the marshmallows. Reduce heat to low and continue stirring until completely melted.
- Remove from heat and stir in the vanilla. Add the cereal and the remaining 1 cup of marshmallows and gently stir until combined.
- Pour into the prepared baking dish. Press GENTLY with your fingertips just until completely spread out (the harder you pack them in, the harder they are to eat).
- Allow to set, about 1 hour. Cut and enjoy!
Notes
- How many marshmallows do I need? One 16 ounce bag of marshmallows is about 8-9 cups. You’ll melt all but one cup of the marshmallows in the butter, reserving the last cup for adding with the cereal.
- Line a 9-inch square baking dish with parchment paper. This way you don’t have to worry about extra butter on your fingertips, or the other extreme of your bars sticking to the pan! Use binder clips to help the parchment paper stay in place.
- Use fresh marshmallows. Seriously, they make a difference. Don’t grab that bag that’s been in your pantry for months and months thinking it will be okay since you are melting them. It won’t be okay.
- Add my secret ingredient. VANILLA EXTRACT. Not imitation vanilla, but PURE VANILLA extract. It makes a difference in creating the illusion that you’re using homemade marshmallows.
- DO NOT (I repeat) DO NOT press these bars into your pan firmly. Using your fingertips, GENTLY press them in just until they are spread out. The harder you pack them in, the harder they are when it’s time to eat them!
- The trick to pressing them in your pan without sticking to your hands is to run your fingers in water, shake off the excess, and press. Voila. No sticking!
- Store in an airtight container for two days. If they last that long, I’d be shocked!
- Make these gluten free by choosing a crispy rice cereal labeled Gluten Free (and check your marshmallow labels too just in case).
- Can you freeze rice krispie treats? YES! I slide them on a parchment paper lined sheet into a ziploc freezer bag. Thaw on counter until soft again!
Video
Nutrition
Original Rice Krispie Treats recipe with all the tips and tricks for making them thick and chewy!

Can I use large marshmallows instead? How much would I use?
Hello!! So excited to make these tomorrow! I only have an 8×8 pan or a 9×13. Would you recommend it still being okay to use the 8×8? Or is it better I use the 9×13 in this case? Thanks!
They’ll be thicker in the 8-inch pan, if you like that, you can cut into smaller squares. You could use a 13×9 for thinner treats. You decide.
Can I add chocolate chips without melting them?
The mixture will be warm, so there is a good chance the chips will get melted when you fold them in.
Hey, this recipe is fantastic, but my treats came out almost stale? Just the cereal seemed stale, but it wasn’t. It was a brand new sealed box that I ended up eating a bowl from while these were setting. The bowl was perfectly fresh, but it’s like somewhere during the treat-i-fication process, the rice crispies were made insta-stale. Does anyone have any personal experience or insight as to what I did wrong? Thanks!
Were your marshmallows stale?
Really yummy! Tastes even better if you use OliveNation vanilla bean paste because it tastes more like vanilla rather than having the alcoholic flavor of regular vanilla extract! Highly recommend!
Have you tried a little bit of jello like recommended? So good
I didnt have vanilla extract but i added melted peanut butter instead and it was phenomenal!
This is the BEST rice crispie recipe ever! My whole family loves them and can’t stop eating them. I cannot go back to eating crispies made from the box recipe again! I use my butter wrapper with a little butter on it to push my crispies down into the pan. That way you can control how firm to press
Can I use large marshmallows instead? How much would I use?
My rice crispy treats always have a good flavor but never seem to fully set up/ hold together. Any thoughts?
16 oz is 2 cups. You said 8-9 cups. I’m a little confused how much marshmallows do I need?
If you measure a 16 ounce bag of marshmallows in a measuring cup, you’ll get 8-9 cups of marshmallows. A bag of marshmallows is sold by weight, not volume.
No, 16 fl oz (volume) is 2 cups. 16 oz (weight) of solid material can be different volumes based on its density.
What I do is put them in cupcake papers and put melted chocolate on the bottom of it (let it harden first).Then put the Krispy treats on top!
I love this!!! Do you use standard muffin tin? Also, does the paper come right off easily?
I would not use paper.
My marshmallows settle to the bottom of the pan. What am I doing wrong?
Have you melted them completely? Or are you referring to the cup of mini marshmallows?
Too bad for you, more for me
I want to make this gluten free and dairy free. I’ve bought the Millville brand gluten-free cereal from Aldi. What dairy free butter would you suggest? I usually use Earth Balance but I don’t know if you would consider that margarine and you said do not use margarine. Also, how many bags of mini marshmallows do I need to make 9 cups? I might’ve missed it but I don’t see that. I want to make sure I buy enough bags. The bags are 10 ounces.
To get mine flat without pressing too hard I lined two pans with parchment, gently spread into the first pan and then flipped it over into the second pan to set so that both sides will be flat and even
Just made these quick and easy! Vanilla extract was god-tier Aimee! Excellent recipe. I will be using your recipes in the future! Great 👍 wonderful 💥 beautiful 🤩! See ya and thanks!
Browned butter rice krispie treats are amazing
I have celiac so the recipes are not g/f
Make these gluten free by choosing a crispy rice cereal labeled Gluten Free (and check your marshmallow labels too just in case). Last bullet point.
It is a nice recipe. Thanks!
I doubled the recipe using both big and small marshmallows that I had on hand. After spreading in the pan, I added some sprinkles for fun! My family is drooling. Waiting for me to cut into these! Smells amazing!
If I don’t want unmelted mini marshmallows at the end, should I add in the cup of marshmallows to be melted or should I not add the last cup in at all? Will melting that cup of marshmallow screw up the proportion???
You can melt them!
Thanks for this..a tip for people who don’t have clips, just scrunch the parchment into a ball and then place in your pan….cheers
Thank you so much for recipe and the tips! I had just large marshmallows, too, so I just cut them into smaller pieces so they would melt evenly. No problem! To really keep your fingers clean, you can also press gently down on the mixture with parchment paper!