
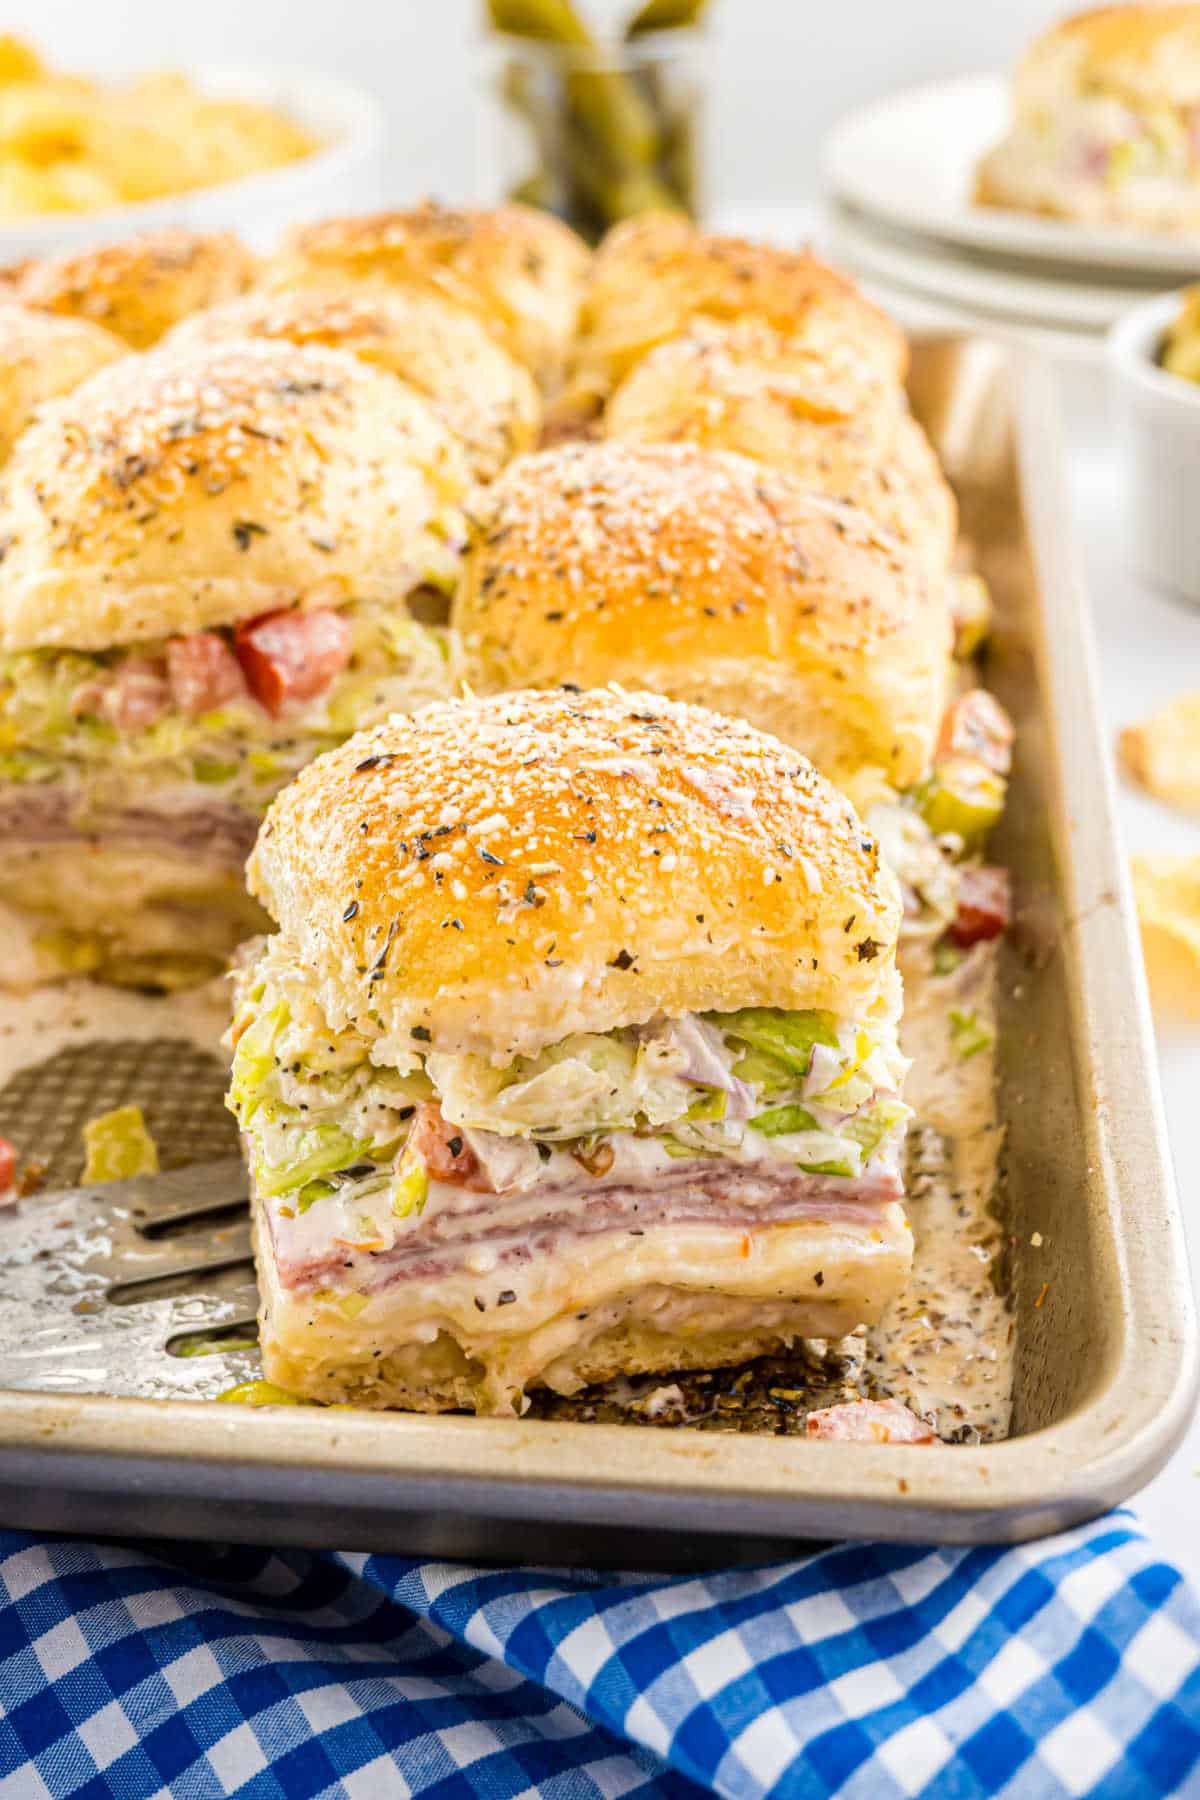
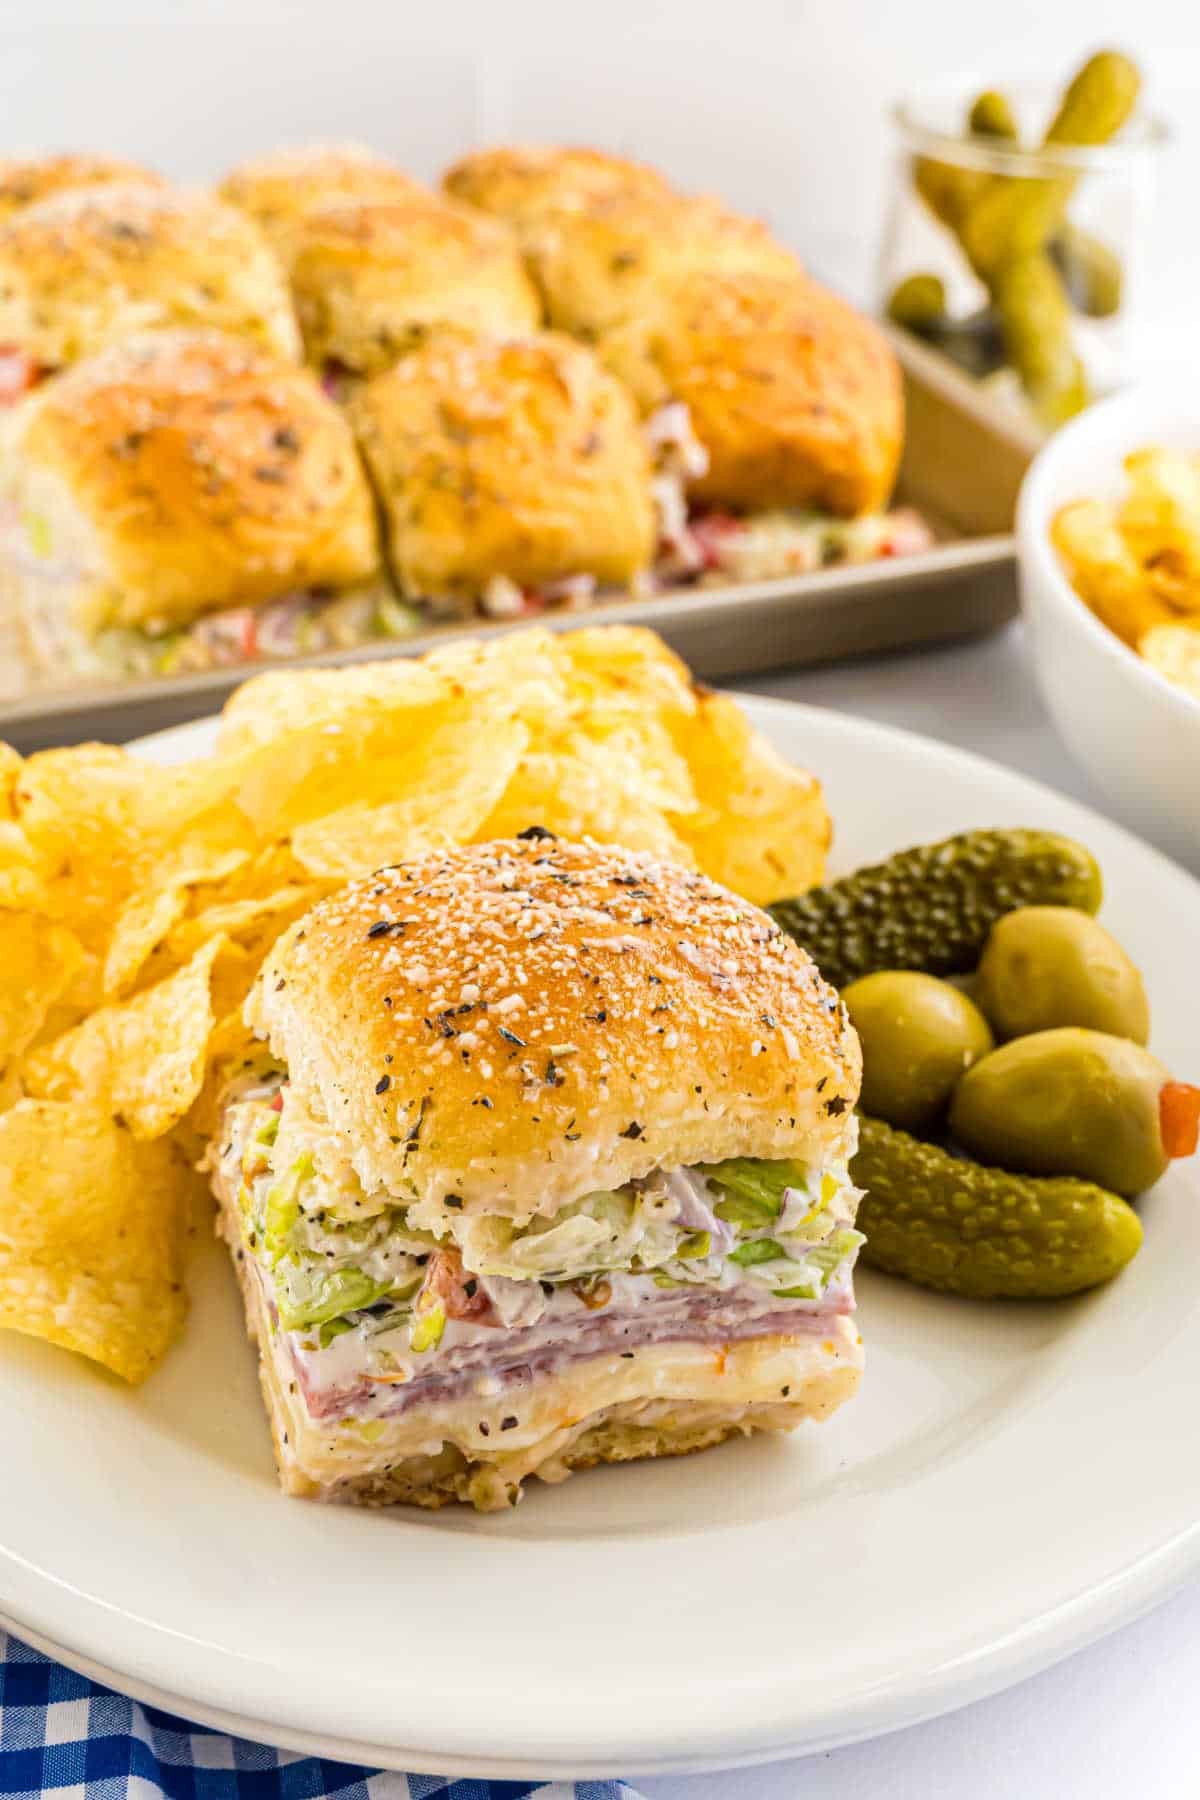
Italian Grinder Sliders make parties and game day get-togethers a whole lot tastier! With turkey, salami, and ham, along with plenty of cheese and zippy Italian grinder salad, these are easy and delicious.
Not only are these sliders packed with the same mouthwatering ingredients as a traditional Italian grinder, they’re in a more convenient size too.
Aimee’s Recipe Notes
- Taste & Texture – Savory, cheesy meat sliders with creamy, tangy grinder salad for extra crunch and flavor.
- Ingredient Swaps – Use prosciutto instead of salami, or swap Muenster cheese for Swiss or mozzarella.
- Storage – Store leftovers in an airtight container in the fridge; reheat in the oven, air fryer, or microwave.
- Top Tip – Prepare the grinder salad ahead of time to allow flavors to mingle, but it’s fine to use immediately if needed.
Here’s What You Need
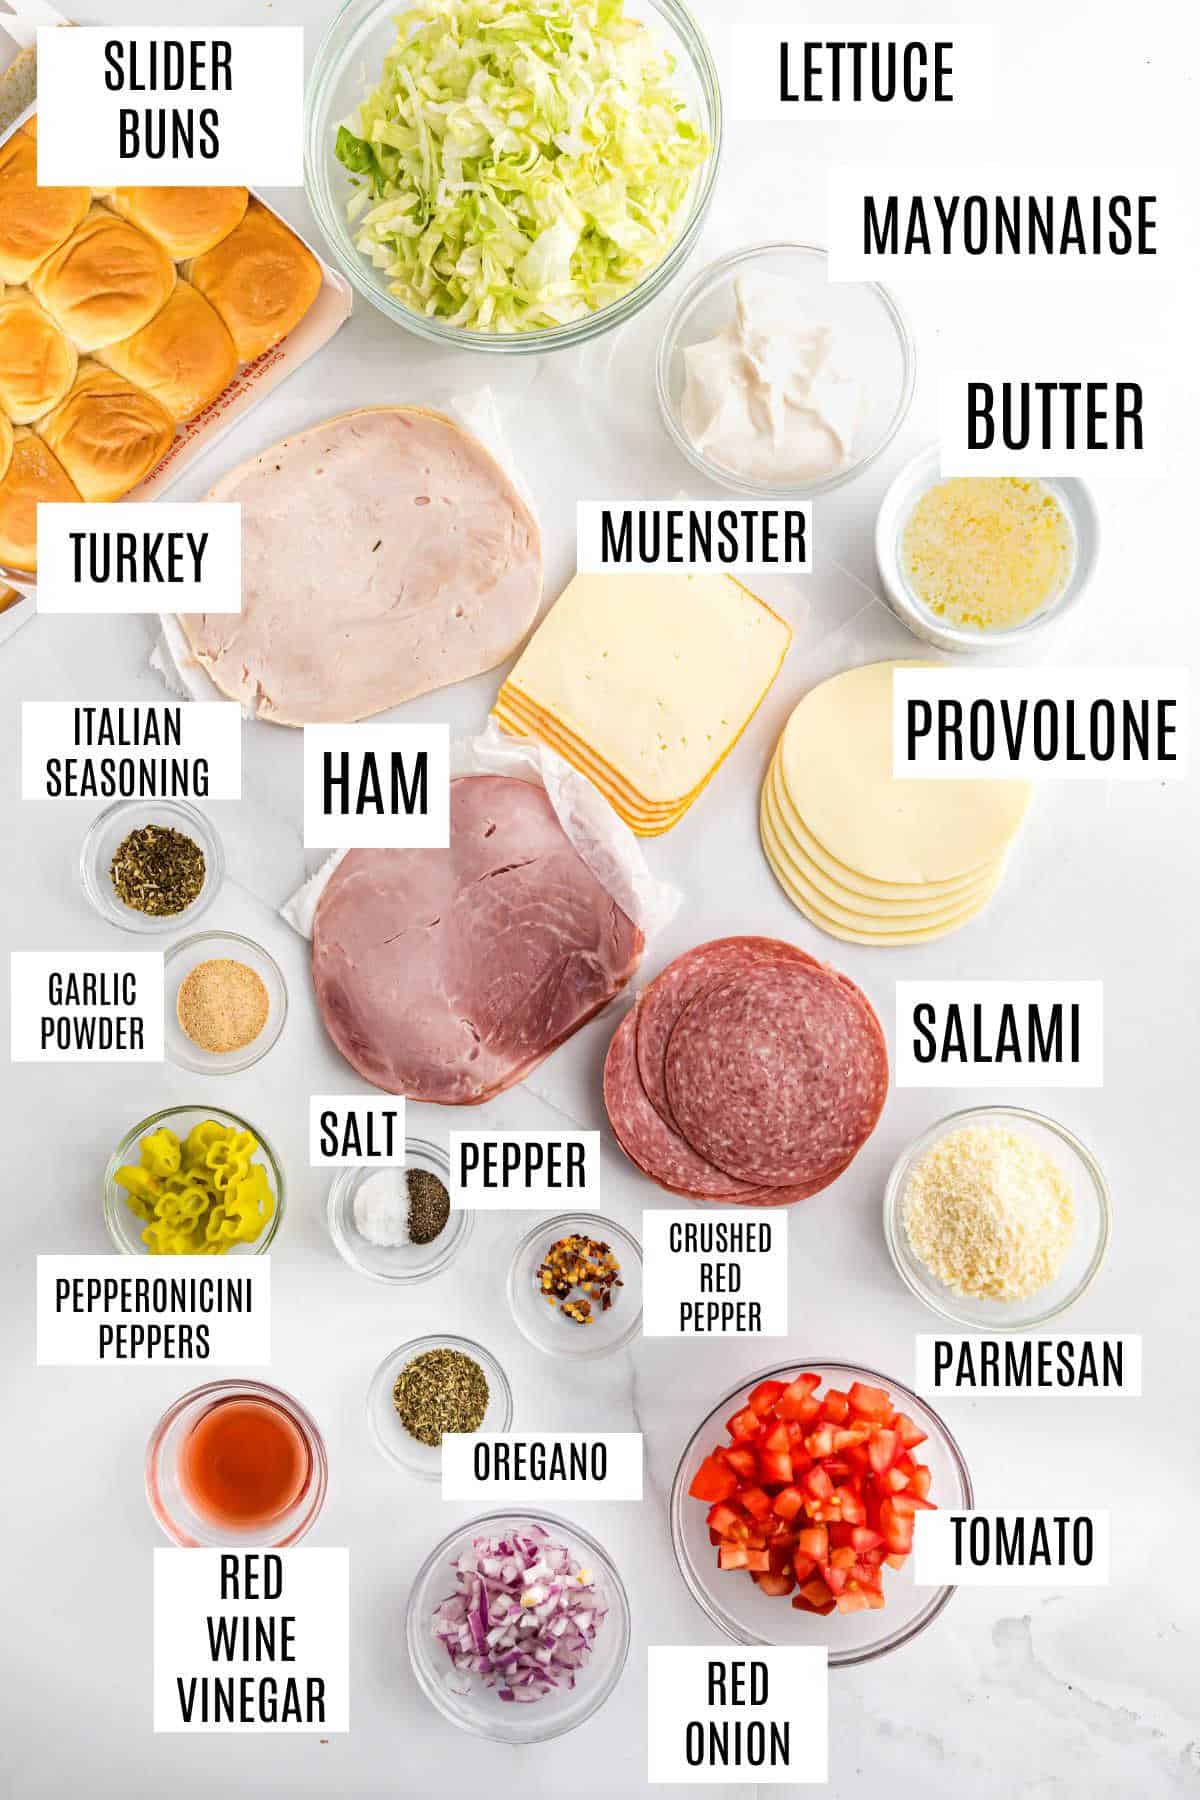
The full ingredient list is in the recipe card at the bottom of the post, but here are some highlights.
- Mayonnaise – This adds creaminess and helps hold everything together. My family grew up on Hellman’s, but Duke is great too!
- Red wine vinegar – For a that signature tangy flavor.
- Crushed red pepper flakes – Adjust the amount to your tastes or omit for a milder option.
- Grated parmesan cheese – I love the nutty, rich flavor this adds to the grinder salad!
- Fresh veggies – Shredded iceberg lettuce, tomato, and red onion add crispness and freshness.
- Pepperoncini peppers – Brings a zesty, slightly spicy kick. I love saving the liquid from the jar to add to salad dressing or drizzle on sandwiches!
- Hawaiian slider buns – Soft and slightly sweet, Hawaiian slider buns are always worth getting excited about. (I use them in these French Dip Sliders too.)
- Deli meat – Sliced turkey, ham, and salami.
- Cheese – I like to use provolone and muenster cheese.
How to Make Italian Grinder Sliders
Prep the Salad – Whisk together mayo, vinegar, seasonings, and parmesan. Toss with lettuce, tomato, onion, and pepperoncini. Chill until ready to use.
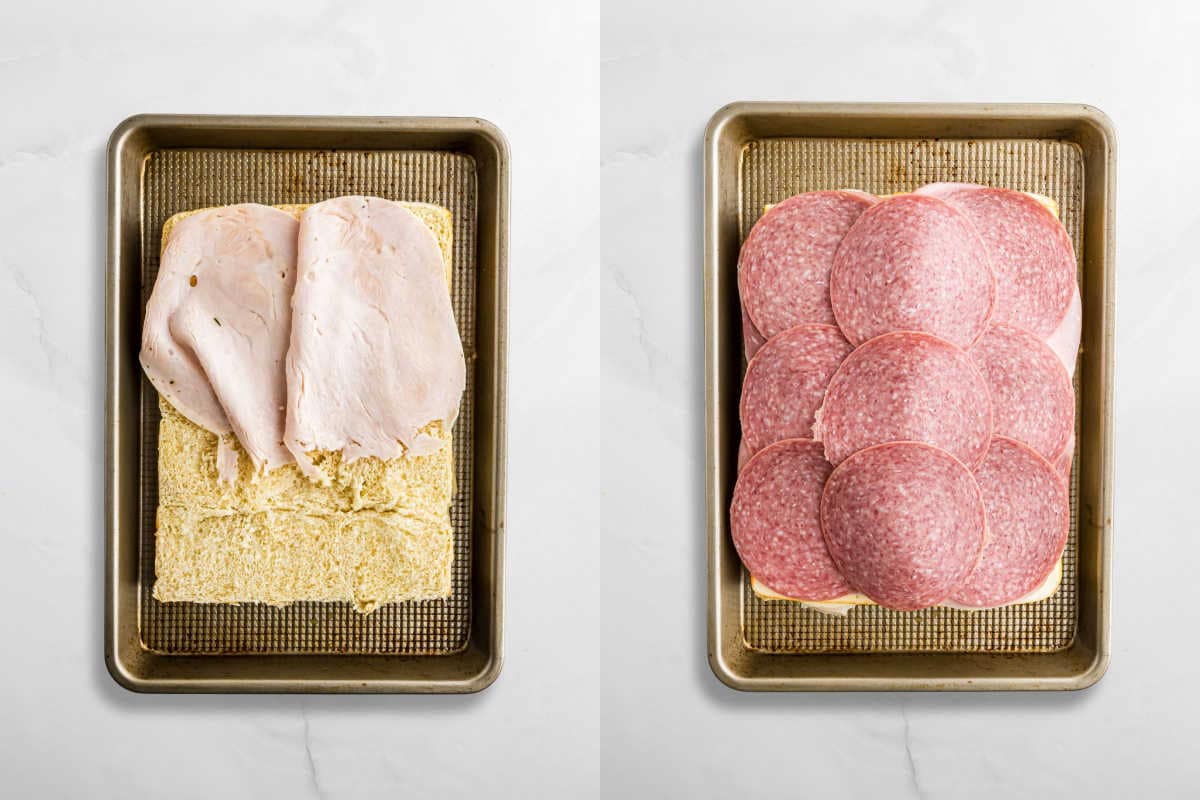
Assemble the Sliders – Slice the Hawaiian rolls in half horizontally without separating them. Layer turkey, cheese slices, ham, and salami over the bottom buns.
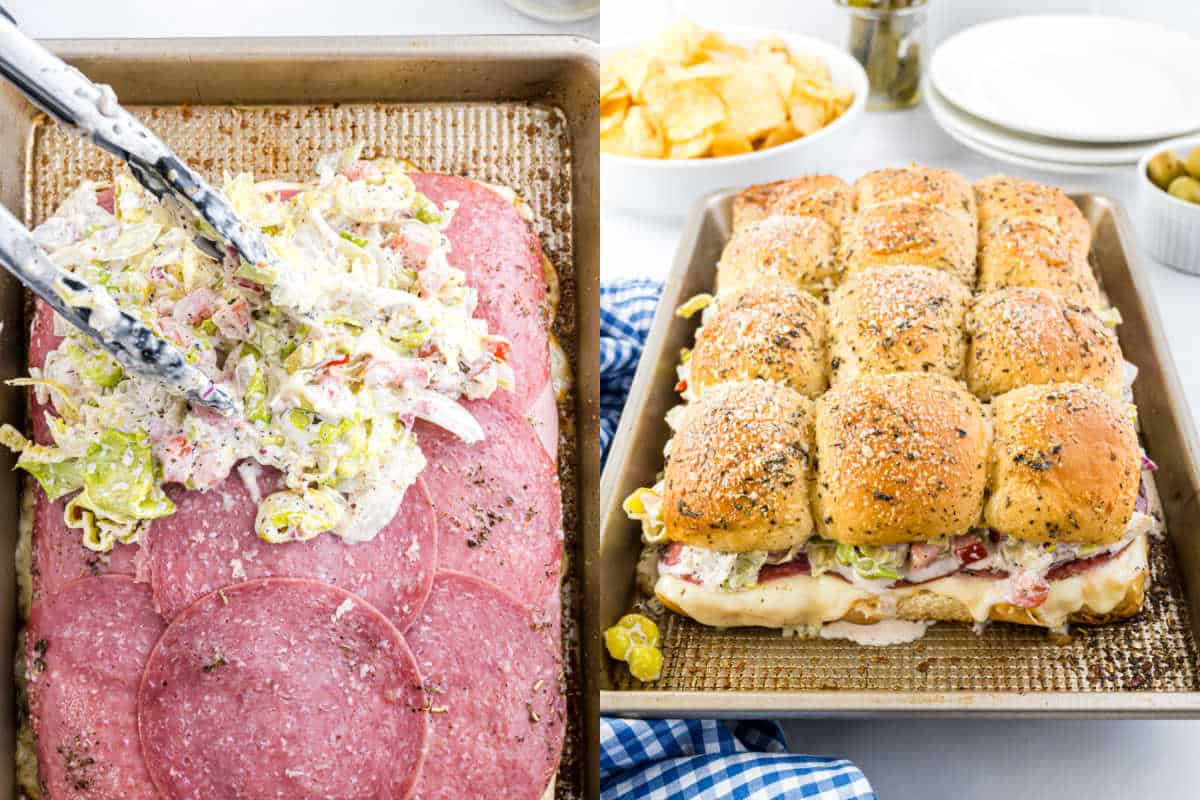
Add Topping & Bake – Brush melted butter mixed with Italian seasoning over the buns, sprinkle with parmesan, and bake covered at 350°F for 15-20 minutes until cheese is melted.
Add Salad & Serve – Remove top buns, spoon grinder salad over hot sliders, replace buns, slice, and serve warm.
Tips and Tricks
- You can switch up the meats and cheeses in this recipe according to your preferences. For example, sometimes I make Italian grinder sliders with prosciutto instead of salami.
- You can make the grinder salad while the sliders are in the oven, but I like to make the topping beforehand that so the flavors have more time to mix and mingle.
- Store leftovers in airtight container in the refrigerator for a day or two; they’ll be best after a day, but still fine to eat after two days. You can enjoy them warm or cold.
Serving Suggestions
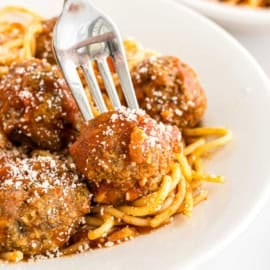
- For parties or get-togethers, they pair well with other finger foods like Grape Jelly Meatballs, or also party dips like Buffalo Chicken Dip. Serving them alongside other types of sliders is fun too! Try my Instant Pot Meatball Sliders.
- For another crowd-pleasing slider idea, try my Turkey Cheddar Sliders. Or make it meatless with these BBQ Jackfruit Sliders!
- If you’re making these Italian grinder sliders for a weeknight dinner, you can serve them with a side of Sweet Potato Fries or Baked French Fries with Blue Cheese Dressing for a complete meal.
Pin this now to find it later
Pin It
Italian Grinder Sliders Recipe
Ingredients
For the grinder salad
- ½ cup mayonnaise
- 1 Tablespoon red wine vinegar
- 1 teaspoon garlic powder
- ½ teaspoon coarse kosher salt
- ½ teaspoon black pepper
- 1 teaspoon dried oregano
- ¼ teaspoon crushed red pepper flakes
- ¼ cup grated parmesan cheese
- 3 cups shredded iceburg lettuce
- 1 large tomato, diced
- ½ small red onion, diced
- ¼ cup sliced pepperoncini peppers, drained
For the sliders
- 12 Hawaiian slider buns
- 4 ounce deli sliced turkey
- 4 ounce slices provolone cheese
- 4 ounce slices muenster cheese
- 4 ounce deli sliced ham
- 4 ounce deli sliced salami
For the topping
- 4 Tablespoons unsalted butter, melted
- ½ teaspoon Italian seasoning
- 1 ½ Tablespoons grated parmesan cheese
Instructions
For the Grinder salad topping
- In a medium mixing bowl, whisk together the mayonnaise, red wine vinegar, garlic powder, salt, pepper, oregano, and parmesan cheese.
- Toss with lettuce, tomato, red onion, and pepperoncini peppers until fully combined. Cover and refrigerate while you make and bake the slider buns.
For the Sliders
- Preheat the oven to 350 degrees F. Spray a cookie sheet or 13×9 baking dish with non-stick cooking spray or light it with foil.
- Place the 12-pack of Hawaiian rolls on the pan (do not break them apart, keep them connected). Using a large serrated bread knife, slice the top of the buns off at the midpoint. Set the top buns aside.
- Layer the turkey on top of the bottom bun. Then layer the provolone cheese, muenster cheese, ham, and salami. Place the top bun on top of the salami.
- In a small bowl, whisk together the topping of melted butter and Italian seasoning. Using a silicone pastry brush, brush over the top of the buns. Sprinkle with grated parmesan cheese. Lightly cover sliders with foil.
- Bake sliders for 15-20 minutes, covered, until buns are lightly browned and cheese is melted.
Assemble sliders.
- Remove sliders from the oven and carefully remove the top of the slider buns (they will be hot so use a large spatula and oven mitts. Set the top bun aside.
- Spoon the grinder salad over the hot salami and place the slider bun top back in place. Slice sliders into individual squares and serve warm.
Notes
- The crushed red pepper flakes with the pepperoncini give these sliders a touch of heat. Adjust more/less for your own preference.
- Swap out some of the salami and use prosciutto if desired.
- If short on time, make the grinder salad while the buns are baking. I prefer to make it before baking to give the salad a little extra time to allow the flavors to mingle. But it will still taste great if used immediately.
- Store leftover sliders in airtight container in the refrigerator. Eat cold or warm up in airfryer, oven, or microwave.
Nutrition
More Slider Recipes
- These Pulled Pork Sliders are loaded with sweet, tangy pulled pork. They’re perfect for game day!
- I think White Castle Sliders might just be the original slider recipe! If you don’t live near a White Castle, making them at home is a must-try.
- You can also keep it simple with this easy recipe for Ham and Cheese Sliders.
- Avoid the mess of wings and make a batch of Buffalo Chicken Sliders instead!


I had this at a bridal shower, but it was served cold with the slider buns and it was amazing.
I have never left a review on any recipe, but had to with these Italian grinders. These are simply delicious, and so easy to make. The dressing HAS to be used in this recipe, as it makes the whole sandwich. I will make these often, and they will be great for camping. Love all your recipes Aimee, but just had to talk about this one!
Aw thank you Sandy! So glad you love this one 🙂