
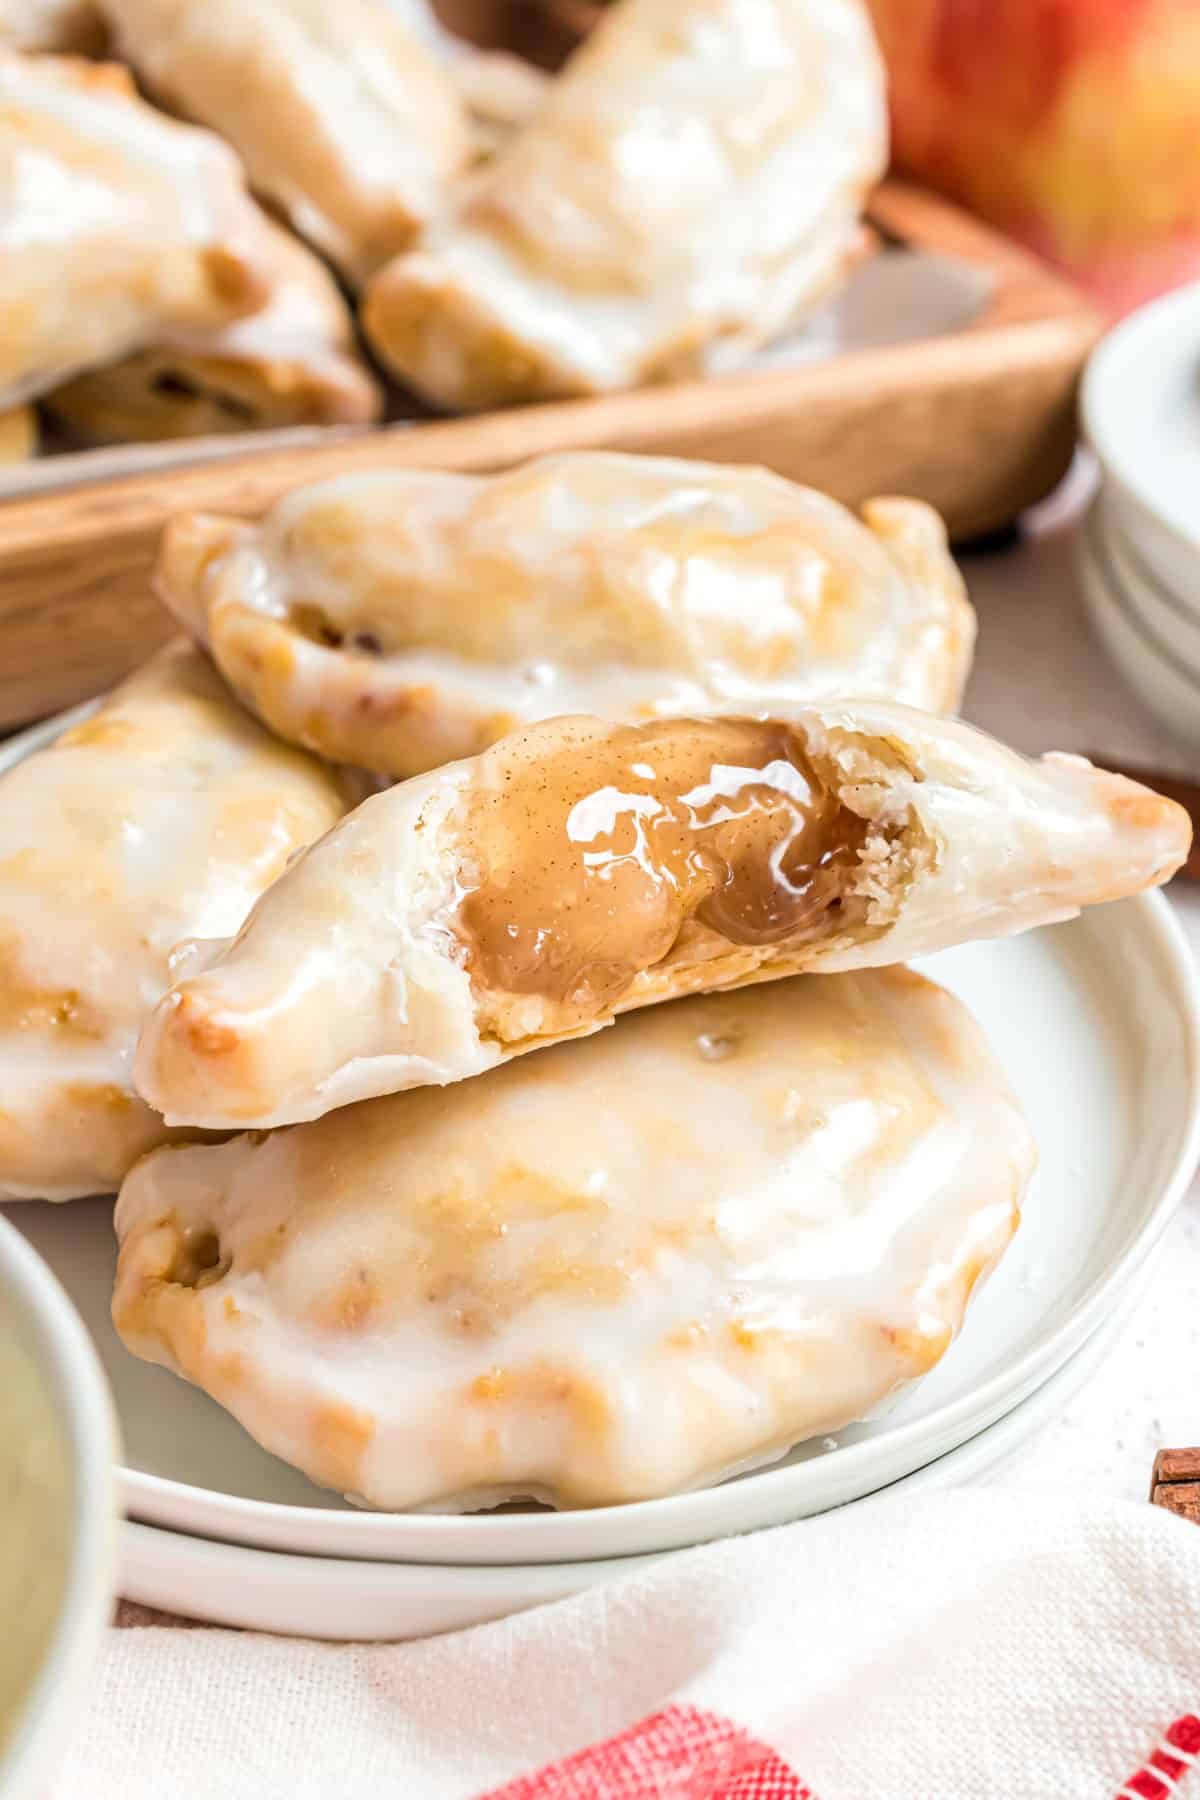
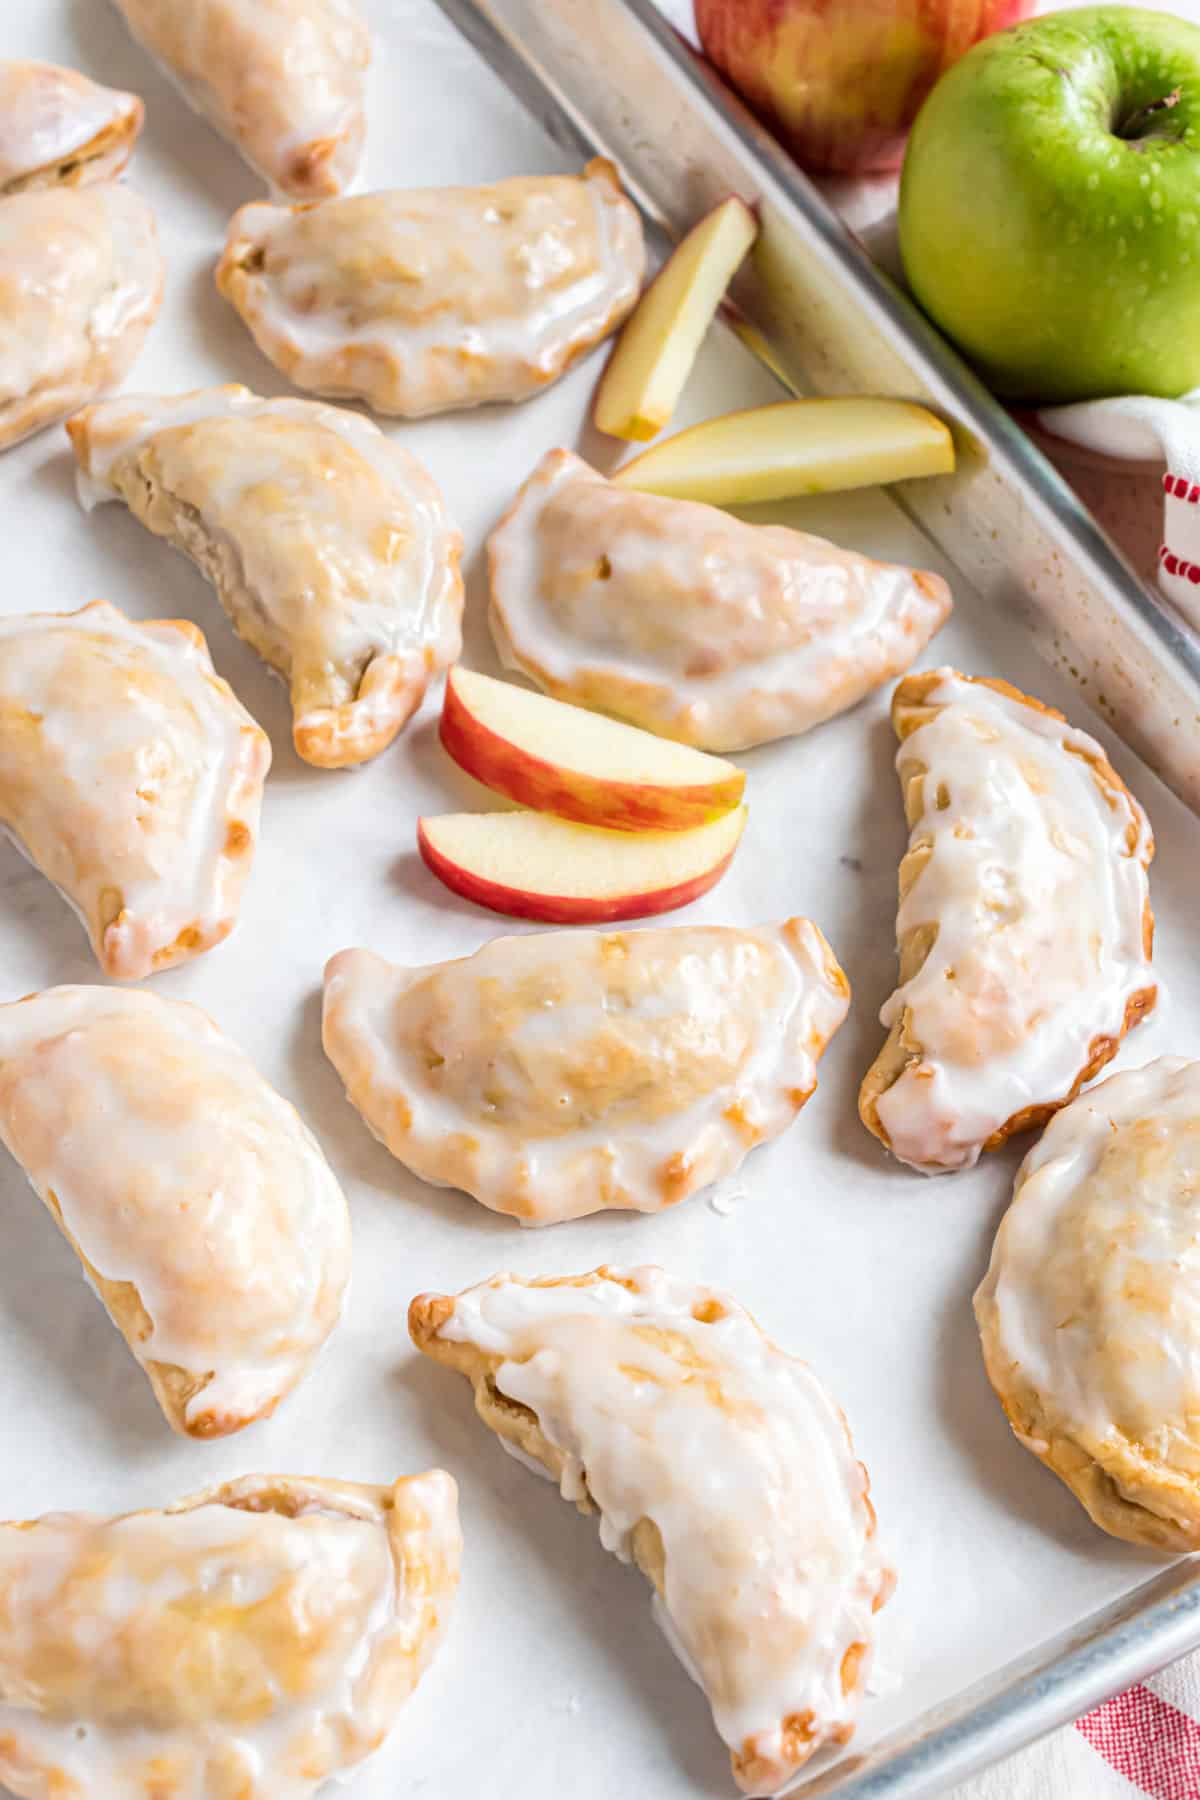
These glazed Apple Hand Pies are the perfect fall treat. And in about 30 minutes, you’ll have one of these delicious baked treats in your hands!
One of my favorite fall activities is going to the pumpkin patch and the apple orchard. There is something about this that screams “welcome fall” to me!
And by “something” I totally mean the food.
From hot pumpkin chili in a bread bowl to apple cider donuts, I love the food at these places. Unfortunately, we don’t go more than once or twice a season, so I’ve got to make these treats at home instead.
Having to recreate my favorite desserts at home (like this Apple Crumble Recipe) is rough. I mean, the taste testing, the trial and error. Kidding. The perks of my job are pretty amazing.
I decided instead of baking my Apple Pie recipe, why not make something a little bit smaller- and portable!
And these Apple Hand Pies are the perfect seasonal treat and so delicious. I could eat this entire batch by myself!
- Simple ingredients and just 20 minutes to prep!
- Refrigerated pie crust creates perfect flaky crust and is hassle free!
- The glaze coats the entire pie for a sweet finish.
Love easy apple desserts? Try our mini apple pies for another on-the-go treat idea! Or give our apple fritters a try next. The vanilla glaze on top is so good!
Ingredient Notes
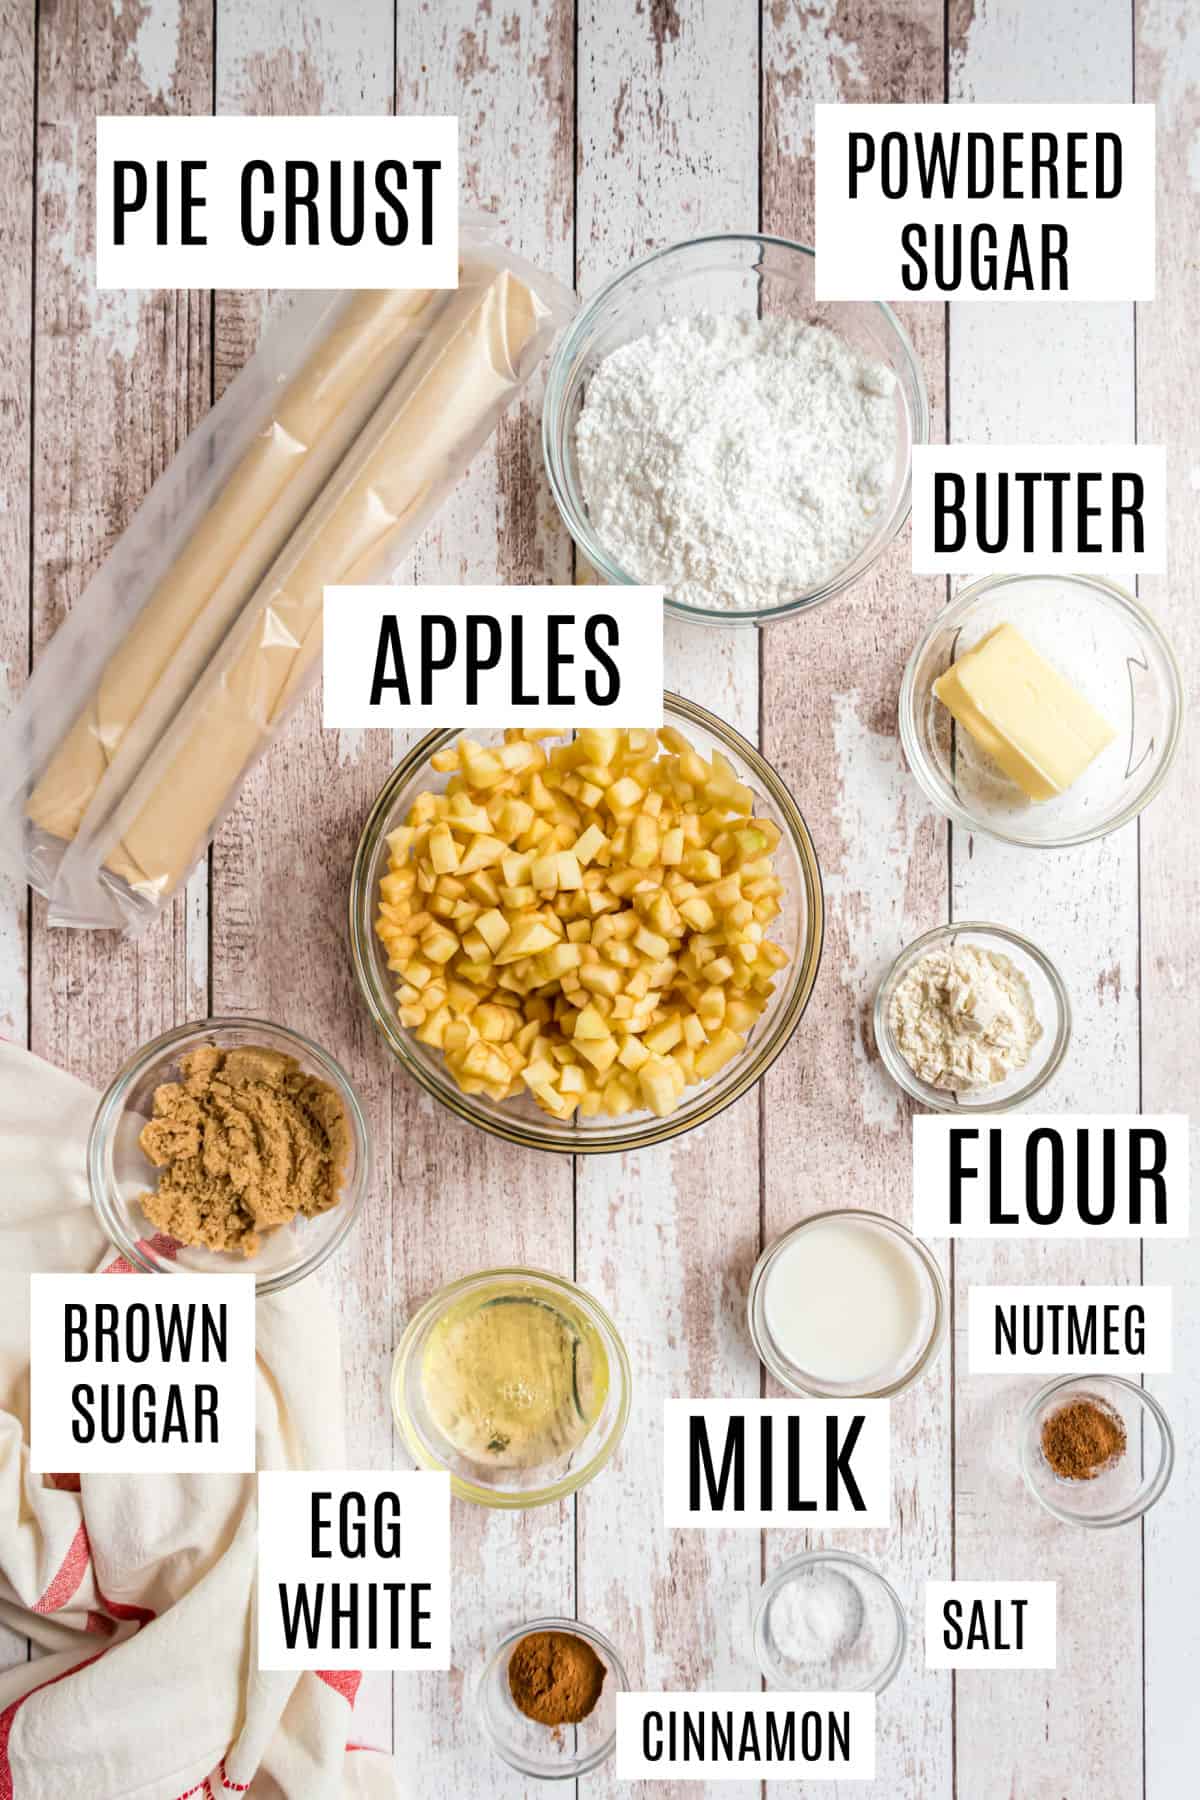
- Pie Crust – The convenience of a store-bought pie dough is hard to beat, but you can also make homemade pie crust if you prefer. You need TWO store bought pie crusts for this recipe.
- Apples – Gala, Granny Smith, Golden Delicious or Honeycrisp are my favorite apples to use for hand pies. You’ll need about two large apples.
- Brown Sugar – Light brown sugar adds the perfect amount of sweetness to the apple filling in these hand pies. Dark brown sugar is fine to use as well.
- Egg White – Don’t skip the egg wash on the the top of each hand pie! This is what makes them have a golden, glossy crust. Save the egg yolk to make a batch of homemade lemon curd.
- Use powdered sugar, also known as confectioners sugar, to make the glaze for dipping the hand pies.
How to Make Apple Hand Pies
Making my apple hand pie recipe is quite simple. Just a few easy to follow steps.
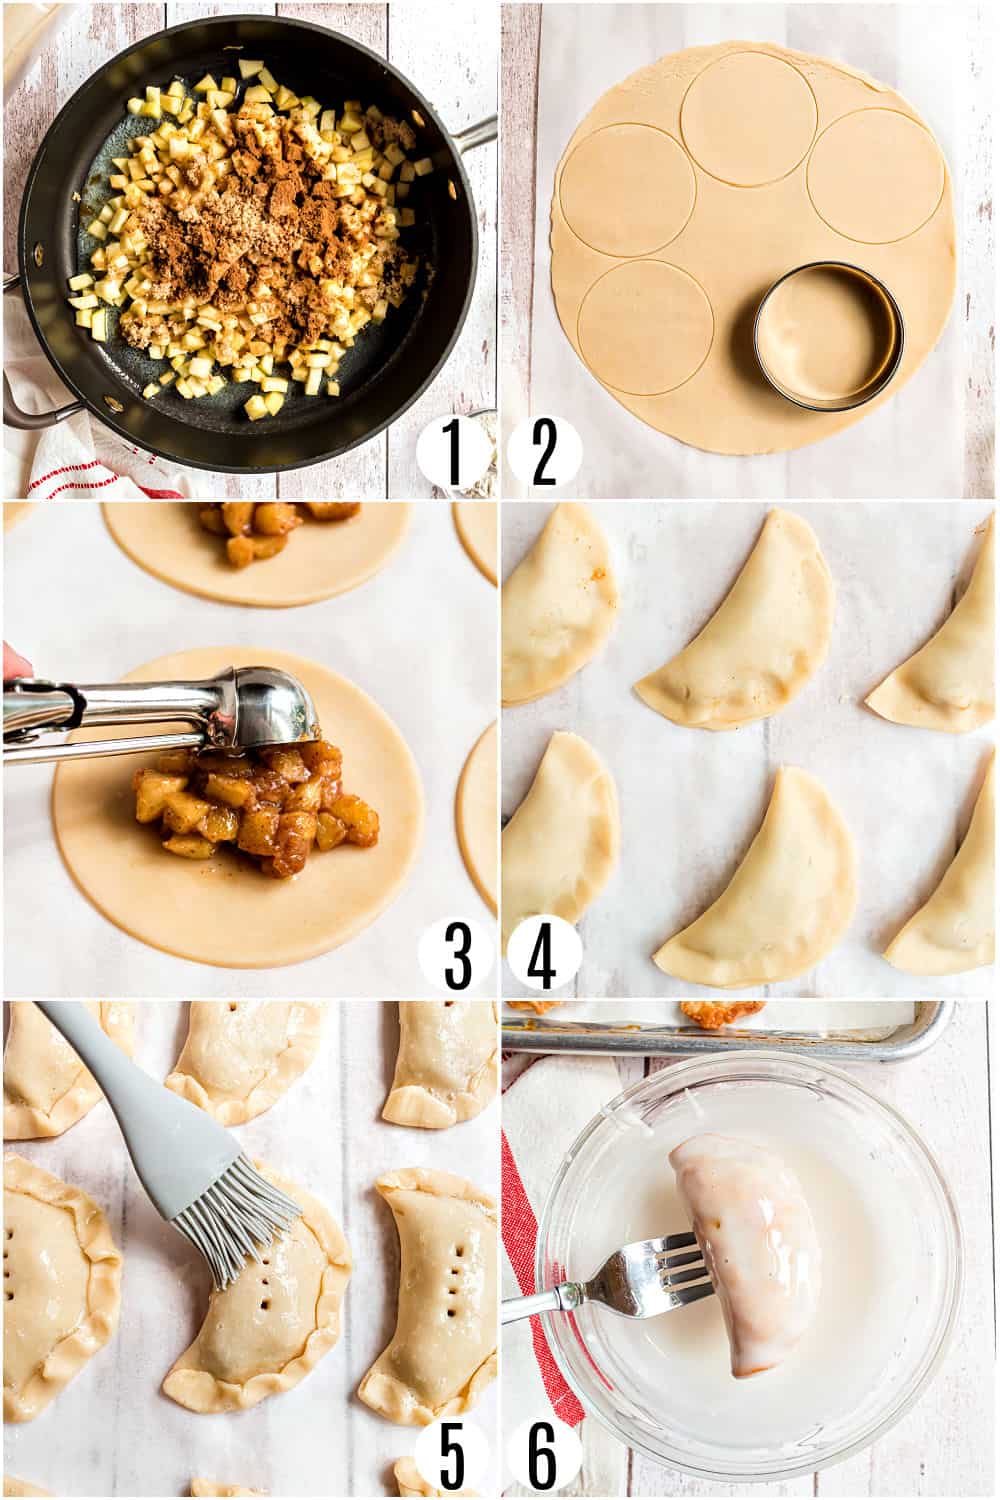
Cook the apples.
- Making the apple pie filling is easy. Peel and dice the apples and cook in butter until soft, about 5-10 minutes.
- Sprinkle in flour and heat an additional minute while the mixture thickens as you stir.
Aimee’s Pro Tip
You could also use our fried apple recipe for the filling!
Cut hand pies. Unroll the pie crusts and use a 4-inch biscuit cutter to cut 6-7 circles from each crust. You may have to roll scraps to get the extra circles.
Fill each hand pie with at least 1 Tablespoon of apple pie filling.
Seal. Fold in half and pinch edges COMPLETELY. Then fold the pinched edges over.
Egg Wash. Poke hand pie with tines of a fork to prevent bursting. Brush the tops of the pies with the egg white.
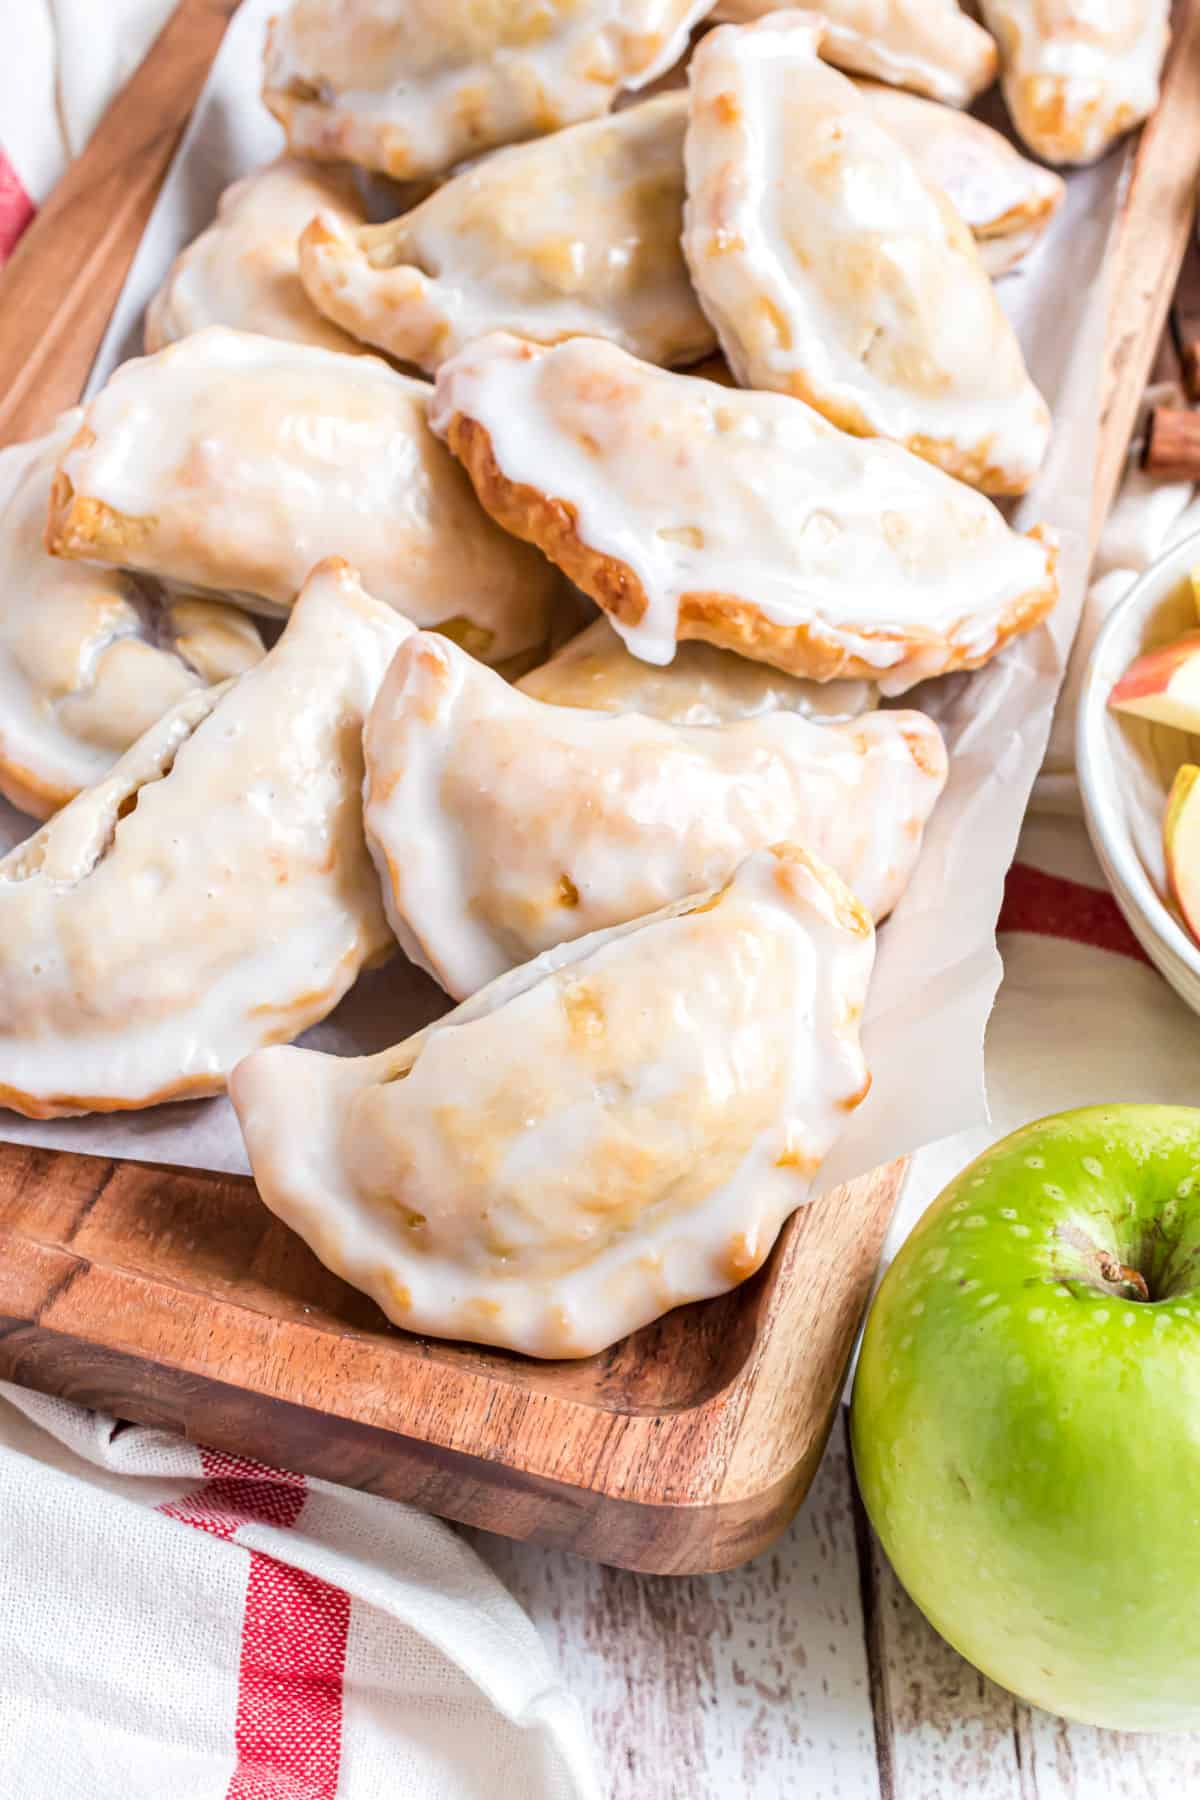
Bake and glaze.
When you finish baking the hand pies, dip each one in the glaze. Make sure to cover them completely. Let sit for 10 minutes to set up then enjoy warm or cold.
Bake the pies at 425 degrees F on a parchment paper lined baking sheet for about 15 minutes, until golden brown. Mix the powdered sugar and milk in a bowl.
Tips and Tricks
- I used a 4 inch circle biscuit cutter to get my hand pies perfect. Each pie crust gave me 5, and then I took the scraps and rolled them out to get 1-2 more. This gave me a total of 12-14 hand pies!
- To scoop an even amount of filling into each crust, I used a 1 TBSP cookie scoop to drop the perfect dollop.
- Fold the dough in half over the filling and pinch the edges tightly. Use a little water on your fingertip to help them stick together.
- I then folded the edges over and twisted a little. But you can fold them over and use fork tongs to pinch again. Before heading into the oven, make sure you prick them on top with a fork, once or twice, so they don’t explode.
- Once you’ve dipped the hand pies into the glaze, place them back onto the parchment paper and allow to set up. Takes about 10-15 minutes for the glaze to harden. Enjoy these warm or cold!
- Store leftover baked hand pies in an airtight container at room temperature. Alternatively, you can freeze the hand pies in a resealable freezer bag for up to 3 months.
Don’t forget to try these Peach Hand Pies for a twist! Or give my warm blueberry crumble recipe a try next.
More Hand Pie Recipes
- My Strawberry Hand Pies are great for Valentines day!
- Make some of these fun and sweet Berry Hand Pies, or these zesty Lemon Hand Pies are a fan favorite too!
- These Caramel Apple Empanadas are cream, tart, and delicious!
- Make some fall flavored Pumpkin Hand Pies for a sweet and smooth treat!
Pin this now to find it later
Pin It
Apple Hand Pies Recipe
Ingredients
For the hand pies:
- 1 box refrigerated pie crust (for two pies) 14.1 ounce
- ¼ cup unsalted butter
- 2 cups diced and peeled apples about 2 large apples
- ¼ teaspoon kosher salt
- ¼ teaspoon nutmeg
- ¼ cup light brown sugar packed
- 1 teaspoon cinnamon
- 2 Tablespoons flour
- 1 egg white beaten
For the glaze:
- 1 ¼ cup powdered sugar
- 2 Tablespoons milk
Instructions
- Remove pie crusts from package and allow to come to room temperature while you prepare filling. Preheat oven to 425F.
- Dice and peel apples. In a large skillet, melt butter over medium high heat. Add apples, salt, nutmeg, brown sugar and cinnamon. Heat for about 5-10 minutes, until apples are soft, stirring occasionally.
- While apples are heating, unroll pie crusts and cut 6-7 circles from each crust (using a 4 inch biscuit cutter). You may have to roll scraps to get the extra circles. Set aside.
- After apples have softened, sprinkle in flour. Heat for an additional minute, stirring thoroughly.
- Using a 1 Tbsp scoop, drop apple mixture into center of each pie crust circle. Fold in half and pinch edges COMPLETELY. Fold pinch edges over. Poke hand pie with tines of a fork to prevent bursting.
- Beat egg white in a small bowl. Brush over the tops of each pie. Bake on a parchment paper lined baking sheet for 15-20 minutes, until lightly browned.
- While pies are baking, whisk together the glaze ingredients. Remove cooked pies from baking sheet and drop in glaze, coating it completely. Return to parchment paper and allow to set, about 10 minutes. Enjoy warm or cold.
Notes
- To scoop an even amount of filling into each crust, I used a 1 TBSP cookie scoop to drop the perfect dollop.
- You’ll need to fold the dough in half around the filling and really PINCH those edges tight (use a fingertip dab of water to keep them sticking together).
- I then folded the edges over and twisted a little. But you can fold them over and use fork tongs to pinch again. Before heading into the oven, make sure you prick them on top with a fork, once or twice so they don’t explode.
- I originally had planned on frying them up, but since my kitchen was clean, I didn’t feel like having grease splatter. So I baked them. And I’m so glad I did. They still had a delicious flaky texture, without all the fat.
- See blog post for more recipe tips and tricks.
- Once they’ve baked up (making sure you used parchment paper to keep them from sticking), drop each warm hand pie into your glaze.
- Place it back onto the parchment paper and allow to set up. Takes about 10-15 minutes for the glaze to harden. Enjoy these warm or cold!


Turned out excellent .
Have you ever tried making these with a fresh fruit mixture?
Simply Awesome
Is there a substitute for the egg white? My son has an egg allergy and would love to make these for him.
I have made these with a pre-made crust or with my own recipe. I find these to be super quick if you use the pre-made crust and buy a can of pie filling. Either way you make it it is delicious!
It’s a great recipe to keep on hand for a quick treat, no matter how you make it 🙂
Is it okay to premake the apple filing the night before?
Sure! The apples may brown slightly, but that’s okay 🙂
Can you make ahead and freeze?
Thank you for this recipe, Aimee! I made these with my own dough recipe and LOVE them! I followed your recipe using everything but the dough. Perfect mix of spices!
Thanks again!
I made them round and with pre made dough. Easy to make and very tasty! First time I’d ever picked my own apples and they are beautifully sweet!
I just made these and they are excellent! These were very simple to make and absolutely loved by all! I used refrigerator dough for the first time in my life as well as my own pie crust on half of the batch and both were terrific with this. Highly recommend!
Yay! Now you have to try all my other flavors of hand pies 🙂
Can you make ahead and freeze preglaze and then reheat and glaze or would it be better to freeze before cooking and then thaw, cook, glaze?