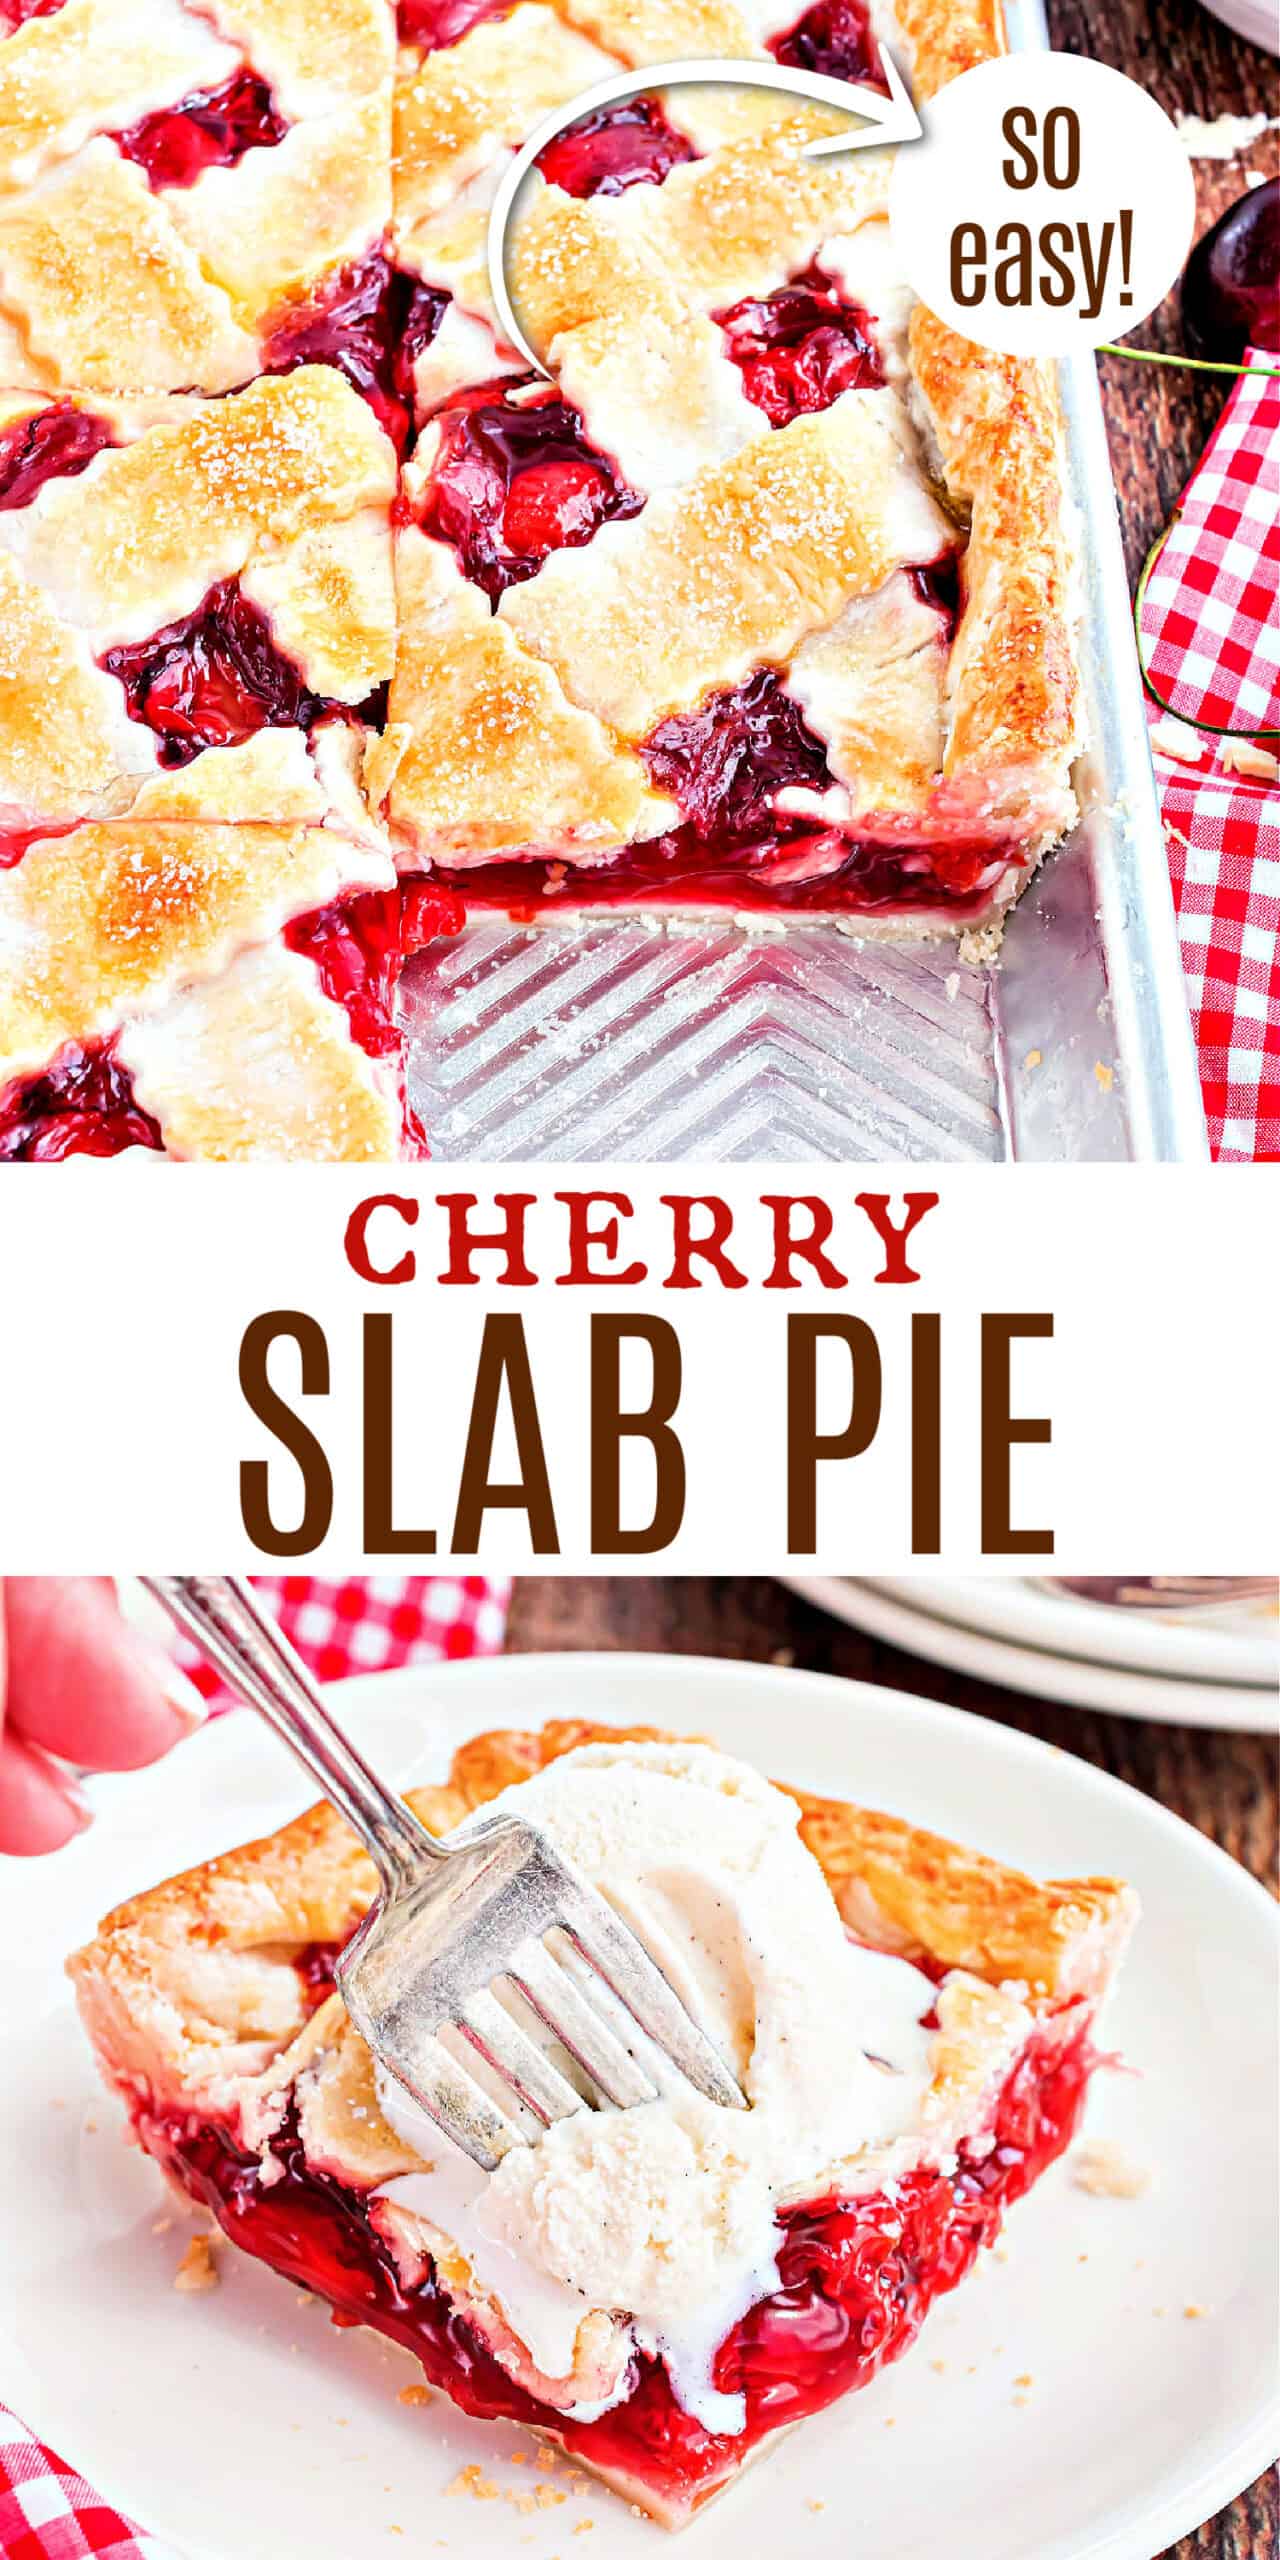
This simple Cherry Slab Pie has a lattice crust topping to create a gorgeous, easy-to-cut dessert you’ll want to show off at your next potluck!
Why Make a Cherry Slab Pie
This easy pie recipe bakes all the flavor of our favorite cherry pie in half the time.
- Pre-made pie crusts save you a ton of time and effort.
- Canned cherry pie filling is ready-made, delicious, and foolproof.
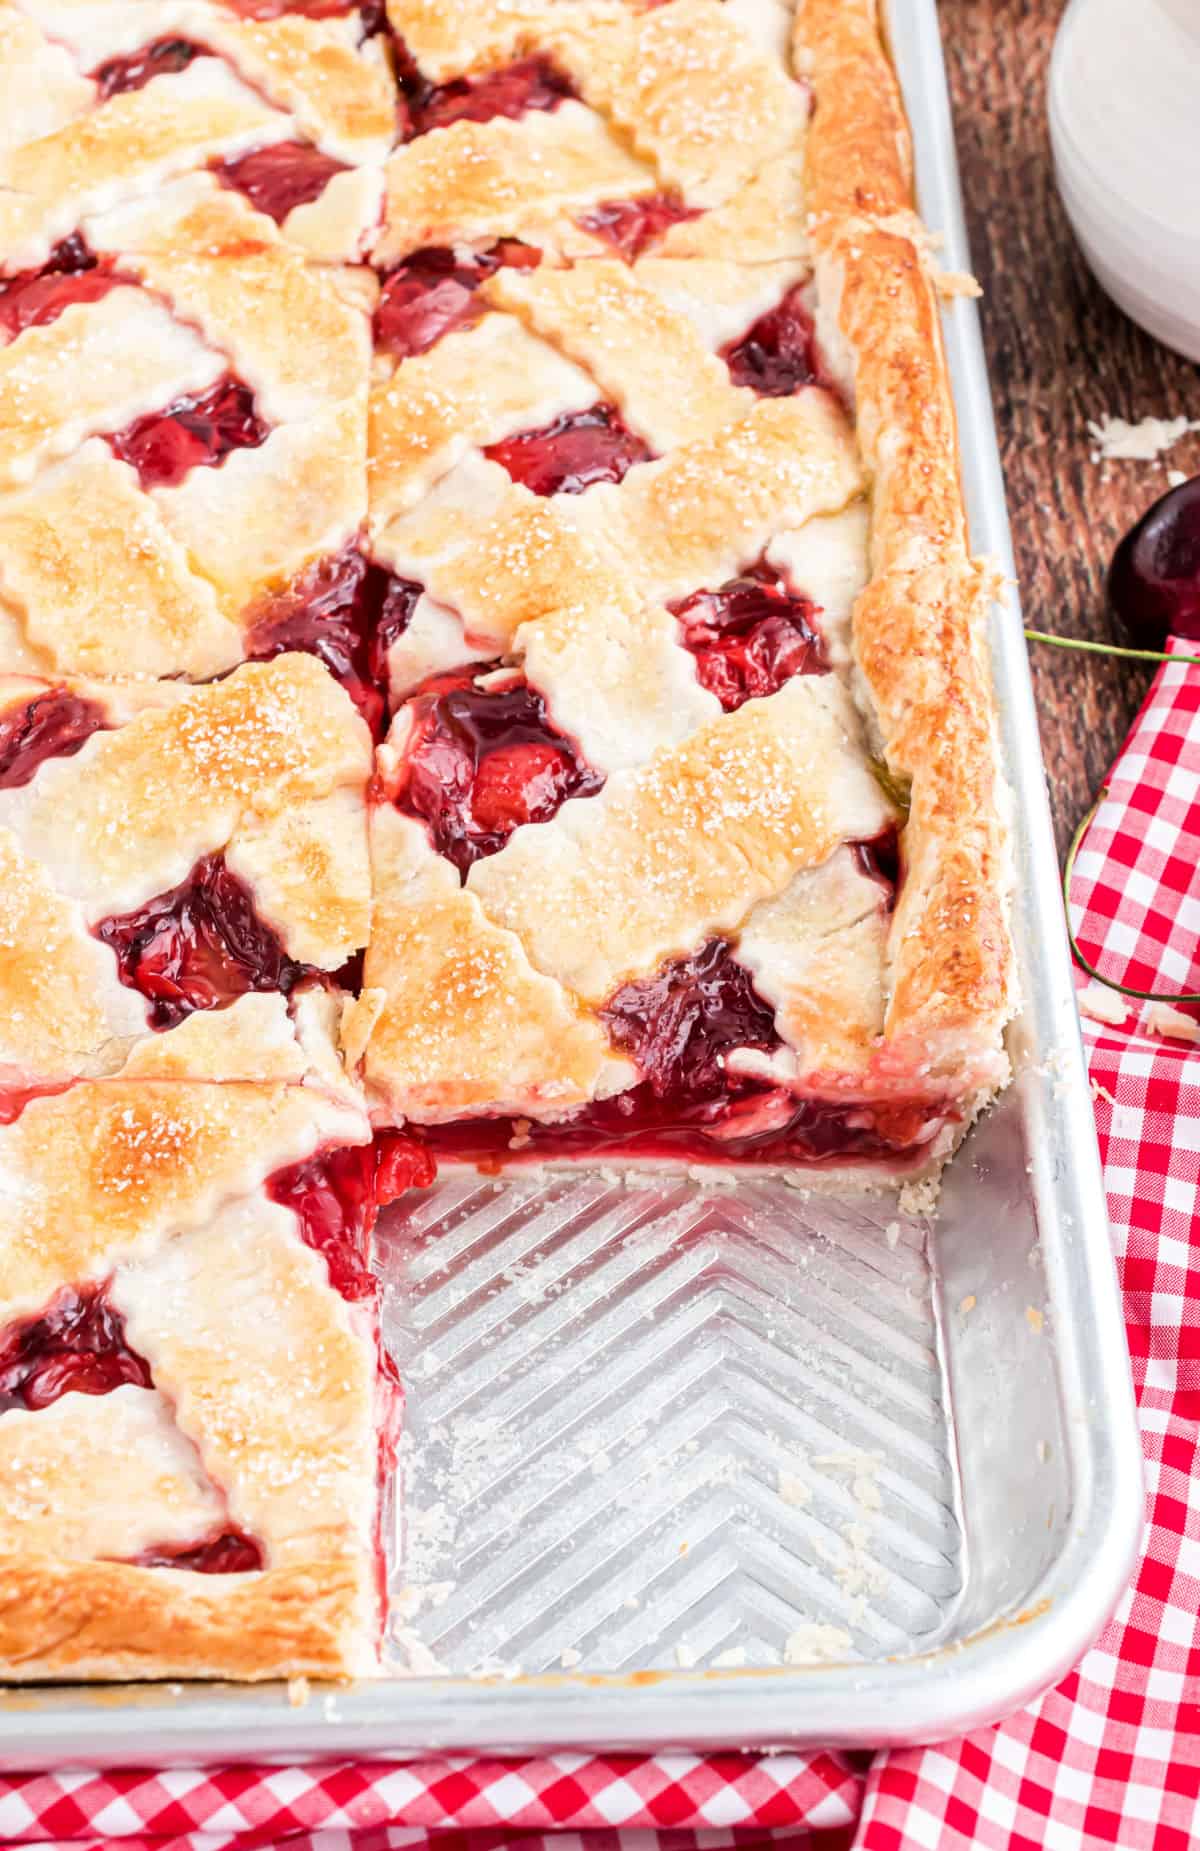
- A woven lattice crust adds visual appeal to the finished pie.
- Almond extract lends a touch of amaretto flavor.
- It can be frozen after baking which means you’ll have pie on standby!
Cherry slab pie is easier to slice and serve than traditional round pies, so it’s perfect for parties, picnics, and other big gatherings.
Much like my fun cherry hand pies, today’s recipe is even easier!
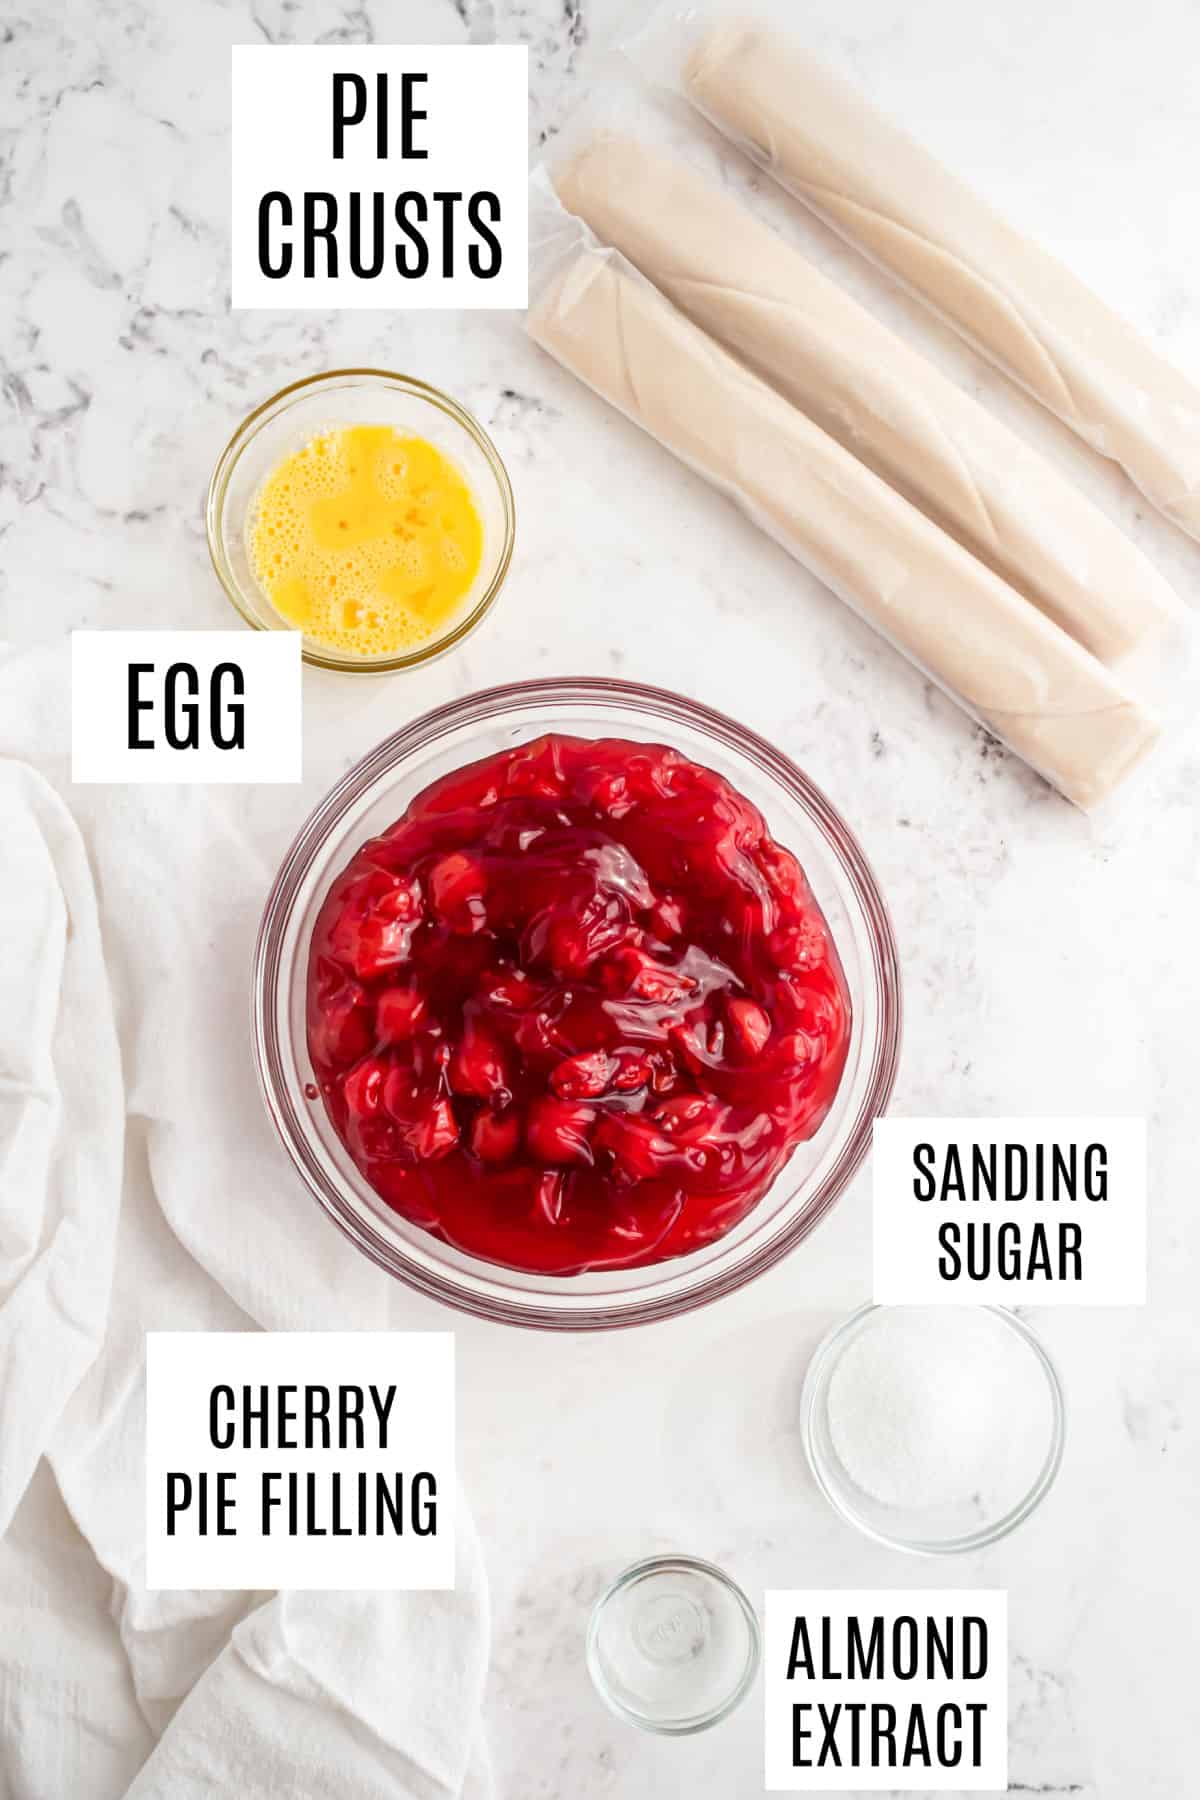
Just 5 Ingredients
Making pie for a crowd doesn’t mean you have to spend a fortune on specialty ingredients.
- Cherry Pie Filling – Ready-made pie filling is a breeze to use. Depending on your preference, you can use sweet or tart cherry pie filling. Or mix the two for the best of both worlds.
- Almond Extract – This extract is optional, but it adds wonderful flavor. Feel free to omit it completely or substitute with vanilla extract if you prefer to avoid nuts.
- Refrigerated, Thawed Pie Crusts – Most frozen pie crusts come with two in a package. You’ll need 3 pie crusts for this recipe. Homemade pie crust can also be used.
- Egg – Brushing your crusts with egg wash before baking guarantees a perfect golden-brown hue with a touch of shine.
- Coarse Sanding Sugar – Sparkly sugar adds a finishing touch of crunch and sweetness to the slab pie.
How to Make Cherry Slab Pie
- Thaw the crusts: First, you’ll need to thaw your pie crusts ahead of time and have them ready in the refrigerator. Check your crust’s packaging for the best instructions on how to thaw them properly.
Pro Tip: Keep your crusts sealed until you are ready to use them. This will prevent them from drying out!
- Prepare the filling: Combine your cherry pie filling with the almond extract, so it’s ready to go. (lemon or lime zest would be a delicious addition too)
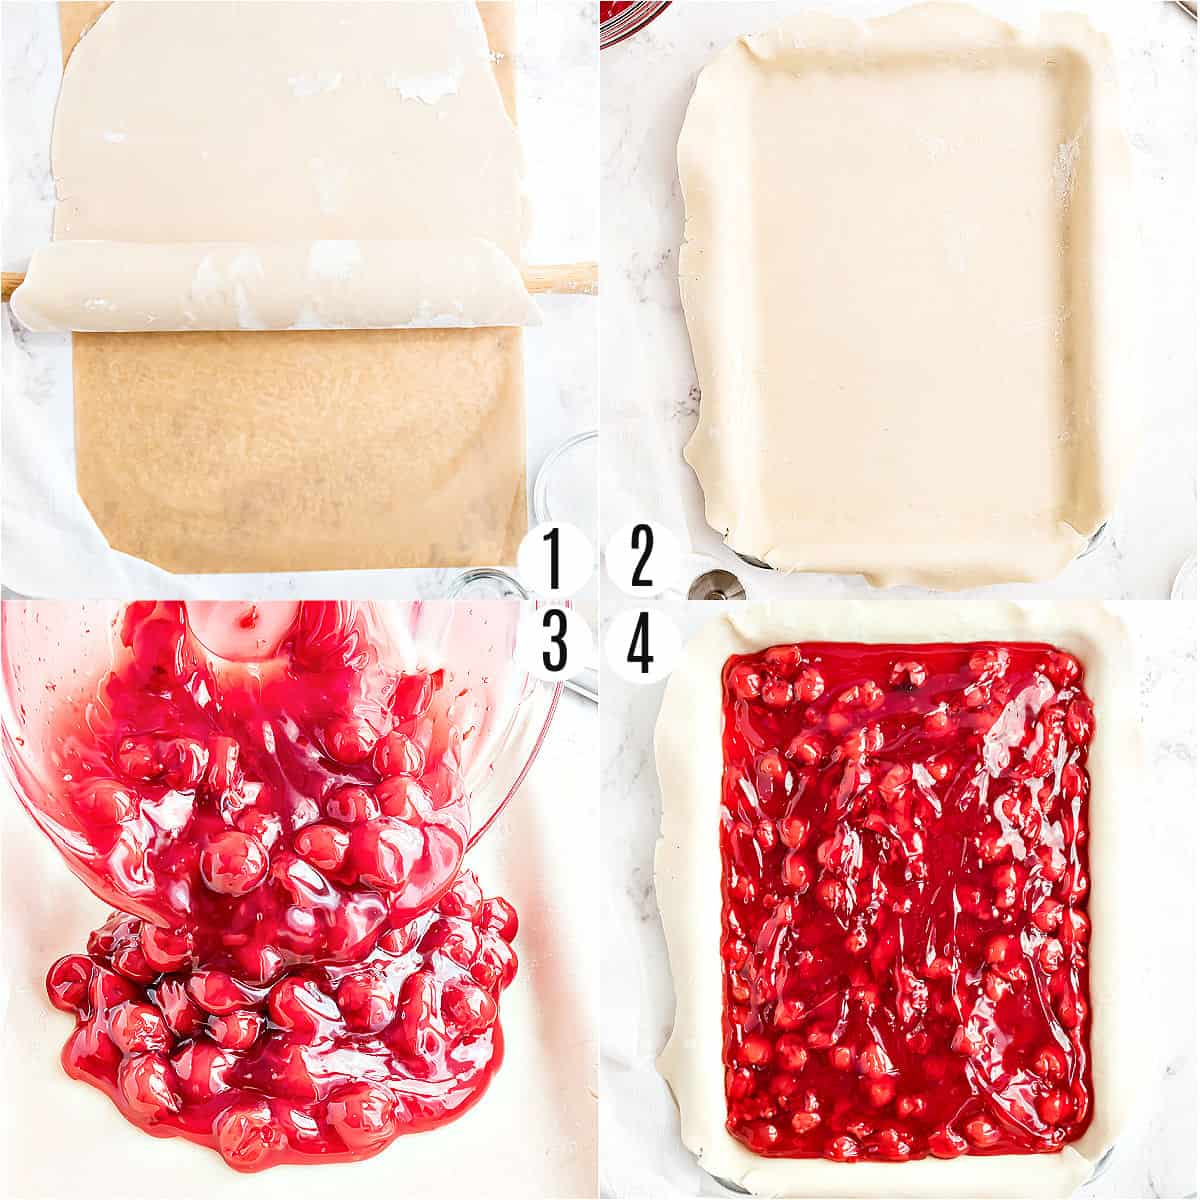
- Roll out the pie crust base: Roll out 2 of the thawed pie shells together on a lightly floured counter. Keep rolling until they are big enough to cover the bottom and sides of your baking dish.
- Start building the slab pie: Press your rolled-out crust into the baking pan, leaving enough hanging over the edges to make a folded-over crust later. Then pour the pie filling into the pan, covering the crust.
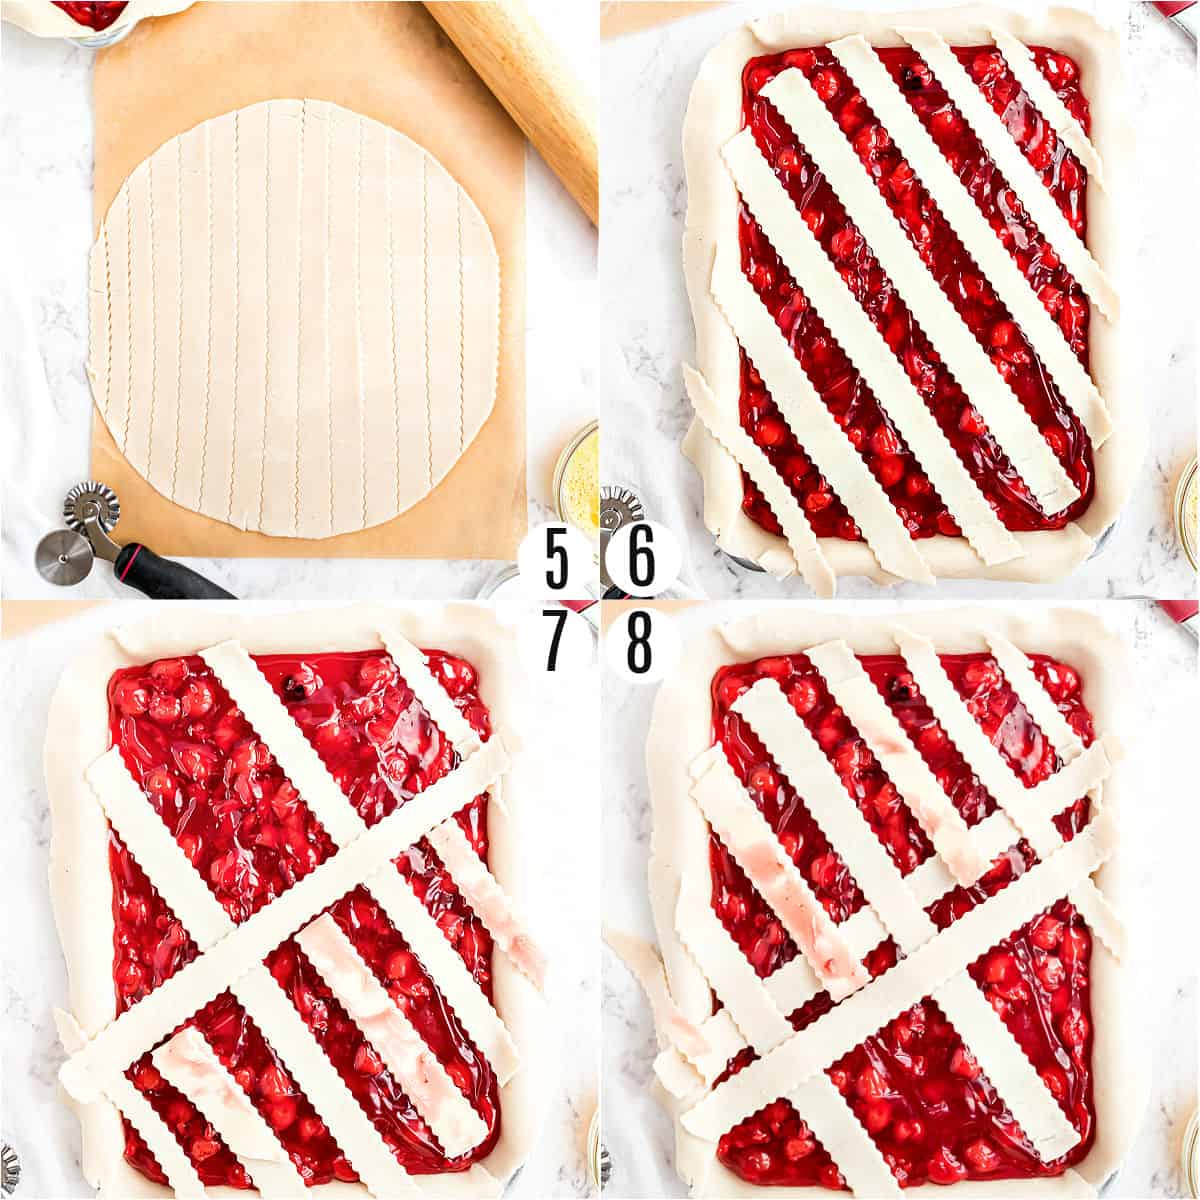
- Prepare the lattice topping: Roll out the one remaining pie crust.
Cut the rolled crust into ½-inch strips, then carefully weave your lattice topping. Don’t worry. It’s easier than it looks!
Fold over the edges of the base crust to form a nice edge all the way around the pan.
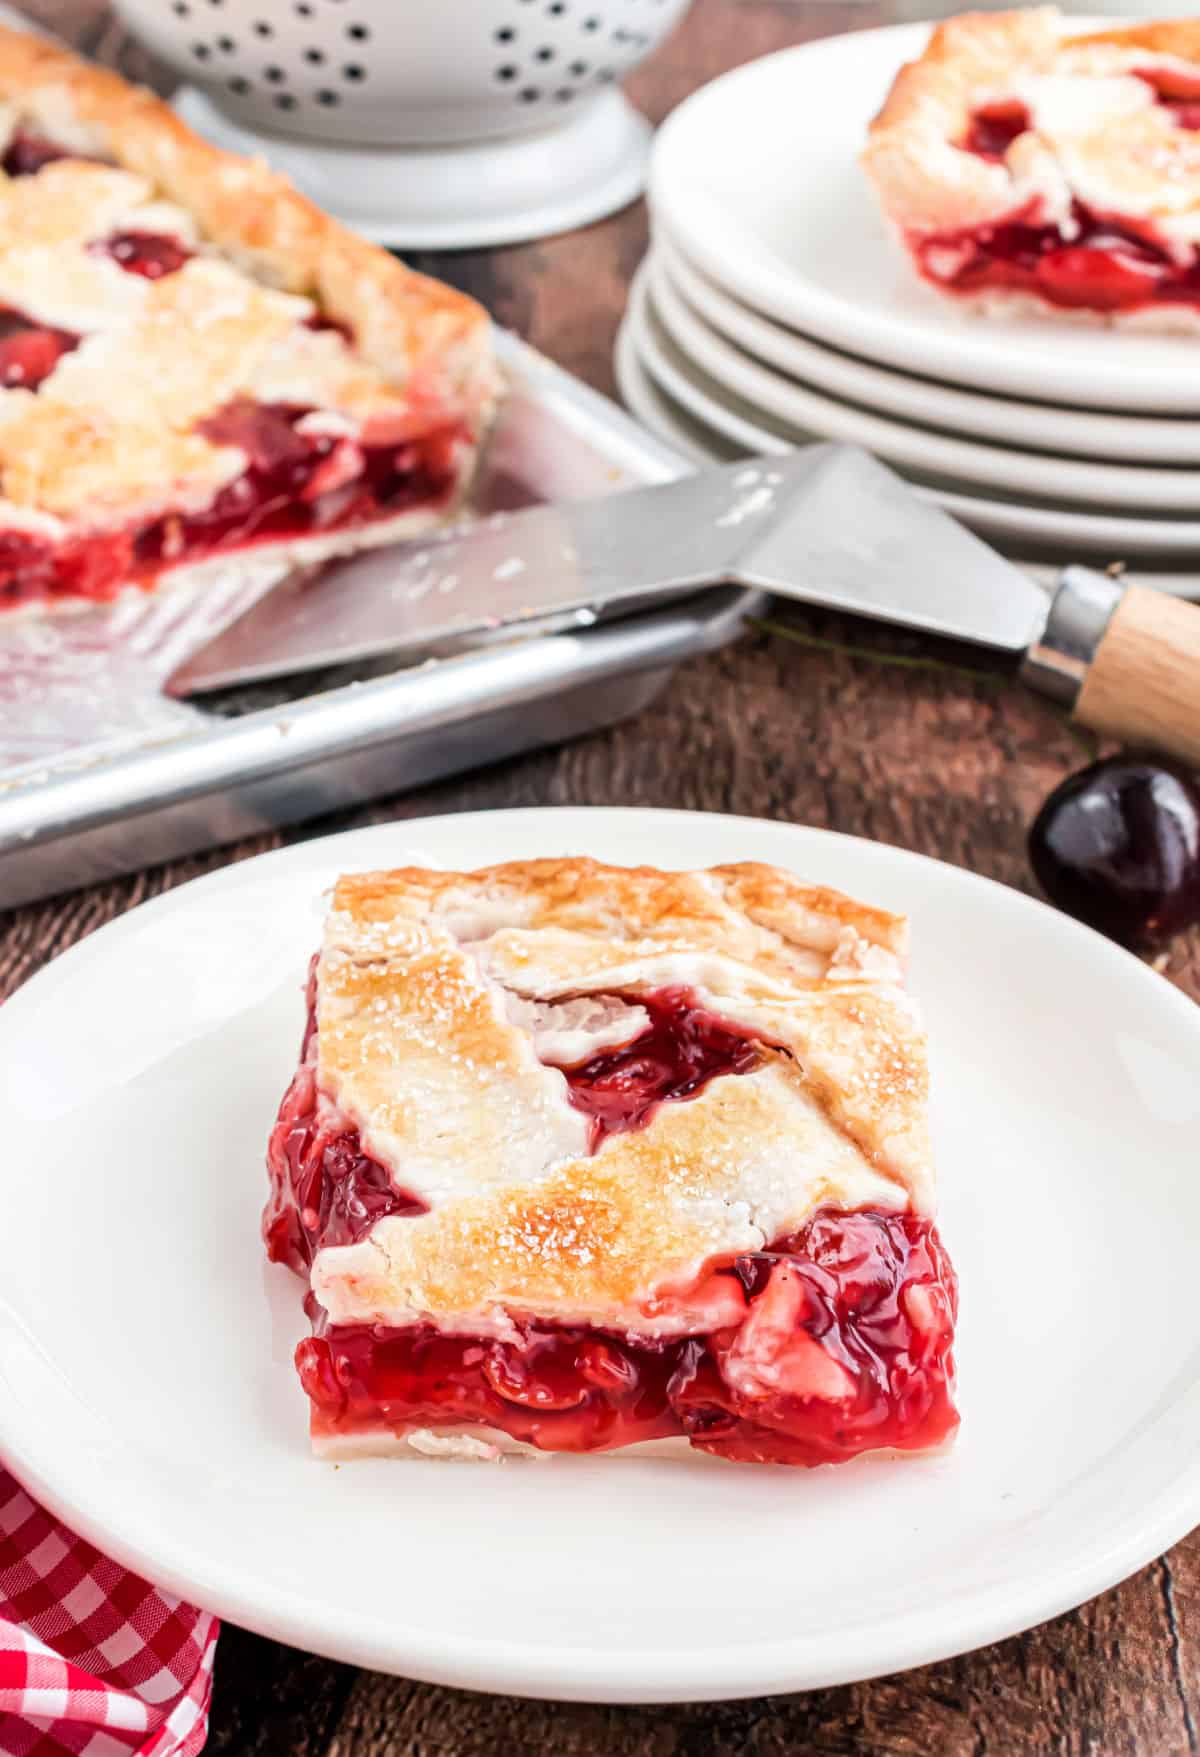
- Egg wash and bake: Brush the finished crust with egg wash, and bake for 30 minutes, until the crust is nicely browned and the cherry pie filling is bubbling.
Tips and Tricks for Easy Cherry Pie
- Store this slab pie covered in the refrigerator for up to 5 days.
- To make transferring the rolled-out crust to the pan easier, roll the crust around the rolling pin, and secure it with your hand to ensure it doesn’t unroll. Then place the rolling pin at one end of the pan and carefully unroll the crust.
- To prevent a soggy bottom on the crust brush it with egg white just before adding the cherry filling (this is optional).
- To keep the edges of the crust from drying out when you’re rolling them up, dip your fingers in a bit of water before handling.
- The sanding sugar should be sprinkled on just before baking to add a sugary crunch. Although it won’t stick to the crust in the same way, you can add additional sugar immediately before serving.
How to Serve Cherry Sheet Pan Pie
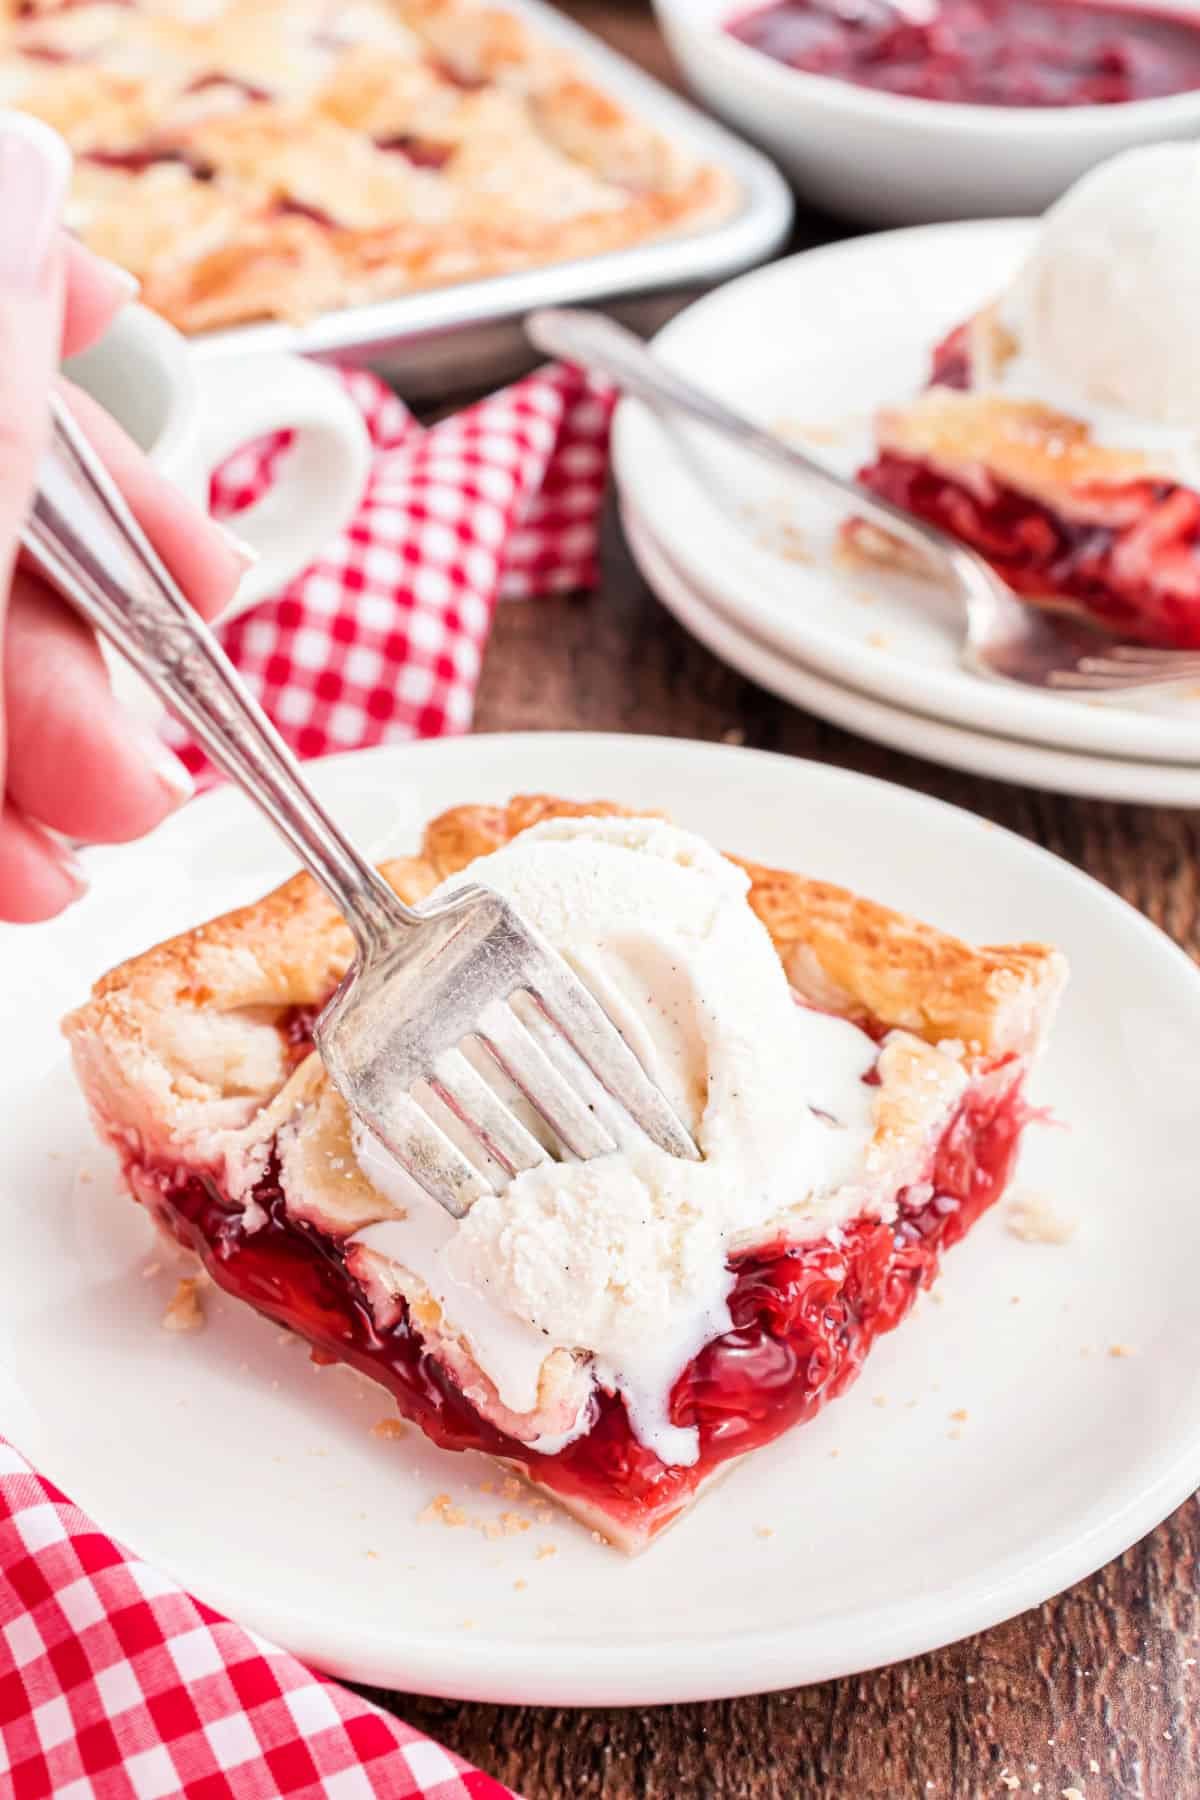
To top off this cherry slab pie, you can never go wrong with homemade whipped cream. Serve it with a hot cup of coffee and imagine you’re enjoying it in a booth at your favorite classic diner.
For an even more indulgent experience, have a slice à la mode with my no-churn vanilla ice cream. And if you’re looking to create a pie-focused dessert buffet, take a peek at our pie and tart recipes.
Love slab pie? You’re in luck! I love this easy apple slab pie recipe for weeknight dessert or serving a crowd. My blueberry slab pie is equally delicious and quite easy as well.
Easy Pie Recipes
Pin this now to find it later
Pin It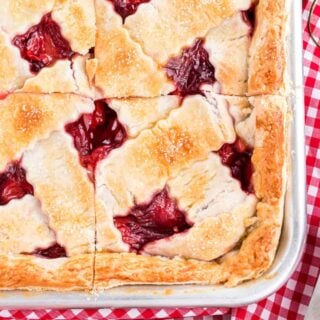
Cherry Slab Pie Recipe
Ingredients
- 2 cans cherry pie filling 21 ounce each
- 1 teaspoon almond extract optional
- 3 refrigerated pie crusts thawed
- 1 egg lightly beaten
- Coarse sanding sugar for garnish
Instructions
- Preheat oven to 425℉.
- Empty 2 cans of cherry pie filling into a large bowl. Stir in almond extract and set aside.
- Lightly flour a work surface. Unroll 2 thawed pie crusts on top of each other.
- Using a large rolling pin, roll out the dough to about a 17”x14” rectangle.
- Transfer the dough to a 9”x13” pan and press the crust into the corners of the pan, allowing the dough to hang over the edges.
- Pour the pie filling into the prepared pan and spread it out in an even layer. Set aside.
- Roll out the third crust and, using a pastry cutter or knife, cut strips that are about ½-inch wide. There should be about 14-15 strips total.
- Begin laying the strips across the pan, starting with the longest strip of dough and placing it, diagonally, from corner to corner. The strips should be overlapping or almost touching the edges of the pan.
- Fold back every other strip of dough and begin laying the other pieces diagonally across the pan in the other direction from corner to corner. Repeat until the lattice design is formed.
- Roll the edges of the crust toward the center of the pan until an even edge is formed and all the ends of the pie crust strips have been concealed.
- Brush the crust with beaten egg and sprinkle with sanding sugar.
- Bake for 30 minutes or until crust is browned and cherry filling is bubbly.
Notes
- STORE: Store this slab pie covered, in the refrigerator, for up to 5 days.
- Freeze: To freeze, bake as directed. Let it cool completely and then wrap in plastic and then in foil. It can be frozen for up to 2 months. Thaw in the refrigerator before serving.
- To make transferring the rolled-out crust to the pan easier, roll the crust around the rolling pin, and secure it with your hand to ensure it doesn’t unroll. Then place the rolling pin at one end of the pan and carefully unroll the crust.
- To prevent a soggy bottom on the crust brush it with egg white just before adding the cherry filling (this is optional).
- To keep the edges of the crust from drying out when you’re rolling them up, dip your fingers in a bit of water before handling.
- The sanding sugar should be sprinkled on just before baking to add a sugary crunch. Although it won’t stick to the crust in the same way, you can add additional sugar immediately before serving.