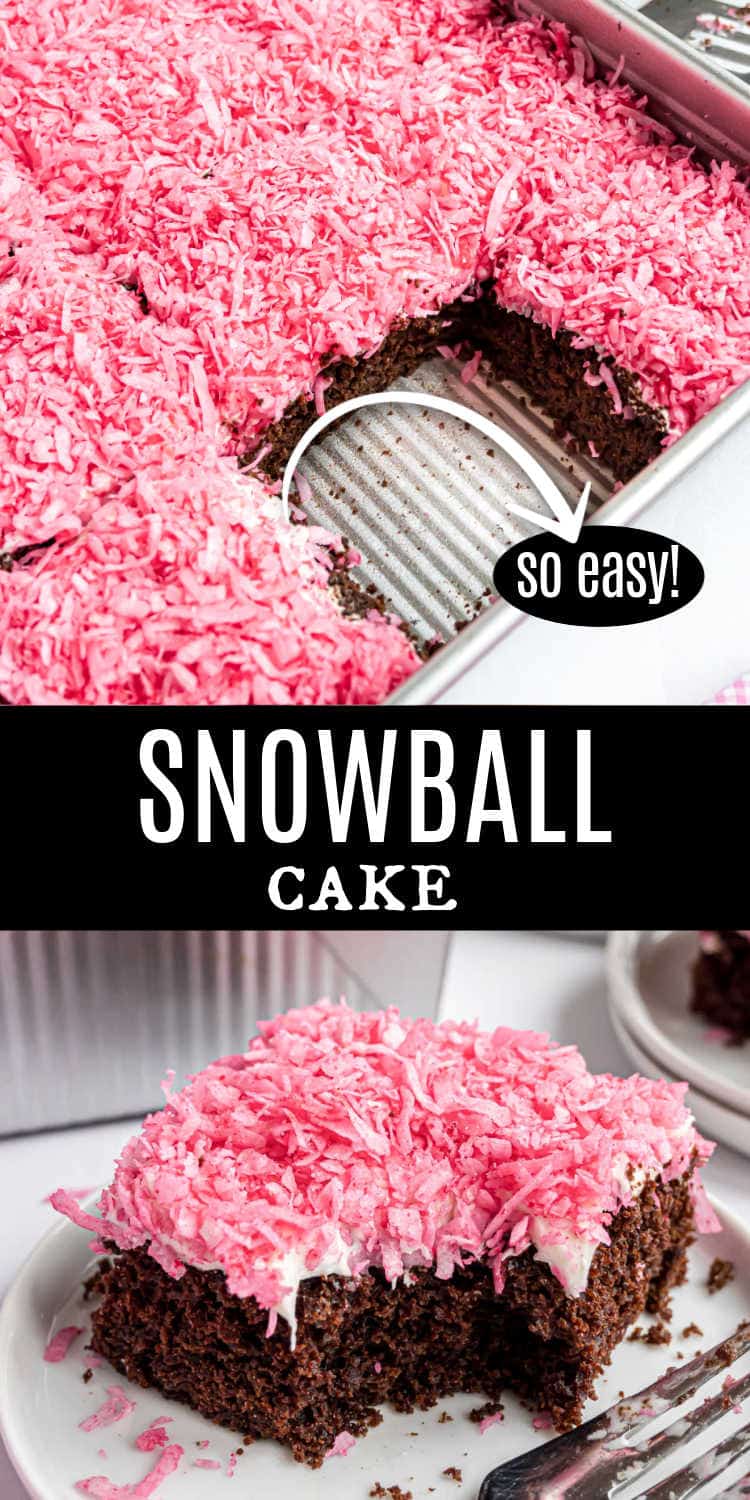
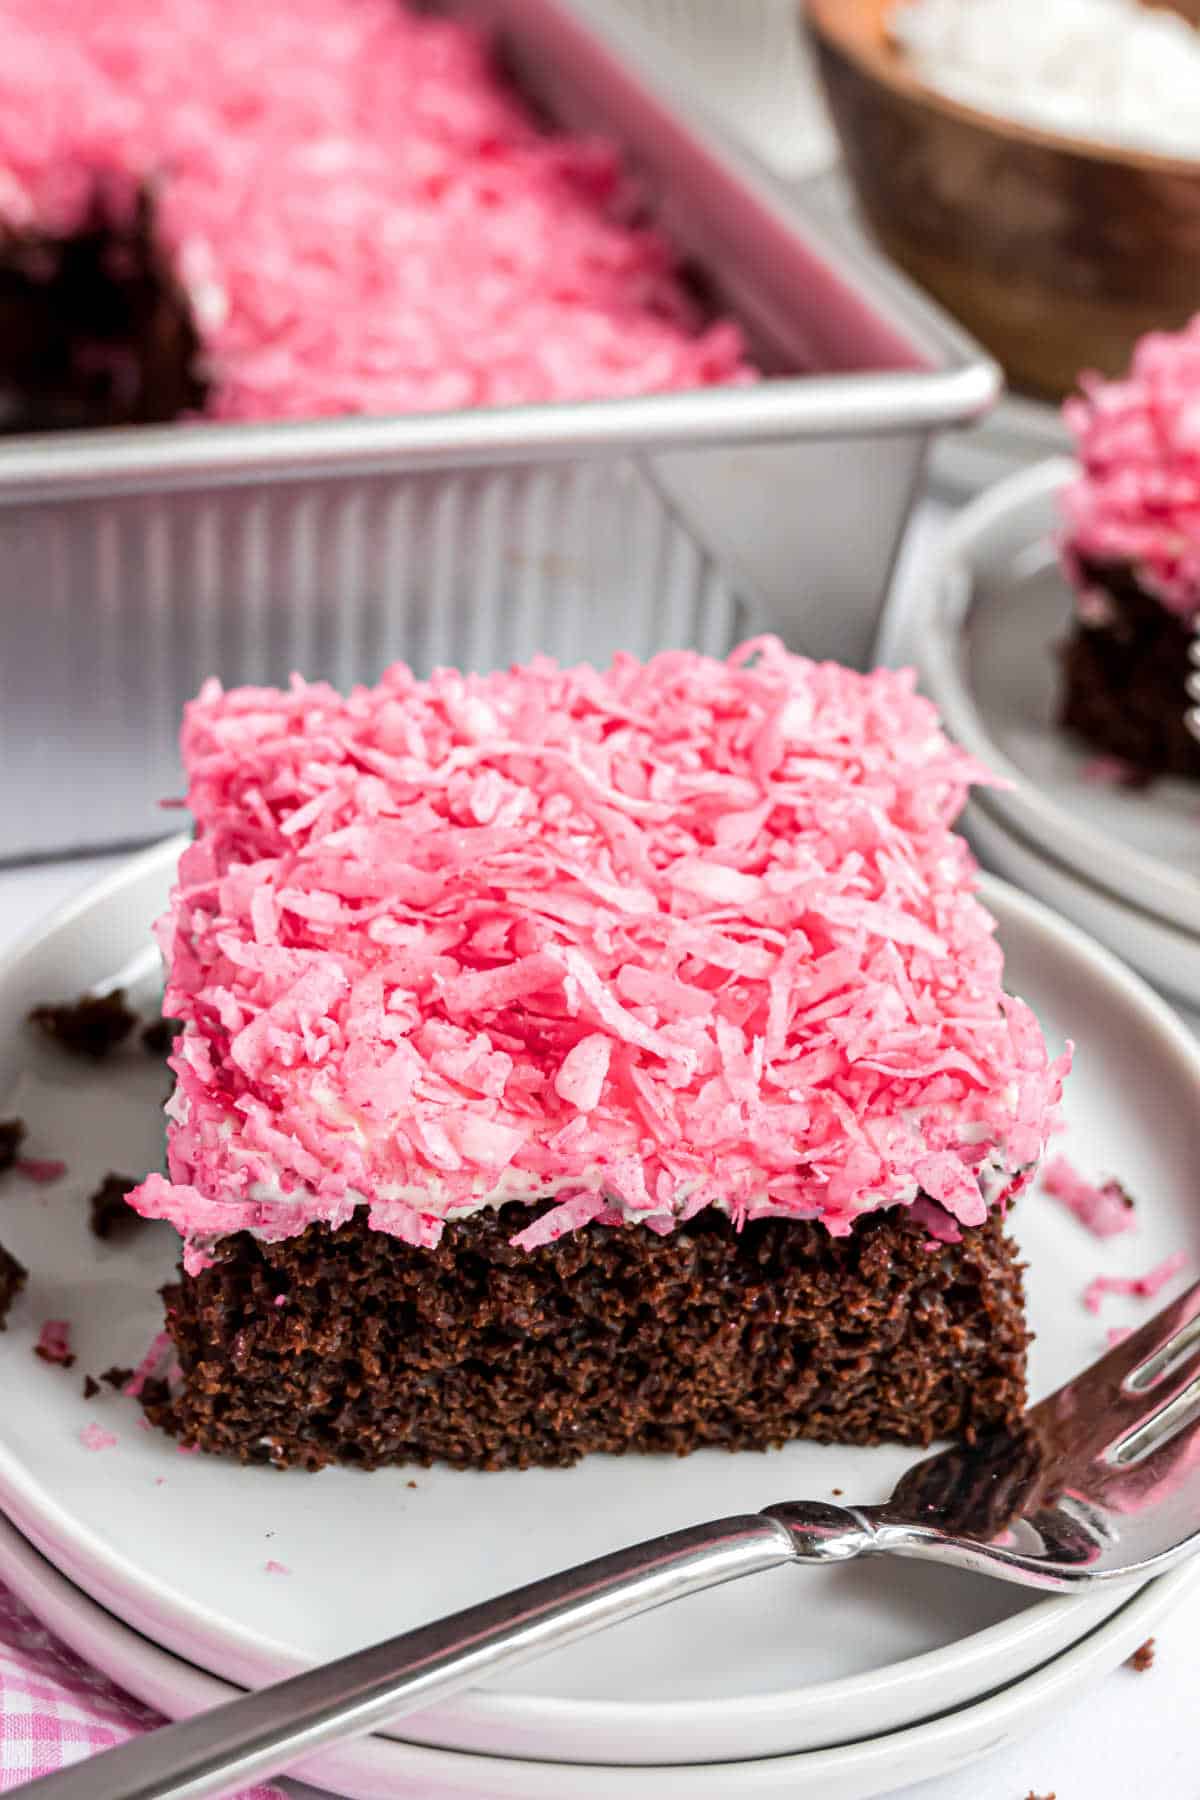
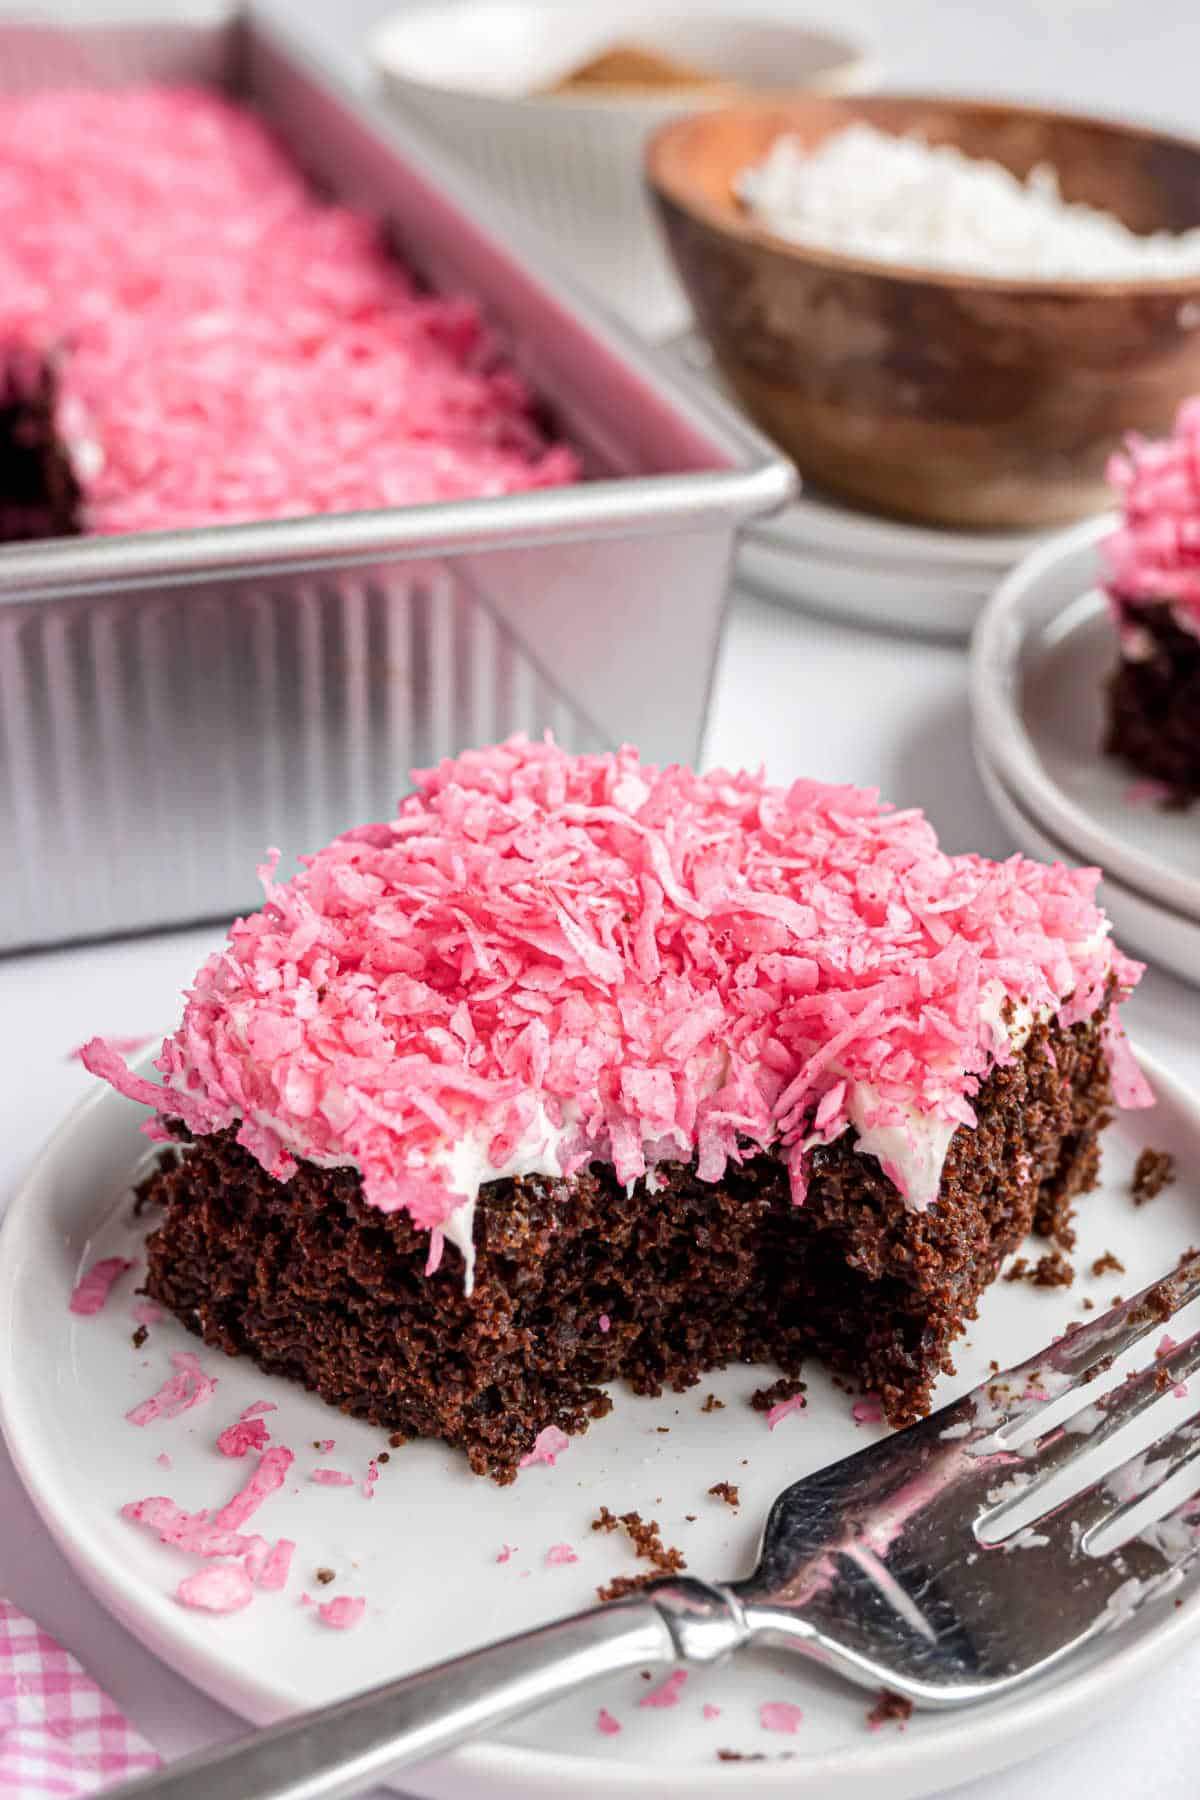
If SnoBalls are your favorite snack cake, you are going to flip for this giant-sized version! My copycat Hostess Snowball Cake recipe is made with chocolate cake, marshmallow frosting, and iconic pink coconut.
Instead of making a layer cake, I made this easy 13×9 chocolate sheet cake recipe for you.
Aimee’s Recipe Notes
🩷Taste & Texture – Rich, moist chocolate cake topped with fluffy marshmallow frosting and sweet, colorful coconut.
🩷Ease of Making – Straight-forward easy chocolate cake recipe with simple layering and decorating.
🩷Ingredient Swaps – Swap pink food coloring for another color to customize.
🩷Time Saver – swap out the homemade chocolate cake for a quick boxed mix.
🩷Storage – Store covered at room temperature for up to 5 days. Freeze leftovers for up to 3 months.
🩷Top Tip – Hot coffee enhances the chocolate flavor, don’t worry, it won’t make the cake taste like coffee.
Sno- Ball Cake Ingredients
The full ingredient list is in the recipe card at the bottom of the post, but here are some highlights.
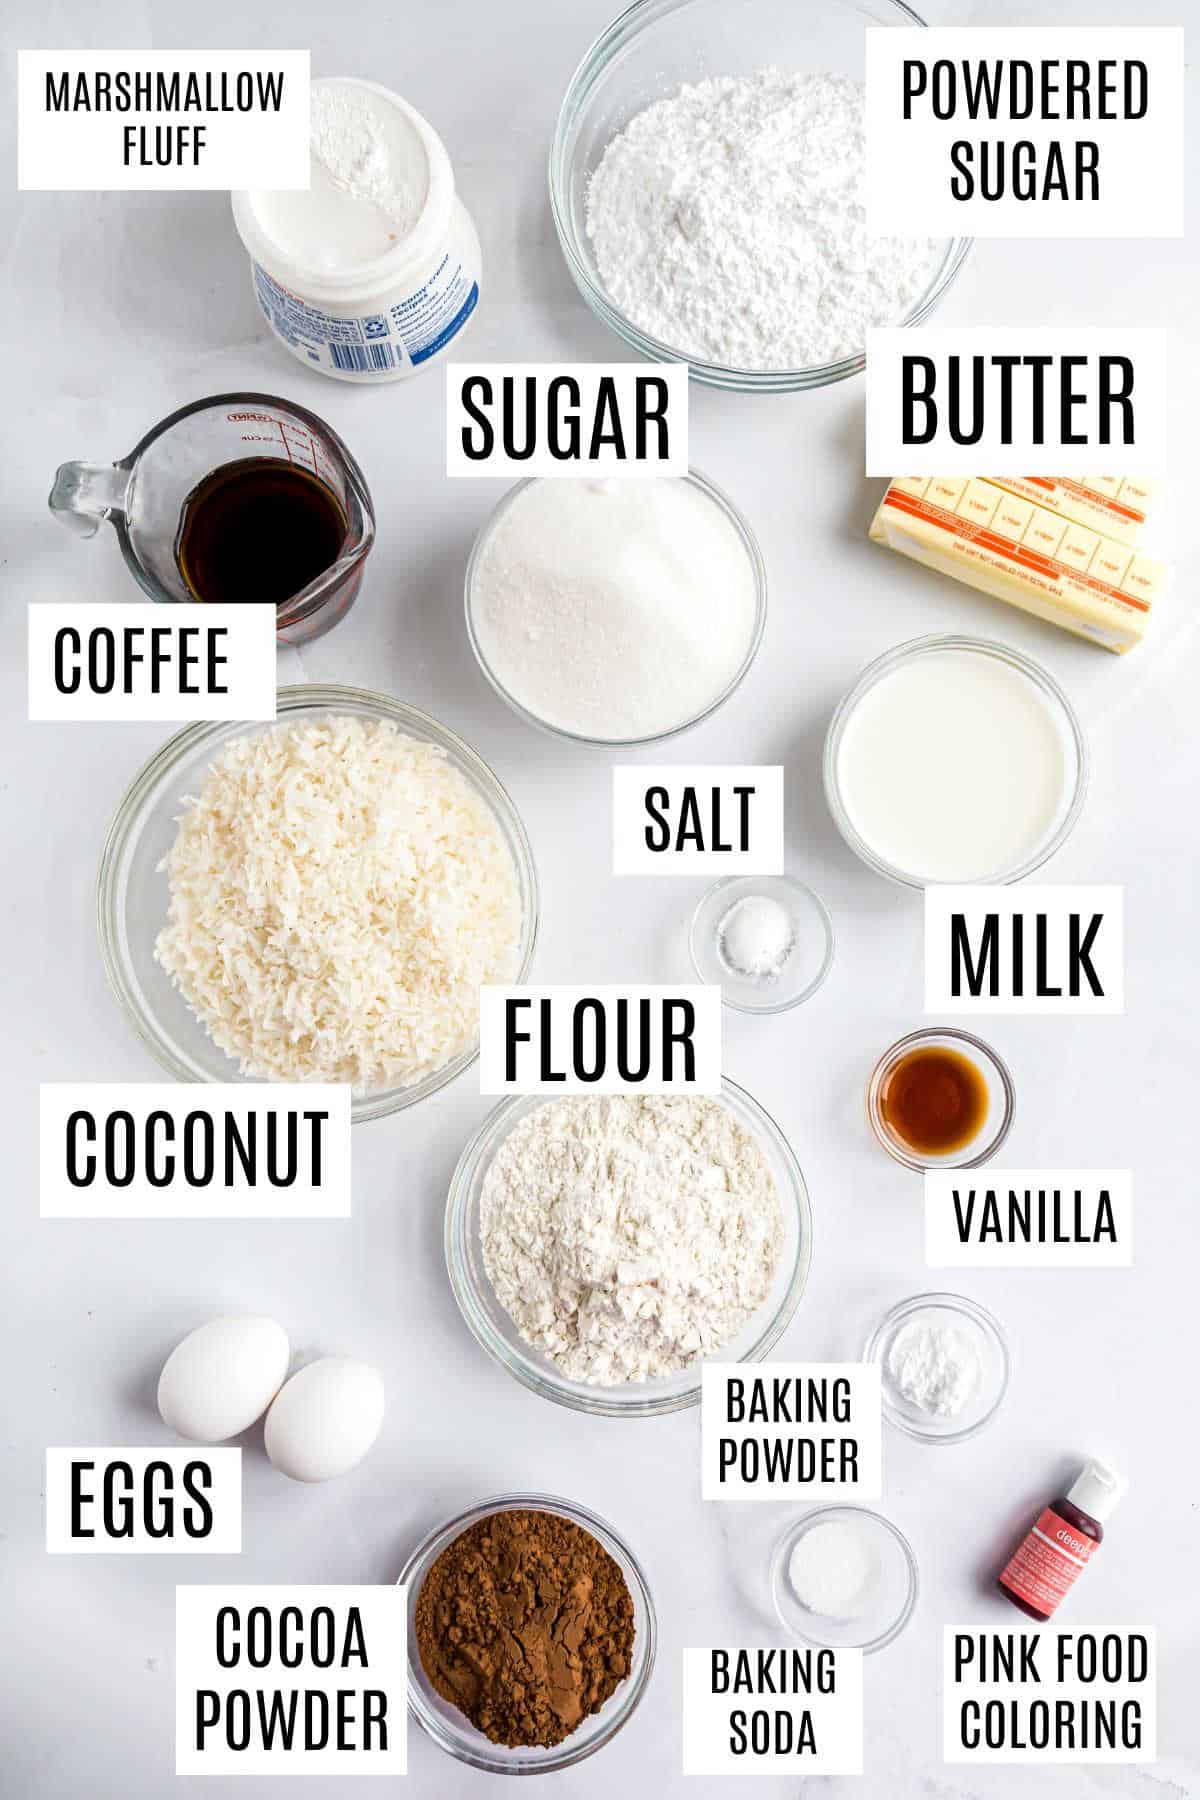
- Cocoa powder – Be sure to use unsweetened cocoa powder, not cocoa mix, cocoa mix is sweetened and meant for making hot cocoa.
- Brewed hot coffee – My favorite ingredient for intensifying the chocolate flavor in cake. (And no, it won’t make your Hostess Snowball Cake taste like coffee, I promise!) It can be replaced with hot water if preferred.
- Whole milk – Using whole milk adds moisture and richness to the cake.
- Marshmallow Fluff – The signature creamy topping! You can use my Homemade Marshmallow Fluff if you want to make this cake entirely from scratch.
- Vanilla extract – Use high-quality pure vanilla extract for the best taste.
- Shredded sweetened coconut – One of the key components that makes Sno Balls what they are! Be sure to use shredded coconut, not flakes.
- Pink food coloring – For a fun, vibrant color. Although I love using gel food coloring in my baking, I think liquid coloring distributes more evenly in this case.
Swap out the homemade cake for a boxed mix to make in a 13×9.
How to Make This Hostess SnowBall Cake
Prepare: Preheat your oven to 350ºF and coat a 13×9 baking dish with nonstick spray or my homemade cake release.
- Cream the Butter & Sugar Properly – Beat butter and sugar for a full 5 minutes to create a light, fluffy texture. Gradually add dry ingredients and coffee mixture in batches to avoid overmixing and ensure a smooth batter.
- Test for Doneness – Bake until a toothpick comes out clean; adjust baking time based on your pan type (metal pans bake more evenly).
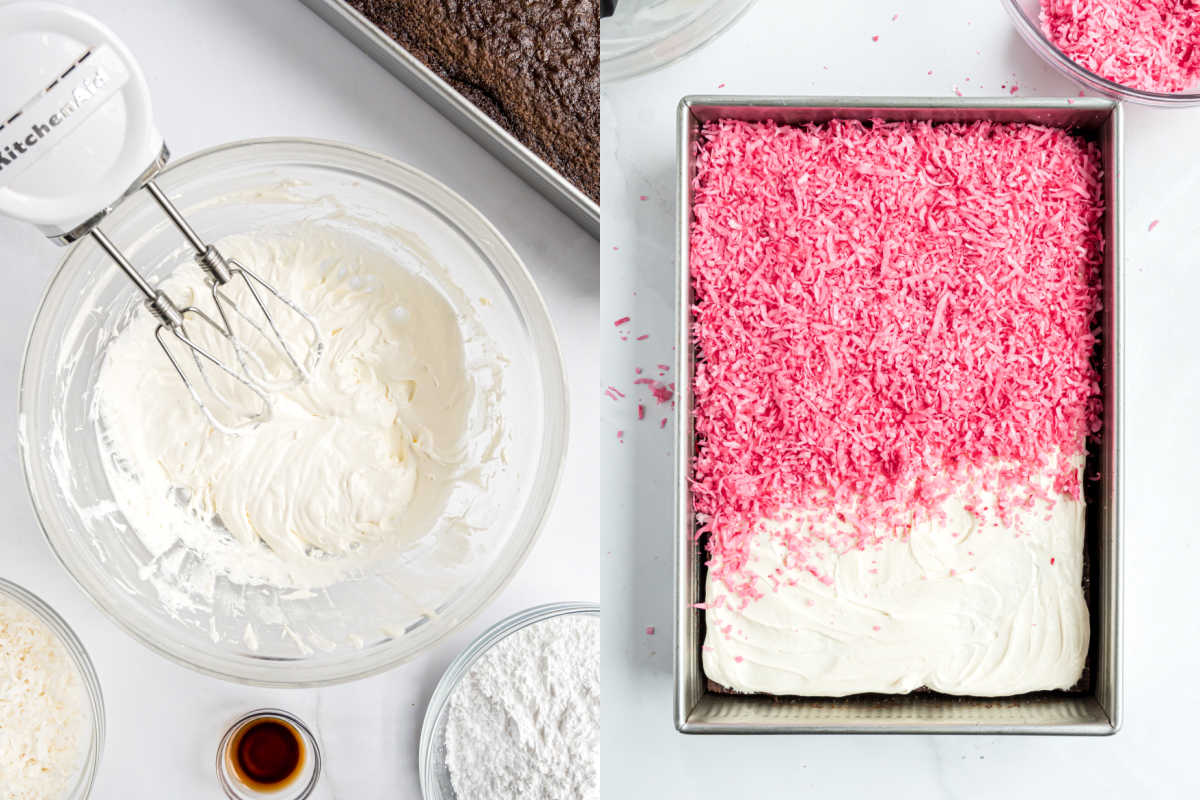
- Frosting Tips – Beat the Marshmallow Fluff and butter until creamy before adding powdered sugar for a smooth frosting.
- Color the Coconut Evenly – Use a spoon to thoroughly mix the food coloring into the coconut for even coverage.
Tips and Tricks
- Store- Cover the pan with plastic wrap and store it at room temperature for up to 5 days. Smaller portions of leftovers can be transferred to an airtight container.
- You can also freeze this cake by using my tips and tricks on how to freeze cake.
- I recommend using a metal baking pan rather than glass or ceramic. Metal pans bake more evenly and predictably.
- Ensure all of the wet ingredients, like the eggs and butter, are at room temperature before mixing. This helps the batter mix evenly.
- It’s important to allow the cake to cool completely before frosting. A warm cake can cause the frosting to melt and sink into the cake. It will still be delicious, but the texture and appearance won’t be the same!
- Zinger- if this cake looks similar to a childhood treat your remember, try my homemade zinger cake recipe, filled with raspberry preserves and marshmallow frosting!
Easy Chocolate Recipes
- Just like its namesake ingredient, this Coca Cola Cake is an American classic! But spoiler alert: it’s a chocolate cake, not cola flavored! You’ll love its rich, fudgy texture.
- If you like your cake in frozen form, this Brownie Ice Cream Cake is just the ticket.
- Mayo makes this Chocolate Mayonnaise Cake Recipe extra rich and moist.
- Black Forest Cake pairs chocolate with cherries, which is always a delicious duo!
- Don’t forget to try my Twinkie Cake and Ding Dong cake recipes for more Hostess treats.
- For another homemade version of a childhood favorite, these Copycat Hostess Cupcakes are sure to please! My Cosmic Brownie Cookies are always a hit too.
Pin this now to find it later
Pin It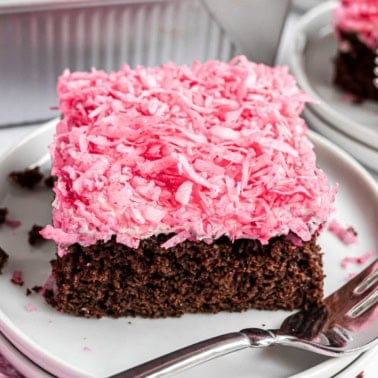
Snowball Cake Recipe
Ingredients
For the Cake
- 1 ½ cup all-purpose flour
- ½ cup unsweetened cocoa powder
- ½ teaspoon kosher salt
- 1 teaspoon baking soda
- ½ teaspoon baking powder
- ½ cup brewed hot coffee
- ½ cup whole milk
- ½ cup unsalted butter, softened to room temperature
- 1 ½ cups granulated sugar
- 2 large eggs
For the Topping
- 7 ounce jar Marshmallow Fluff
- ½ cup unsalted ubtter, softened to room temperature
- 1 teaspoon pure vanilla extract
- 2 cups powdered sugar
- 3 cups shredded sweetened coconut
- 2-4 drops pink food coloring
Instructions
- Preheat the oven to 350 degrees F. Spray a 13×9 baking dish with baking spray, or use homemade cake release. Set aside.
- In a bowl, combine flour, cocoa powder, salt, baking soda, and baking powder. Set this aside.
- In a measuring cup, combine hot coffee with the milk. Set this aside.
- In a mixing bowl of an electric mixer, fitted with a whisk attachment, add butter and sugar to bowl. Beat for 5 minutes, scraping down the sides of the bowl as needed.
- Add in eggs, one at a time. Slowly add in the dry ingredients, alternating with the coffee mixture (about 3 additions of each).
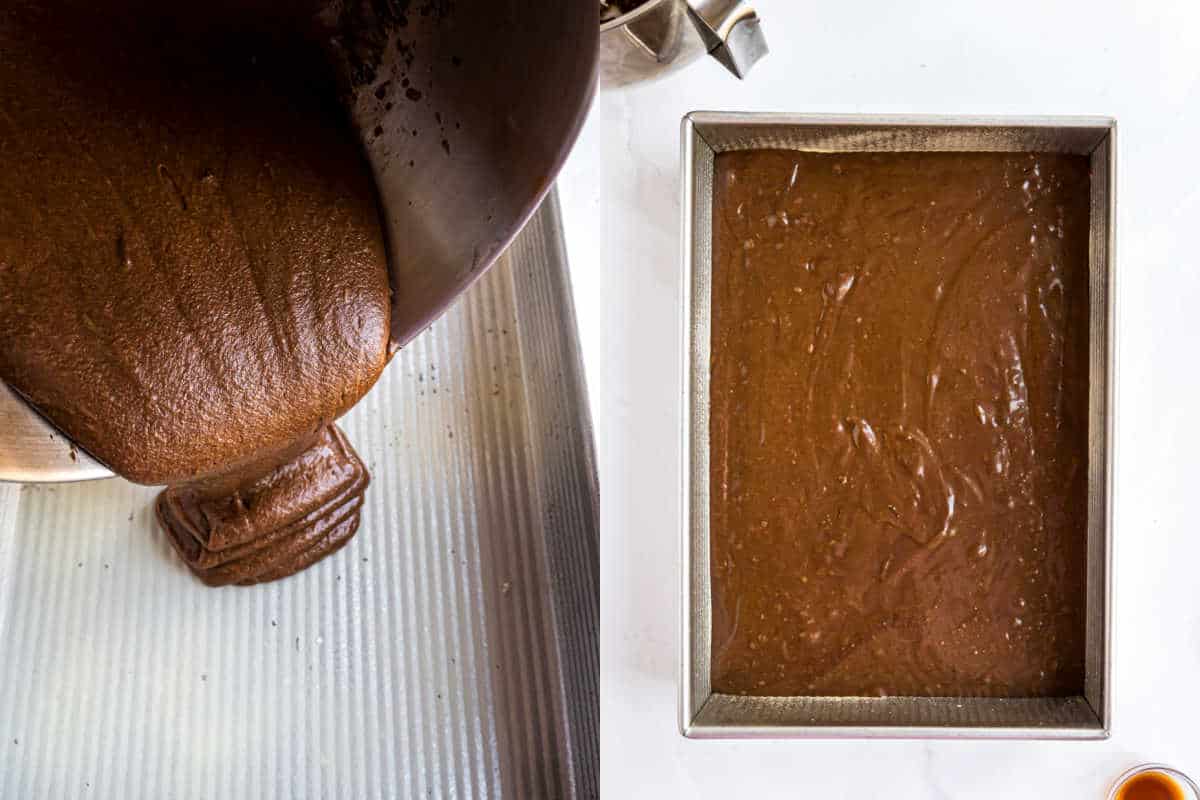
- Pour cake batter into the prepared pan. Bake for about 33-38 minutes, until toothpick inserted in the center comes out clean. Remove cake from the oven and cool completely before adding the frosting.
- For the frosting, beat together the Marshmallow Fluff with softened butter for 3-4 minutes until combined. Add in vanilla extract and powdered sugar. Beat for 3-4 minutes until smooth and creamy.
- In a bowl, combine coconut with 2-4 drops of pink food coloring. Using a wooden spoon, mix thoroughly until color saturates all the coconut. Add more food coloring to achieve desired color.
- Spread frosting over cooled chocolate cake using an offset spatula. Immediately sprinkle on the colored coconut. Slice and serve.
Notes
- Brewed Coffee– the hot coffee helps enhance the chocolate flavor without making the cake taste like coffee. Use hot water if you don’t have coffee.
- Storage- Keep cake covered with plastic wrap at room temperature for up to 5 days. Or freeze cake using my tips and tricks on how to freeze cake.
- Baking Time- this will vary based upon ovens as well as the type of pan used. I prefer baking in metal pans for even baking.


I read on another site another idea. Spread raspberry jam on the cake before frosting it, and I tastes like a Hostess Zinger! I tried that and it was delicious!
LOVE that idea!
Can I just sprinkle some espresso instant powder instead of the hot coffee?
Can this be made into cupcakes instead?
This dessert was a hit with my family. Loved it!!!