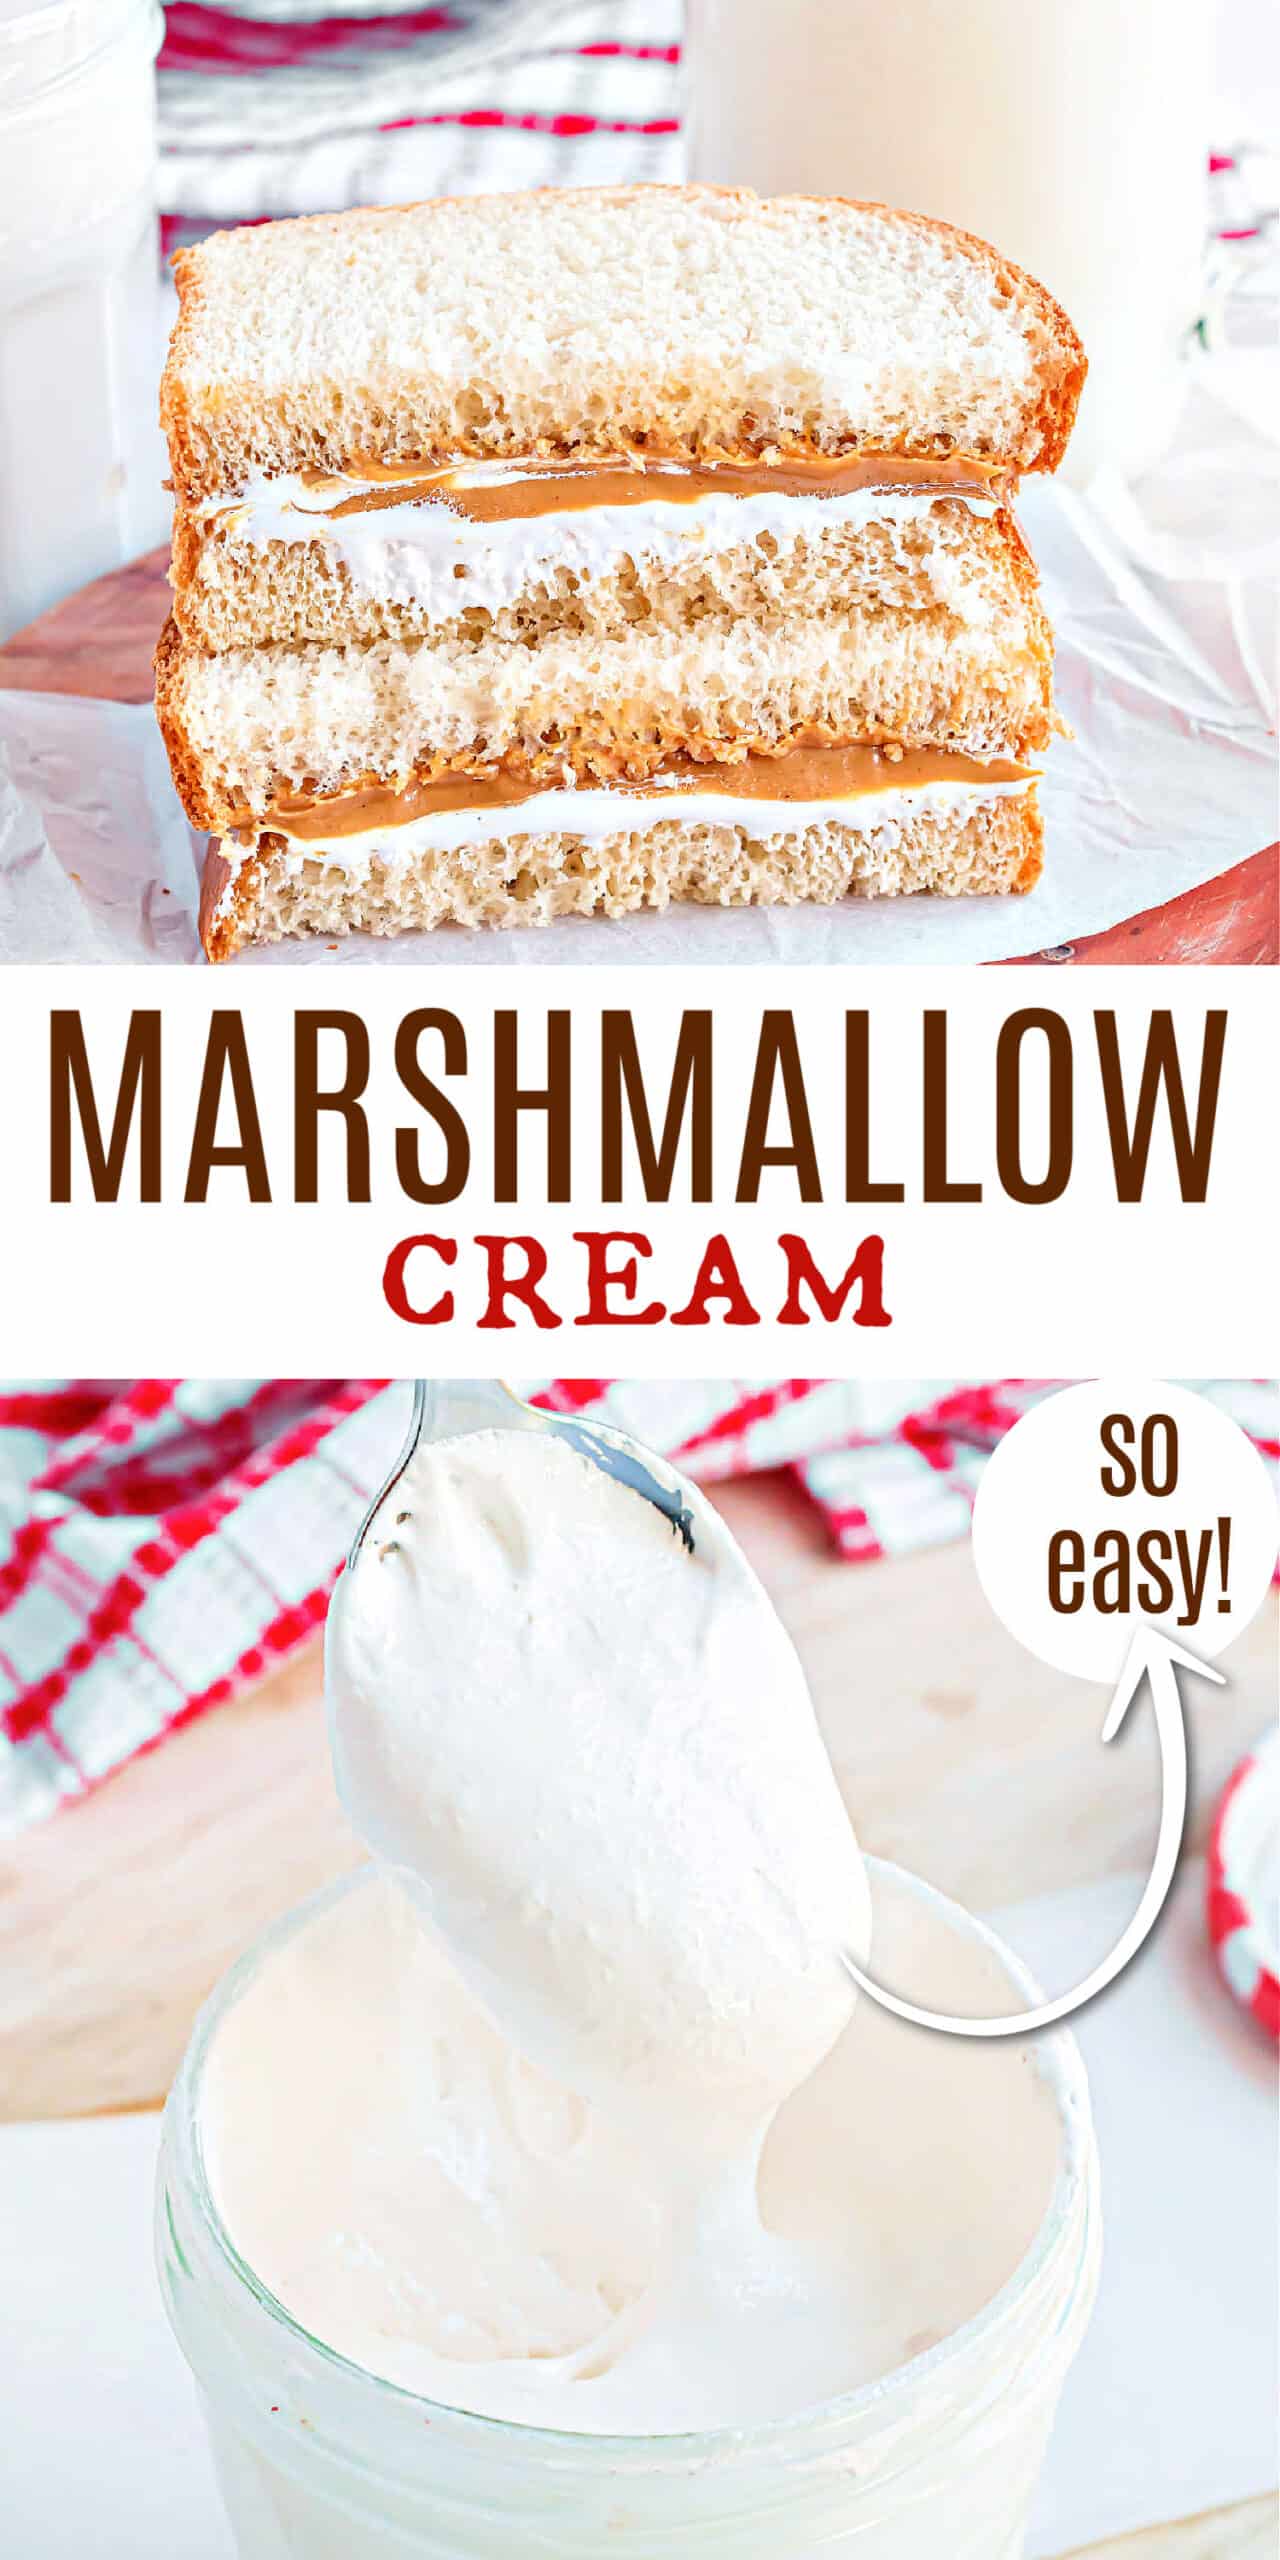
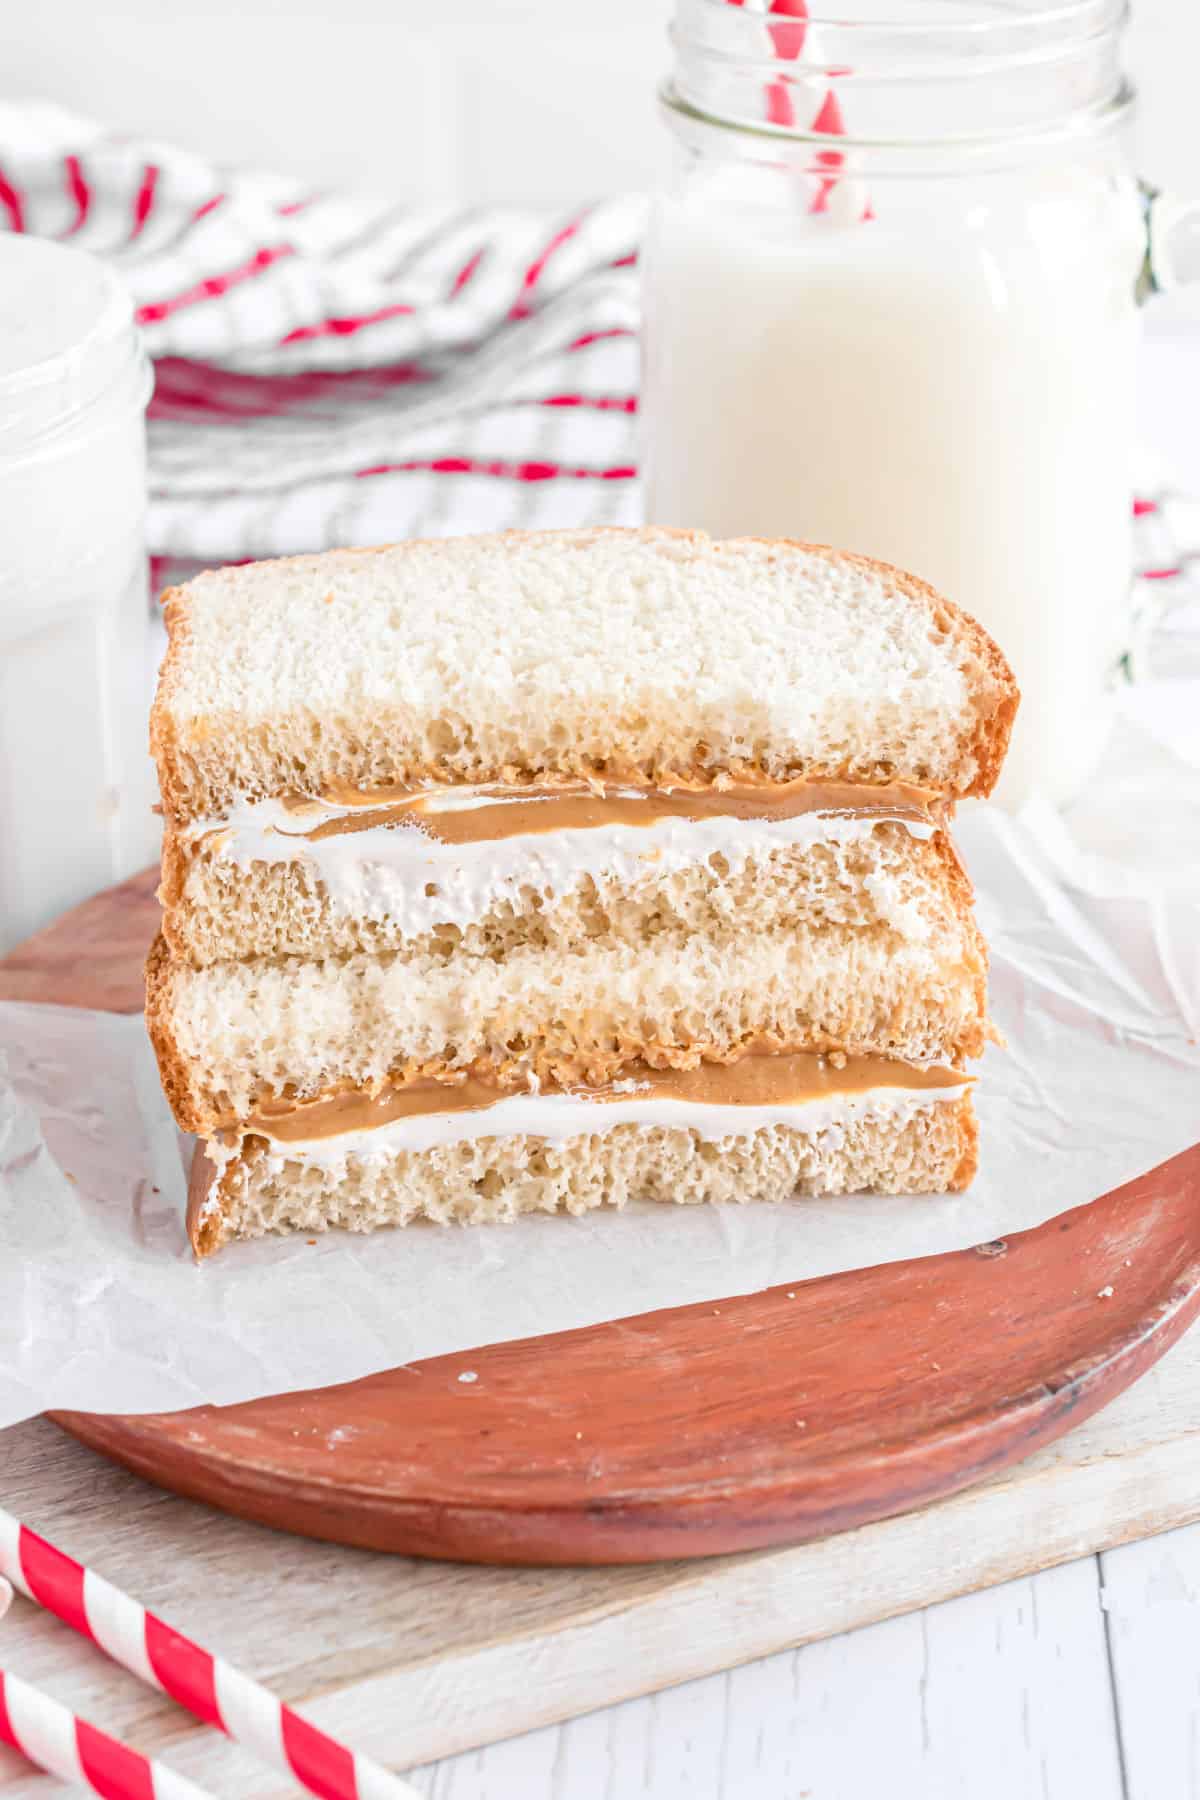
This Homemade Marshmallow Fluff is sweet, ooey, gooey, and finger-licking good. Of course, you’ll want to spread it on everything, but you might finish it with a spoon! It’s perfect on Fluffernutter sandwiches too!
Love homemade marshmallow fluff? Use it in our easy Fluffernutter Fudge and our Fluffernutter Rice Krispie Treats. Both are bursting with peanut butter and marshmallow flavor!
Why Homemade Marshmallow Fluff Works
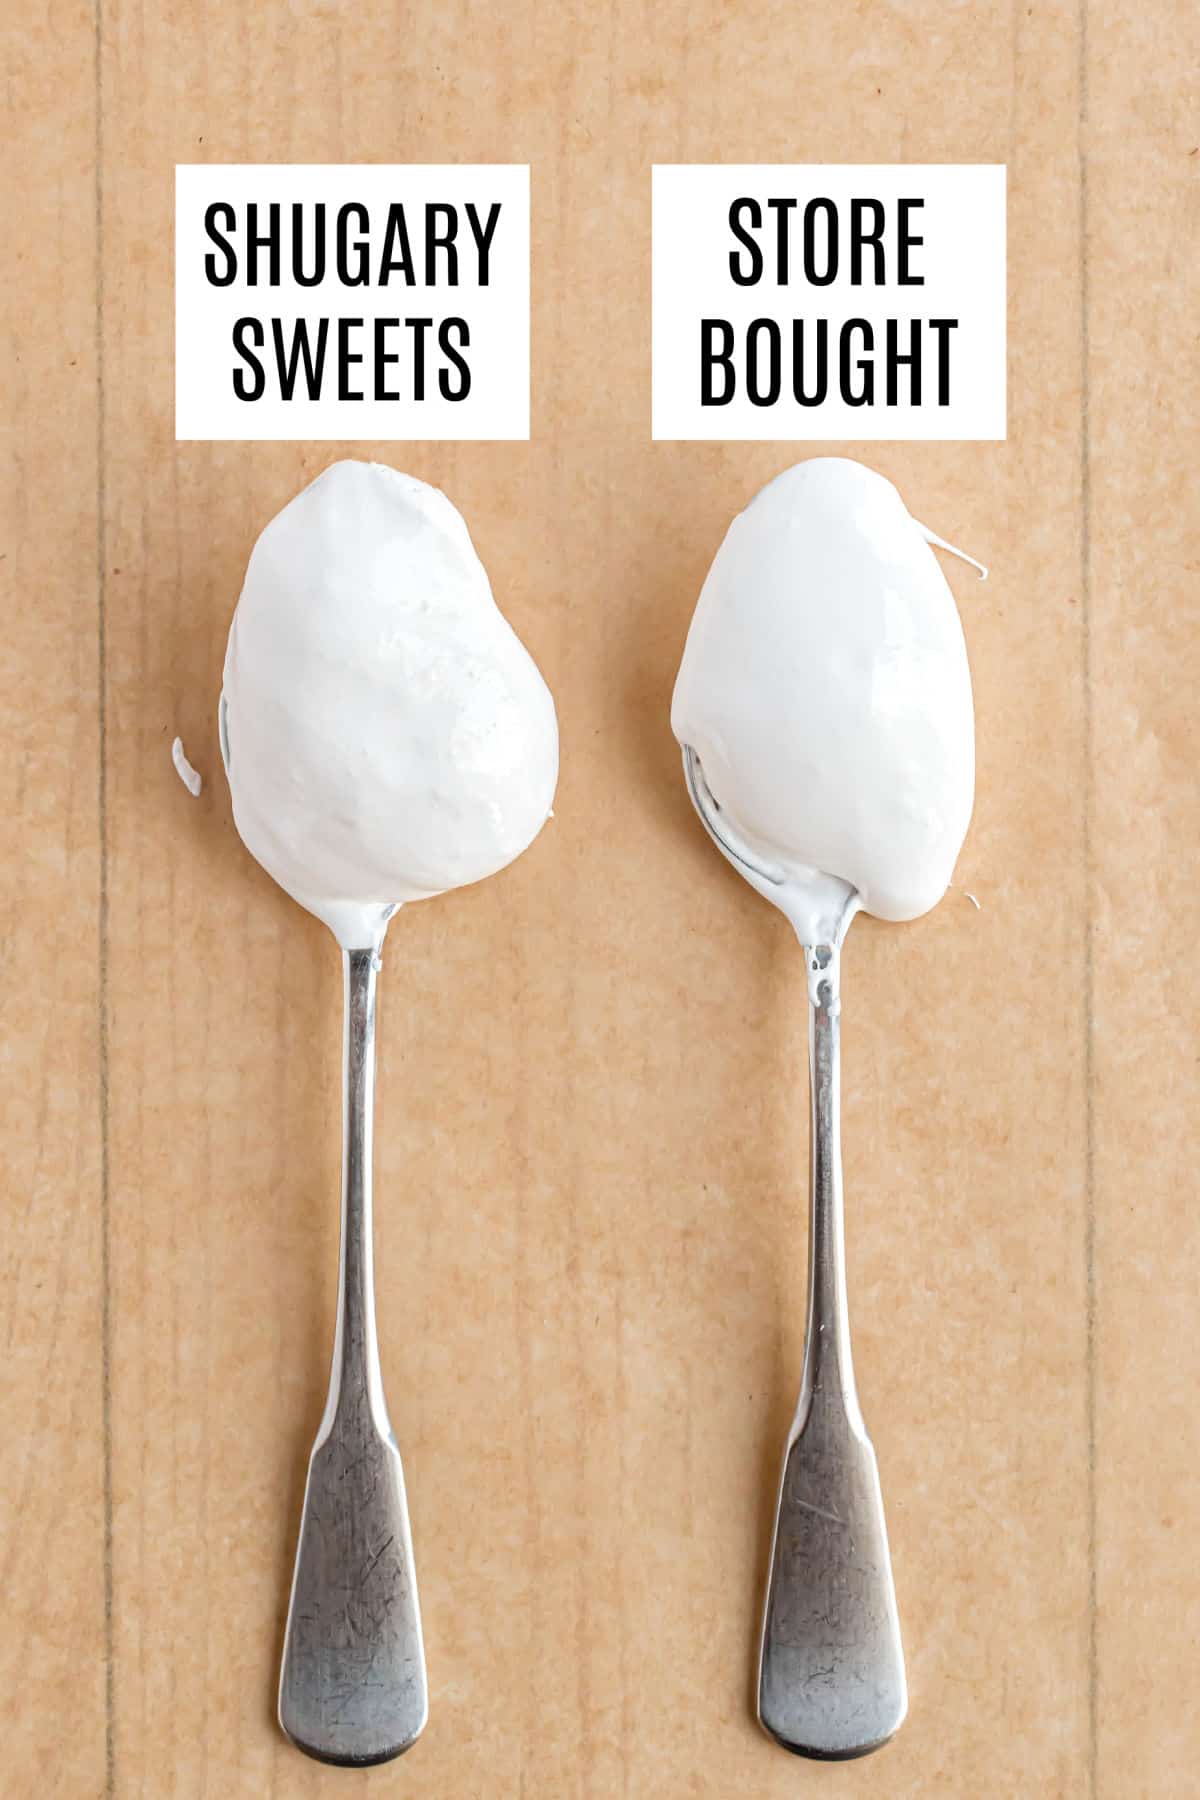
Homemade Marshmallow Fluff is much better than the jarred version you’ll find at the store. No unwanted additives or artificial flavors. It’s the ultimate add-on for a hundred sweet treats, and it’s easy to make.
Here are a few reasons why you’ll love it,
- You’ll know exactly what’s in it. The texture, consistency, and flavor of my recipe are a step above store-bought fluff, and you’ll avoid artificial ingredients and preservatives.
- It’s easy to store. This recipe yields 3 cups, so you might not use it all at once. Fortunately, you can keep it safely in the freezer for up to 3 months or in the refrigerator for 2 weeks.
- It plays well with others. Whether you’re making smores, cookies, or a cup of hot chocolate, marshmallow fluff is a great add-on. It’s also gluten-free, making it an excellent fit for allergen-friendly baked goods.
Ingredient Notes
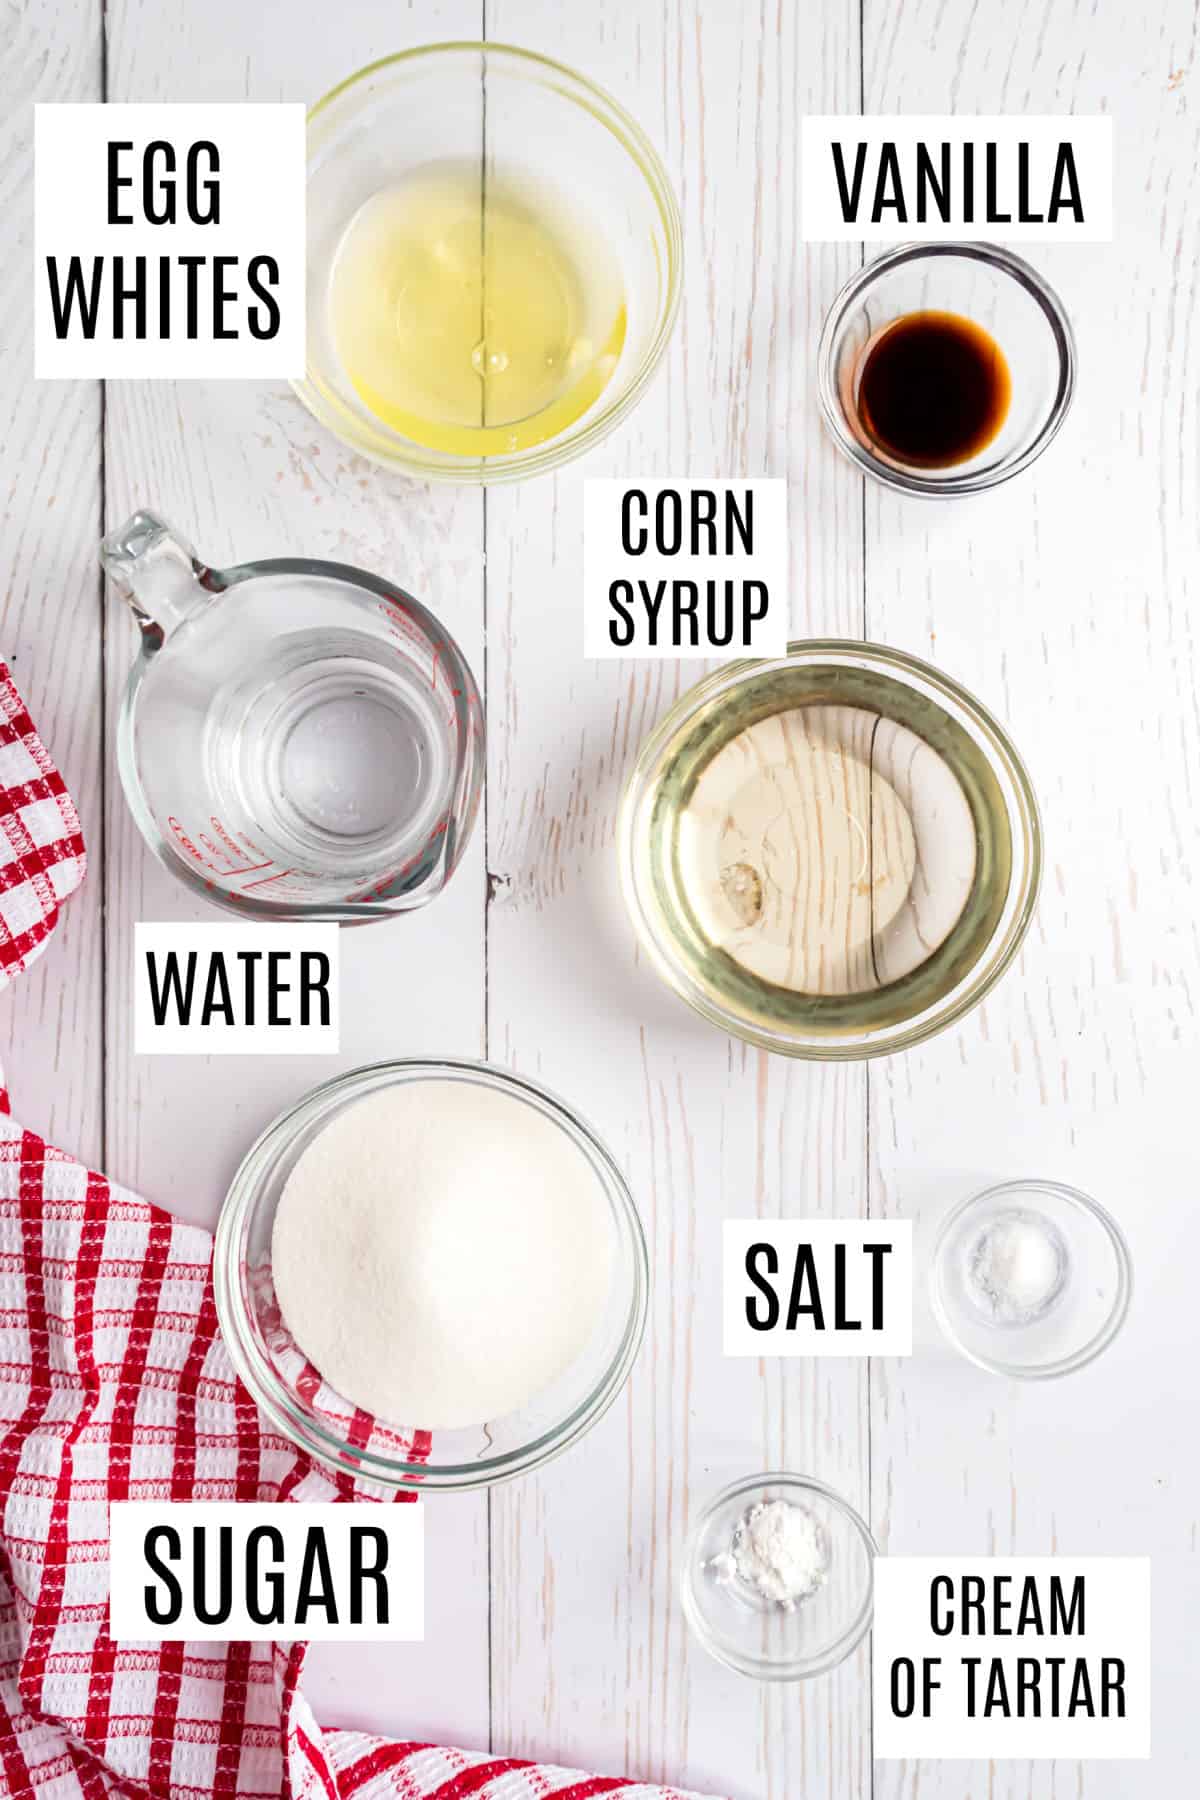
- Water
- Granulated Sugar
- Light Corn Syrup – Light corn syrup is mild and almost transparent, with a subtle vanilla sweetness. Dark corn syrup is caramel colored and has a rich, intense molasses flavor that’s delicious but isn’t suited for this recipe.
- Egg Whites – The egg whites will cook as you stream in the hot sugar mixture, so you don’t have to worry about consuming raw eggs.
- Cream of Tartar – This essential ingredient stabilizes the egg whites and results in the light, fluffy texture we’re going for.
- Kosher Salt
PRO TIP- We love making our own homemade vanilla extract, but if using store bought, be sure it’s pure extract, not imitation (for best flavor).
Easy Instructions
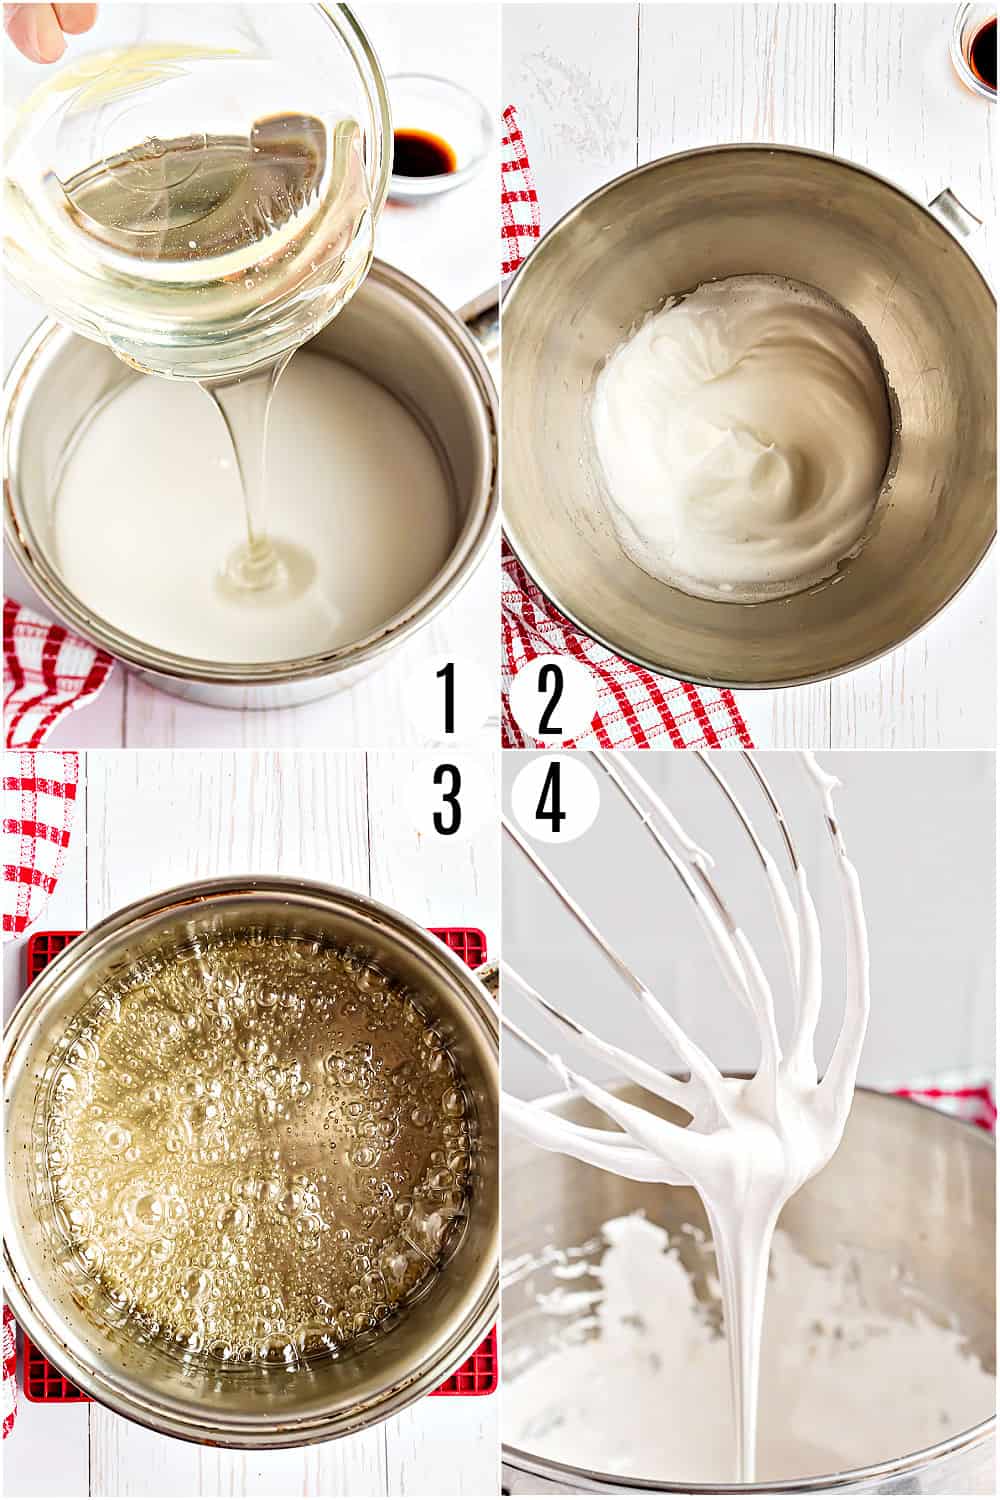
- Make the syrup. Combine water, sugar, and corn syrup in a saucepan and cook over medium-high heat, stirring continuously. Once the mixture is smooth, stop stirring and cook until you reach 240°F on a candy thermometer. This process will probably take about 10-15 minutes, and you’ll notice the mixture transition from cloudy to clear and then golden.
- Create soft peaks. Beat egg whites, cream of tartar, and salt in a stand mixer for about 2-3 minutes until soft peaks form. The mixture will transition from translucent and foamy to an opaque white color. Turn off the mixer and lift the whisk out to test for soft peaks. Point the whisk up, and the mountain-top-like peak should gently fold over.
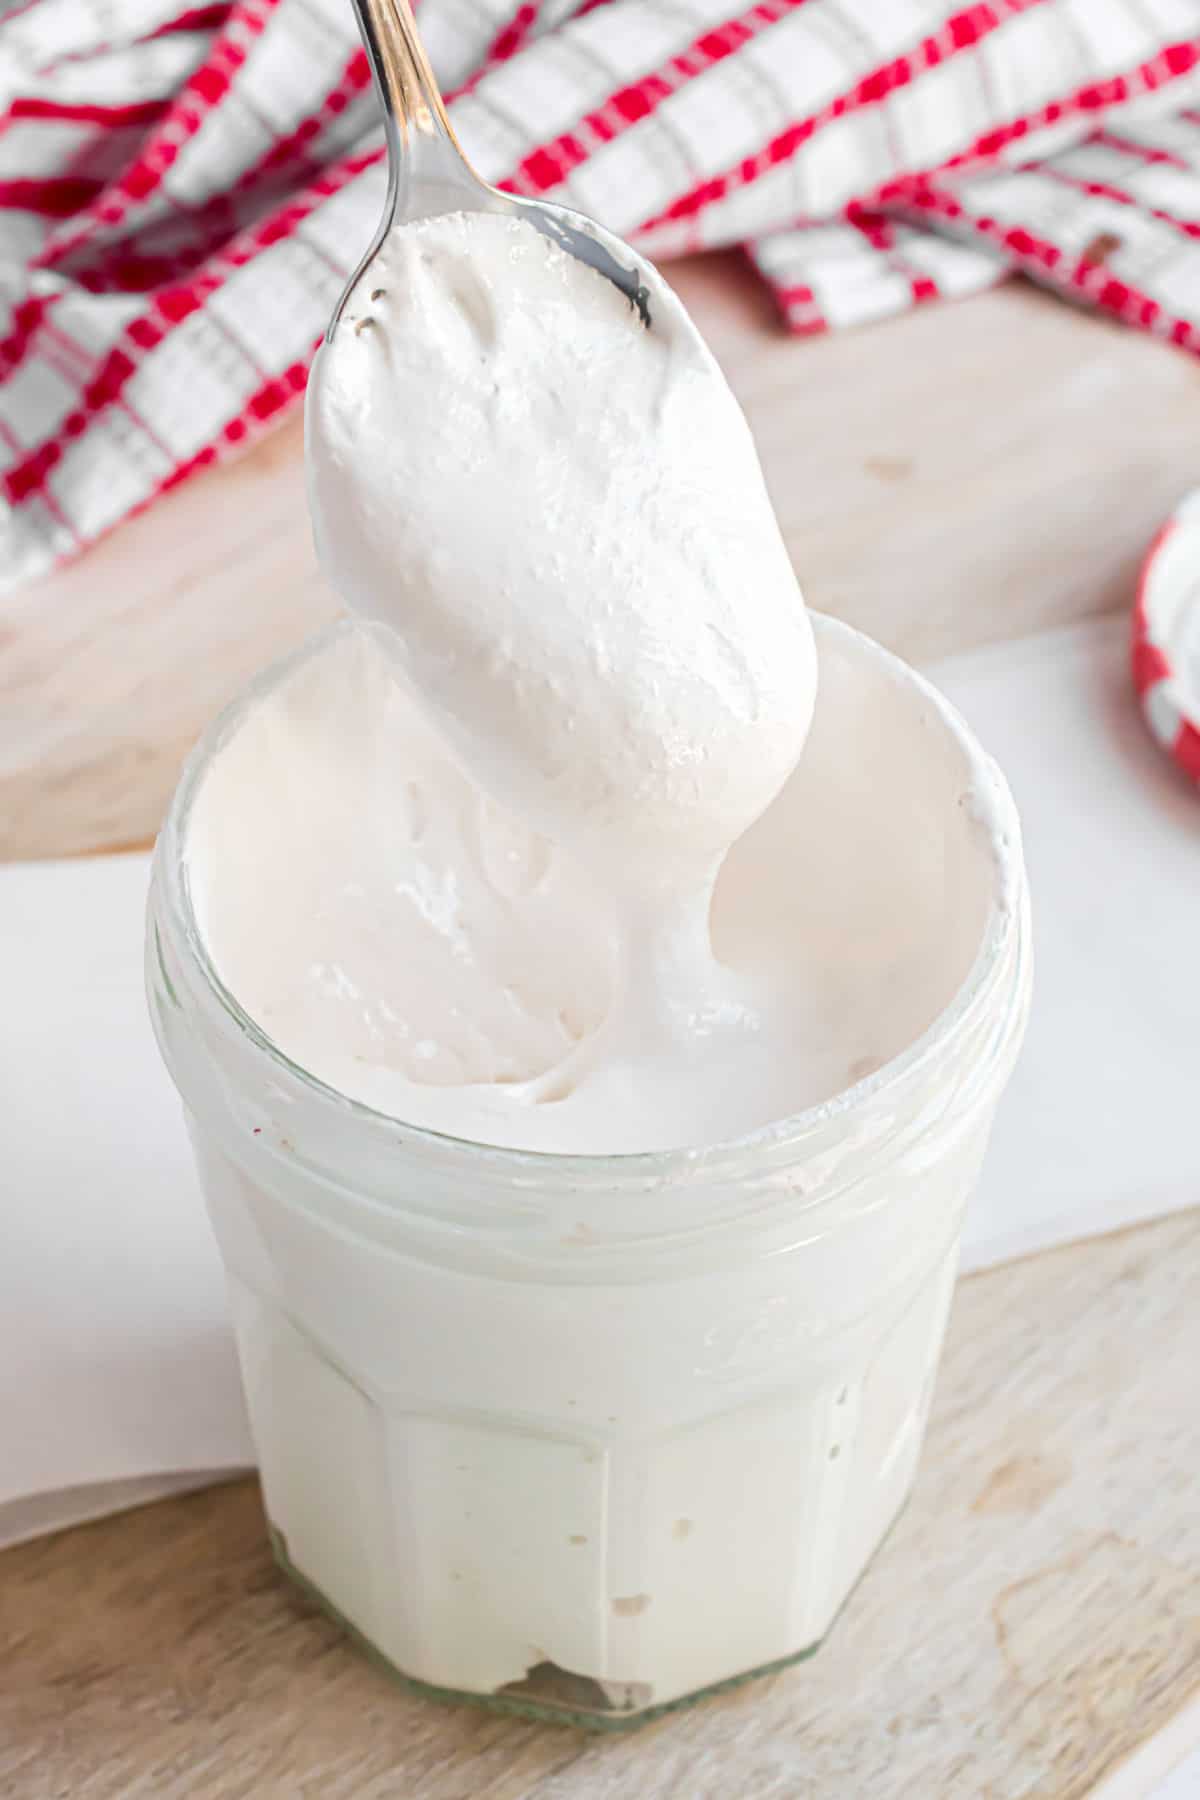
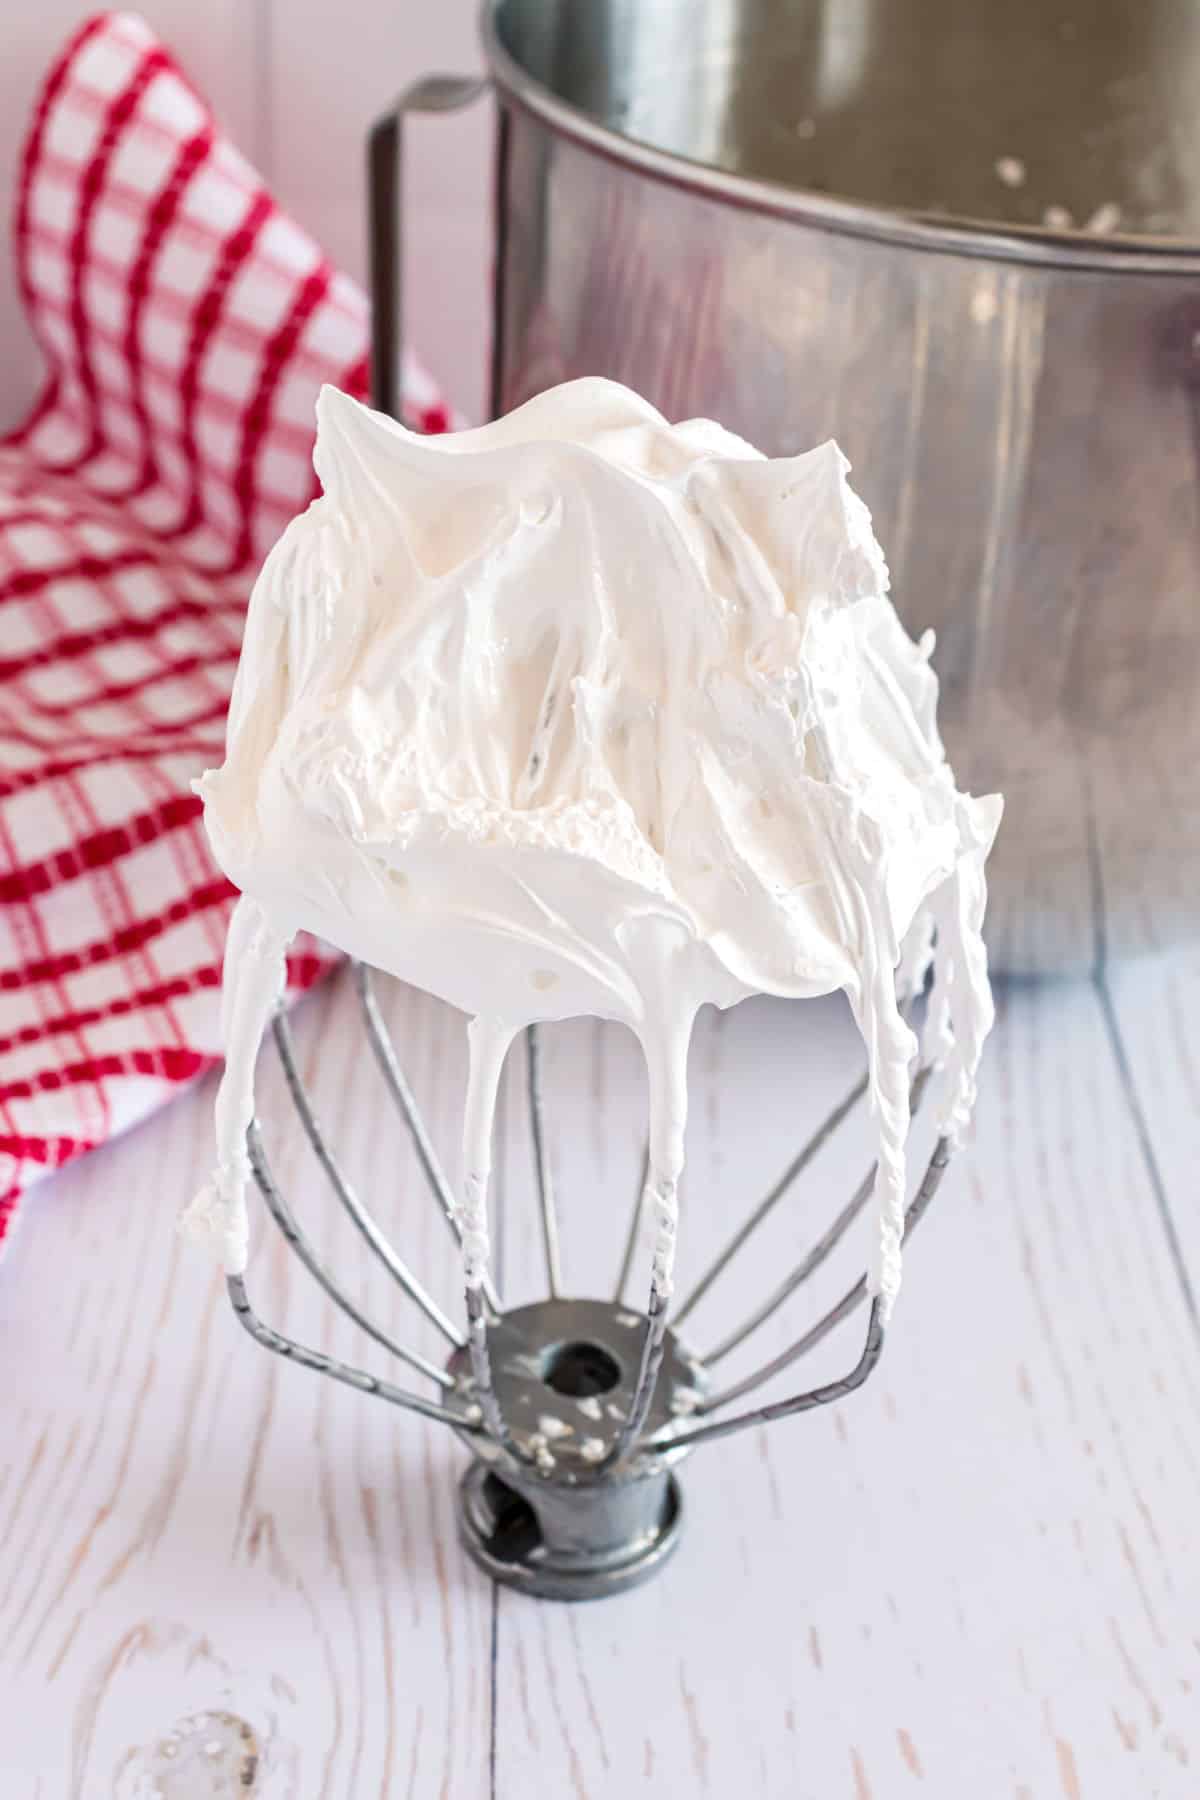
- Stream in the hot sugar to create fluff. With the mixer on low, gently stream the hot sugar into the beaten egg whites. After all the liquid is incorporated, switch the mixer to high and whip for 7-9 minutes. Add the vanilla in the last 2 minutes of whipping. Once the mixture is fluffy, glossy, and has doubled or tripled in volume, you’re done!
Tips and Tricks
- Stop stirring the syrup as soon as the sugar dissolves. When melted sugar splashes onto the sides of the pot, it loses its moisture content and will start to recrystallize. This can trigger a chain reaction and cause the entire pot to crystalize and “seize.” Avoid this by stopping stirring as soon as all the sugar dissolves.
- A stand mixer is essential to nailing this recipe. You can’t incorporate the same air volume with a hand mixer, so the fluff turns out thinner and runnier. Plus, a hand mixer yields about 2 cups less fluff than a stand mixer. You’ll get a good arm workout, but you won’t get the same thick luscious results.
- Use a candy thermometer. A candy thermometer is essential to ensure your fluff turns out every time when cooking the sugar. If it doesn’t get hot enough, the fluff won’t come together; if it’s overcooked, it’ll become hard or caramelized.
- Use it in baking. We love using this homemade fluff in our fudge recipes. Swap out the marshmallows in our rice krispie treats for fluff instead!
Serving Suggestions
I guarantee that once you have a lick of this Homemade Marshmallow Fluff, you won’t be able to restrain yourself from adding it to everything. But if you’re looking for inspiration, check out these must-try ideas.
- Fluffernutter sandwich. Spread a thick layer of your favorite peanut butter and a scoop of this marshmallow cream onto some warm, Homemade Bread, and get ready to indulge! Or, swap the peanut butter for Nutella if you’re craving chocolate.
- S’mores need three essential ingredients: graham crackers, chocolate, and marshmallow. Try swapping the marshmallow in some of these S’mores recipes with fluff and discover your new favorite dessert.
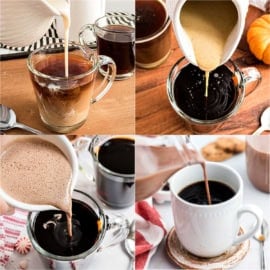
- Drinks. Use the fluff to top your favorite beverage treats! It’s a delicious crowning for a Mocha Latte, Nutella Coffee Milkshake, or Brown Sugar Latte.
Recipe FAQs
There aren’t preservatives in homemade fluff like in the store-bought kind. Store your fluff in an airtight container in the refrigerator. It’ll stay fresh for 2 weeks. You can use it from the jar or whip it again if you want that extra-fluffy volume.
I recommend storing your marshmallow cream in the freezer! The high sugar content prevents the fluff from freezing solid. So you can still use it from the jar or re-whip it immediately after removing it from the freezer. The extra-cold temperature will preserve the freshness longer than the fridge. When stored in an airtight container, it’ll last up to 3 months in the freezer.
Regular marshmallows contain gelatin for stability and to help them maintain their shape. Marshmallow Fluff and Marshmallow Creme are virtually the same and don’t include this ingredient. Without gelatin, they’re soft, spreadable, and closer to a whipped topping consistency with more stickiness.
More Baking Basics You’ll Love
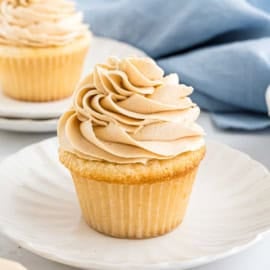
- The BEST homemade Vanilla Frosting to add to your favorite cupcakes or cakes!
- Learn How to Zest a Lemon to add to this easy homemade lemon cake!
- This creamy, rich, homemade Chocolate Ice Cream will never have you buying store bought again!
- Scotcheroos are an easy, no-bake, homemade granola bar! Make these easy treats for your kids lunches this week!
- Learn How to Make Fudge easy with these step by step pictures I have!
Pin this now to find it later
Pin It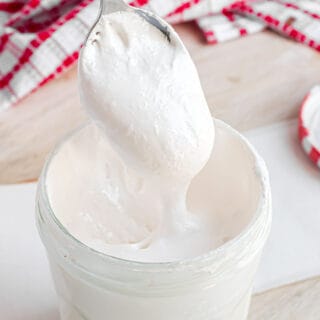
Homemade Marshmallow Fluff
Ingredients
- ½ cup water
- ¾ cup granulated sugar
- ¾ cup light corn syrup
- 2 large egg whites
- ½ teaspoon cream of tartar
- ⅛ teaspoon kosher salt
- ½ Tablespoon vanilla extract
Instructions
- In a medium saucepan, combine water, granulated sugar, and corn syrup. Heat over medium-high heat and stir until the sugar is dissolved.
- Stop stirring and continue to heat until the mixture reaches 240℉. Remove from heat.
- In the bowl of a stand mixer, beat egg whites, cream of tartar, and salt until soft peaks form, about 2-3 minutes.
- While mixing on low, slowly add the sugar syrup mixture. Once all the liquid has been added, mix on high for 6-7 minutes, adding the vanilla during the last minute or two of mixing. The mixture will become fluffy and glossy.
Notes
- Store marshmallow fluff in an airtight container, in the refrigerator, for up to 2 weeks. This mixture can be used immediately or whipped again after storing.
- Marshmallow fluff can be frozen. Due to the high sugar content in marshmallow fluff, the mixture doesn’t freeze solid. But it will get cold enough to preserve the freshness. Store in an airtight container for up to 3 months.
- The mixture will be white and cloudy at first until the sugar dissolves in the saucepan. After heating for a few minutes, the syrup mixture will bubble, be clear, and then change to a more golden color as it approaches the 240℉ mark. Heating the syrup mixture to 240℉ will take between 10-15 minutes. Be sure to monitor the syrup carefully, and don’t heat it past the soft ball or 240℉.
- What are soft peaks? When whipping the egg whites, they will become foamy first, and then the mixture will become opaque and white. When the beaters are held upright, the egg mixture will point up at first but then begin to melt back down into the rest of the mixture. Make sure your bowl is clean and dry before adding the eggs.
- A stand mixer is essential to nailing this recipe. You can’t incorporate the same air volume with a hand mixer, so the fluff turns out thinner and runnier. Plus, a hand mixer yields about 2 cups less fluff than a stand mixer. You’ll get a good arm workout, but you won’t get the same thick luscious results.
- Use it in baking. We love using this homemade fluff in our fudge recipes. Swap out the marshmallows in our rice krispie treats for fluff instead!