
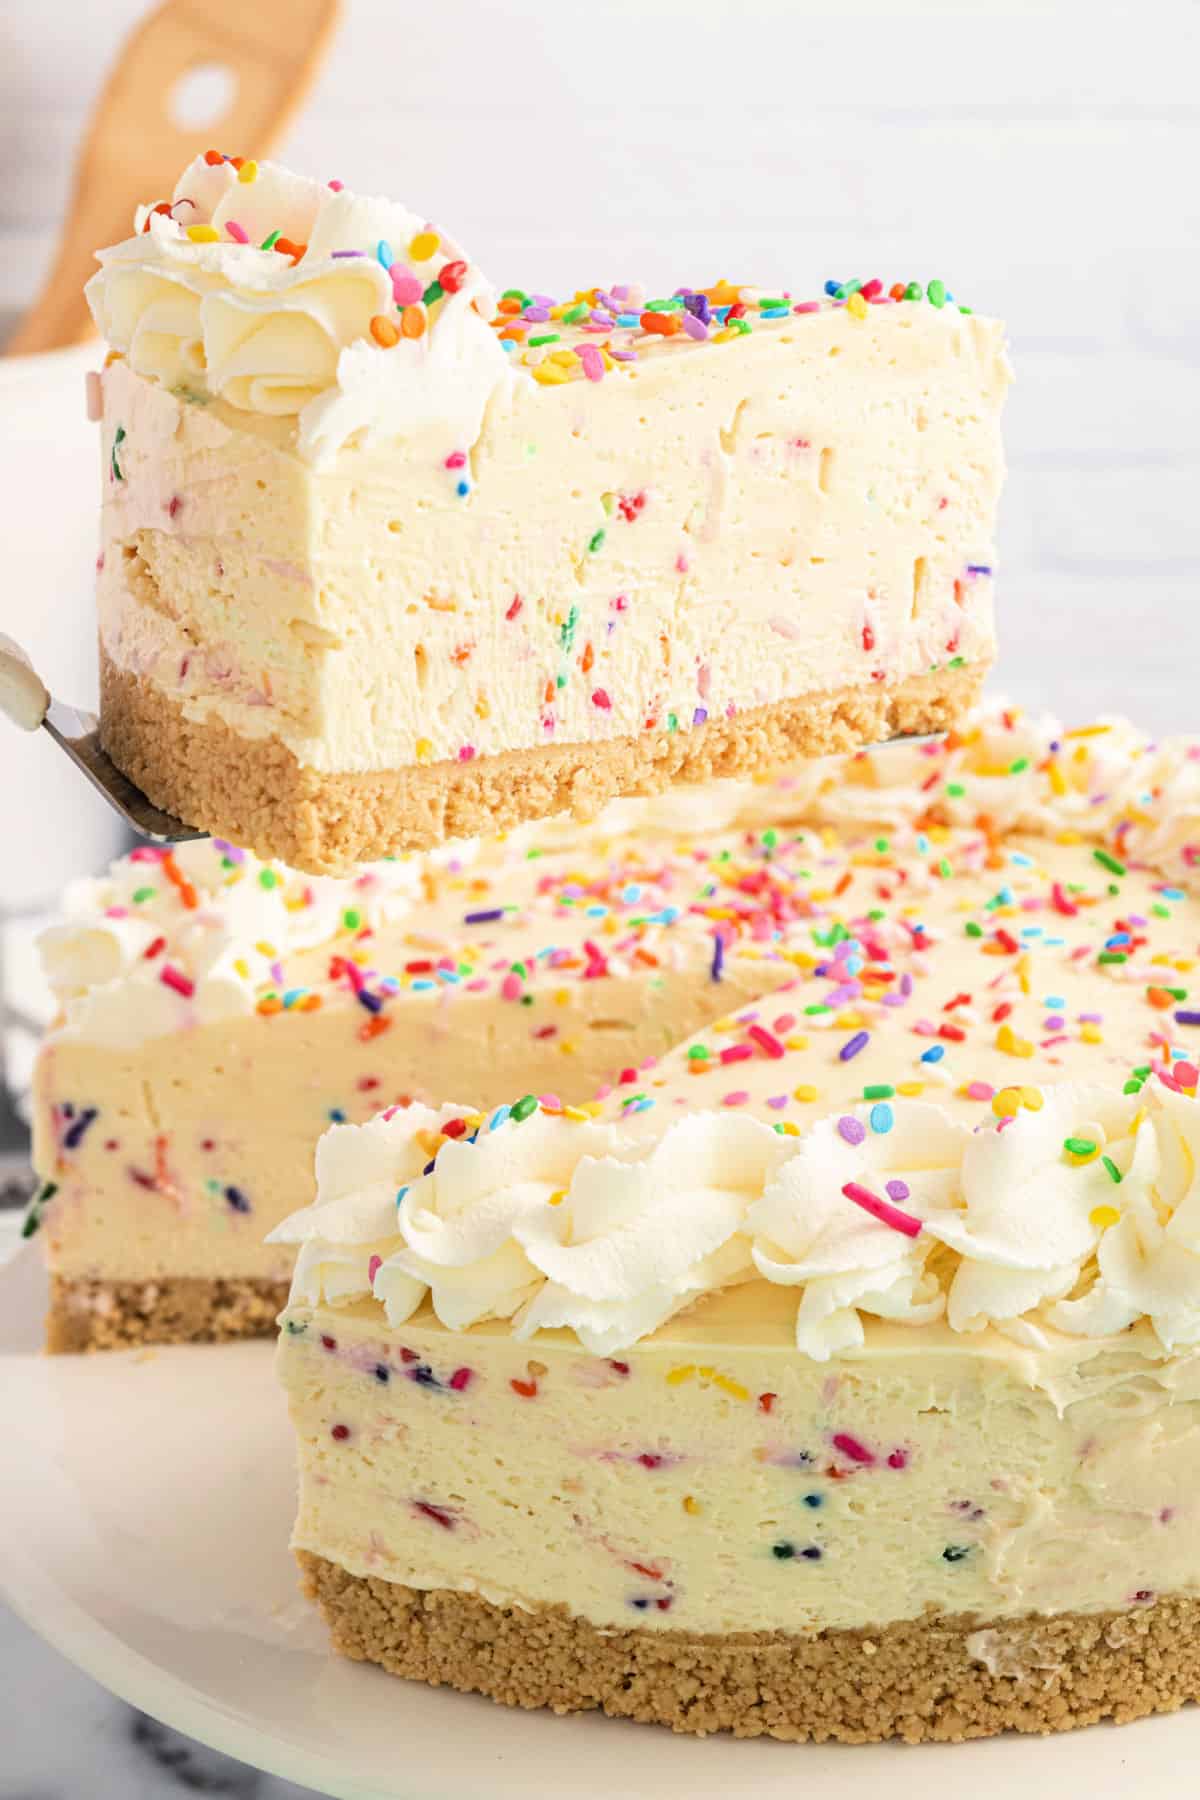
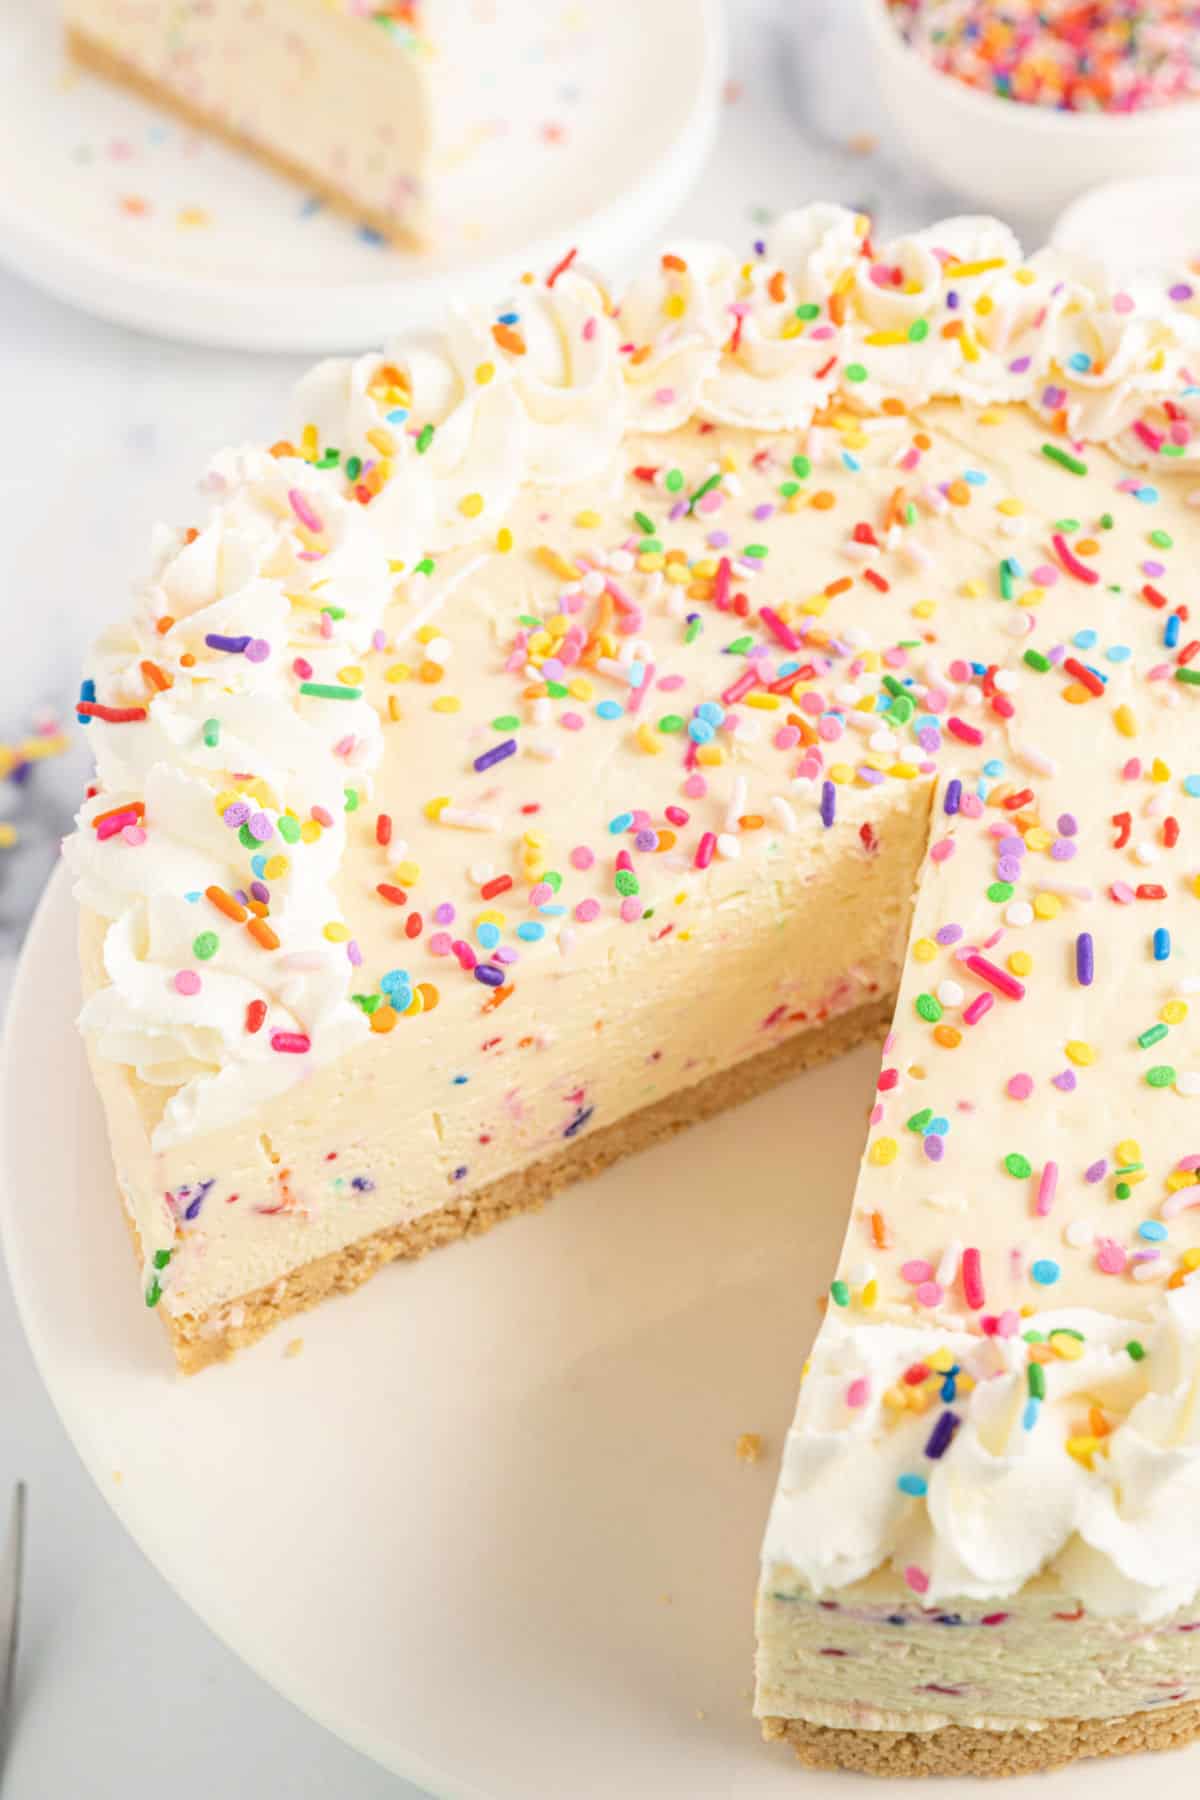
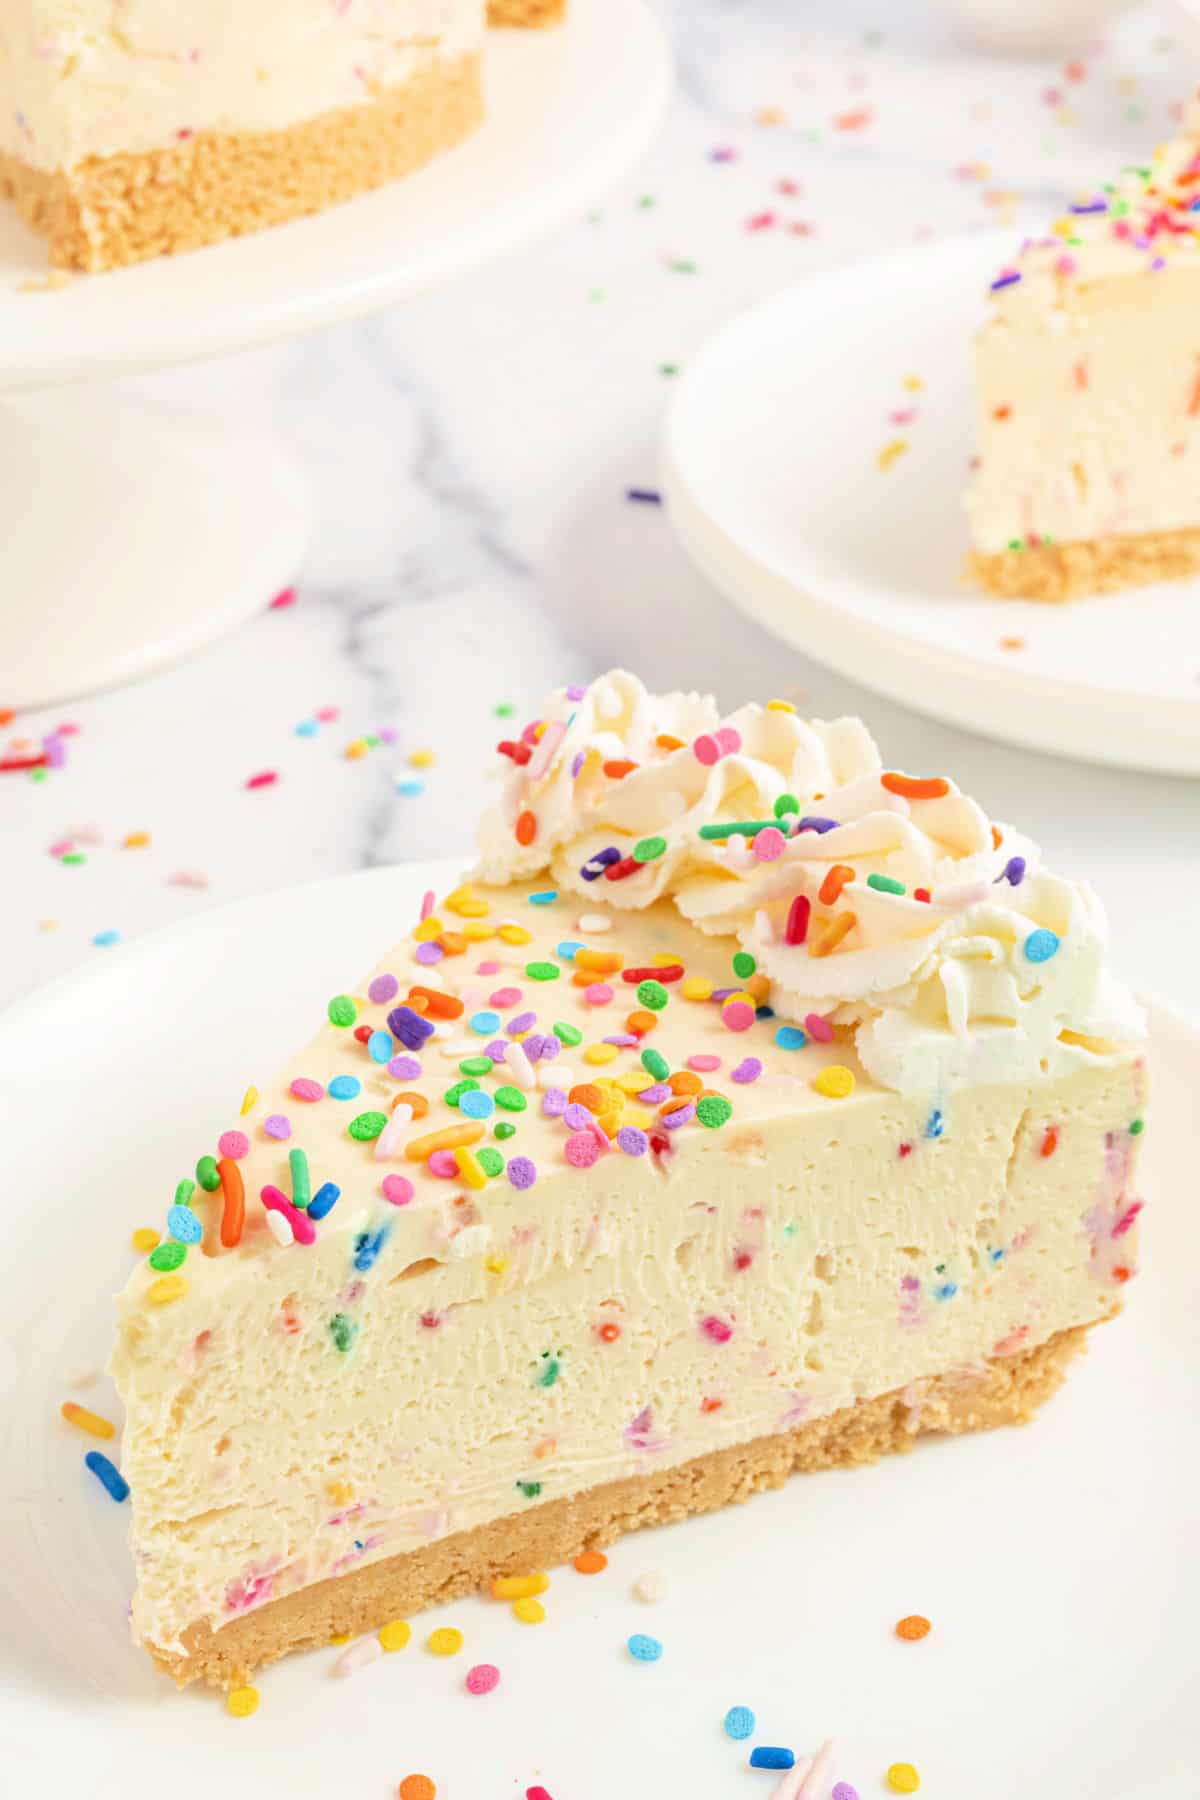
Funfetti No Bake Cheesecake with a golden Oreo crust and luscious, creamy, colorful funfetti filling makes for a magical dessert perfect for any celebration!
Why This Recipe is Best
Cheesecake is always such a refreshing, creamy dessert and it’s appropriate any time of year! And today’s version really brings the FUN in funfetti!
Cause who doesn’t love to add sprinkles to their dessert? This no bake cheesecake would be great for birthdays, parties, holidays and any other celebrations.
Our funfetti cheesecake is delicous, and today we make an easy no bake version!
- No baking needed! The crust AND the filling are both no bake.
- Served in a cookie crust made with golden Oreos.
- The thick, rich cheesecake layer is made with cake mix and melted white chocolate.
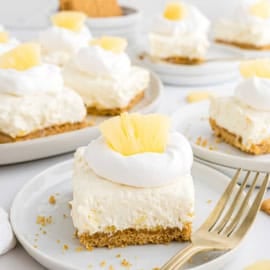
If you love creamy no bake desserts, be sure to try our no bake strawberry cheesecake next. Or give our creamy dirt cake recipe a try for your next party!
Ingredient Notes
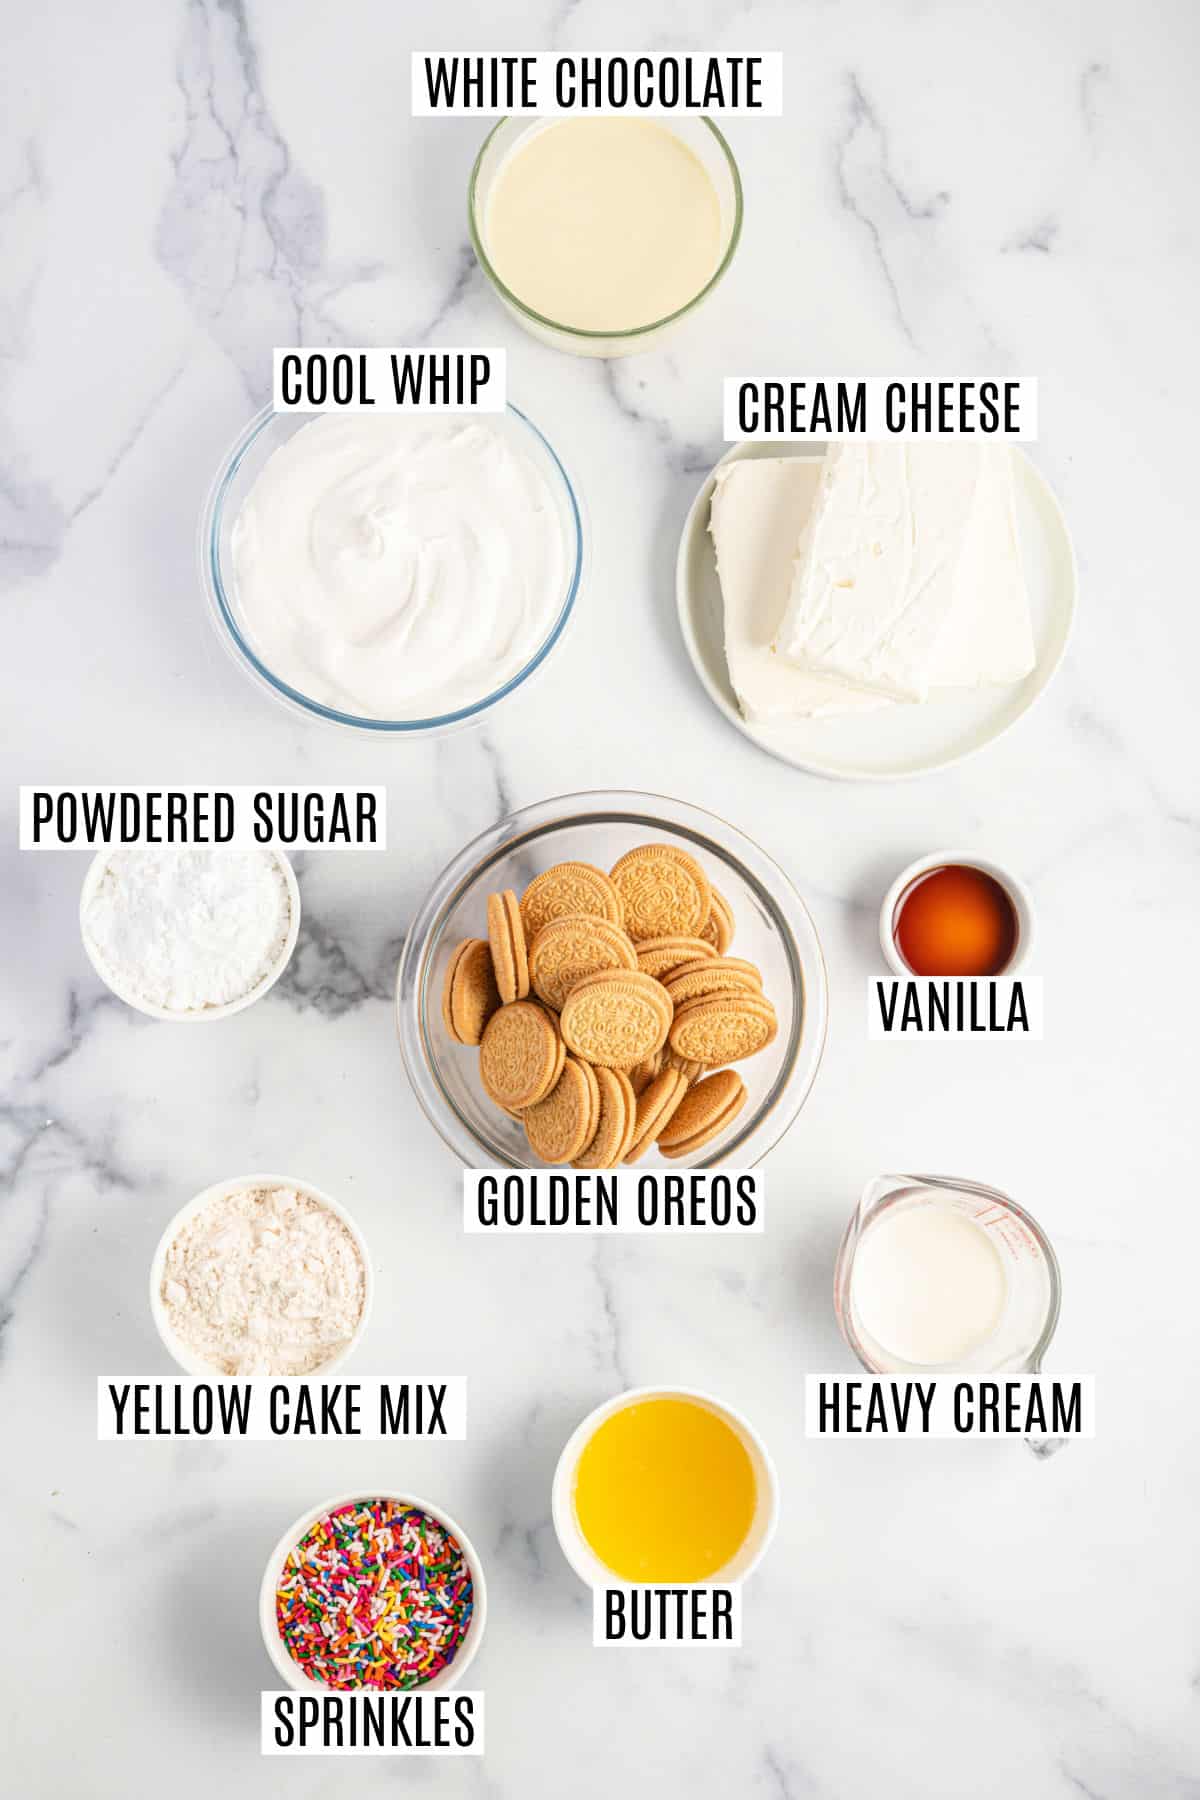
- Oreos – I love the buttery sweetness from the golden Oreos in the crust, but you could also use a regular graham cracker crust or make a crust with Nilla wafers or regular chocolate Oreos.
- Cream Cheese – Make sure to use the full fat variety and let it soften on the counter for a few minutes so it’s easier to blend. Also, be sure to use the block cream cheese, not the kind in the tub.
- Heavy Whipping Cream – The heavy cream should be kept COLD in the fridge until you’re ready to add it to your mixing bowl.
- Yellow Cake Mix – For safety concerns, you may want to heat treat the cake mix, using our guide on how to heat treat flour. It only takes 5 minutes!
- White Chocolate – Use a good quality white chocolate for the best taste.
- Cool Whip – The whipped topping is added to the cream cheese for a lighter cheesecake consistency. My homemade Stabilized Whipped Cream works if you don’t want to use the store bought stuff!
- Sprinkles – I recommend using rainbow nonpareils or jimmies to keep the colors from melting in the cheesecake.
Easy Instructions
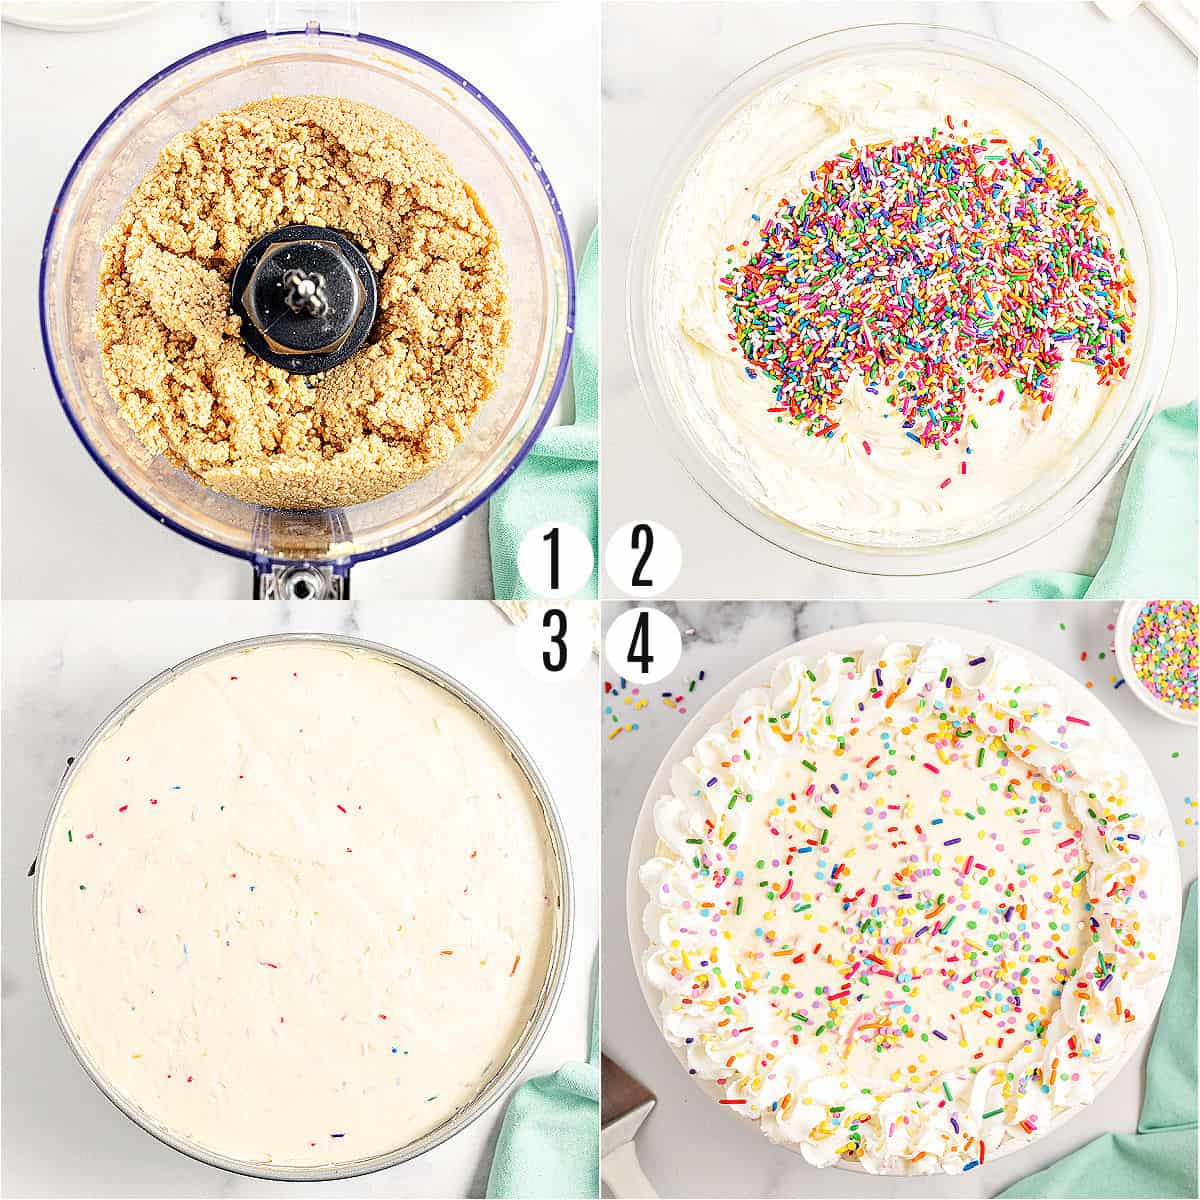
STEP 1. Make the crust. Process the Golden Oreos into fine crumbs in a food processor then stream in the melted butter until the crumbs are well coated. Firmly press the crumbs into the bottom of a 9-inch springform pan and place the crust in the freezer.
STEP 2. Make the filling. Blend the cream cheese, powdered sugar, vanilla extract and heavy whipping cream in a large bowl until smooth. Mix in the cake mix, then add in the melted white chocolate and mix until the filling is thick and smooth. Fold in the Cool Whip, then add the sprinkles and stir until they are evenly distributed.
PRO TIP: Use the least number of strokes possible to stir in sprinkles. The more you stir, the higher chance they will “bleed” colors.
STEP 3. Assemble and chill. Spoon the cheesecake filling over the cookie crumb crust and smooth it out evenly. Cover and refrigerate for at least 4 hours; overnight is best.
STEP 4. SERVE. Slice, serve and enjoy!
Tips and Tricks
- Freeze the crust while you make the filling. The freezing helps the crust firm up so it won’t become mushy when you add the cheesecake filling on top.
- Use softened, room temperature cream cheese for the creamiest, smoothest filling. Use our tips and tricks on how to soften butter for best results.
- Be sure to chill for at least 4 hours so you can easily slice the cheesecake. Overnight is really best if you have the time!
- Toppings: Add some extra whipped cream and sprinkles to the top of the cheesecake for a fun presentation!
RECIPE TIP: Our lemon whipped cream pairs beautifully with this delicious no bake treat.
Recipe FAQs
Cover the sprinkles cheesecake with plastic wrap and store in the refrigerator for up to 4 days.
Yes, this dessert freezes well! Cover the cheesecake with both plastic wrap and foil to prevent freezer burn, then store it in the freezer for up to 2 months. Thaw the cheesecake overnight in the refrigerator before serving.
Sure! If you prefer, you can use a homemade graham cracker crust, Nilla wafers or use regular chocolate Oreos to make the crust. A store bought graham cracker crust works well too if you prefer.
More Easy Dessert Recipes
See all Desserts recipes
Pin this now to find it later
Pin It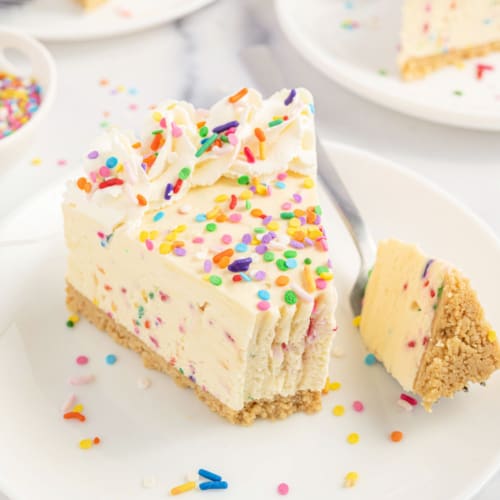
Funfetti No Bake Cheesecake
Ingredients
For the Crust
- 25 Golden Oreos
- 6 Tablespoons unsalted butter, melted
For the Filling
- 3 packages cream cheese, softened (8 ounce each)
- 1 cup powdered sugar
- 2 teaspoons vanilla extract
- ¼ cup heavy whipping cream
- 1 cup yellow cake mix, dry
- 2 packages white chocolate baking bars, melted (4 ounce each)
- 1 container Cool Whip, thawed (8 ounce)
- ½ cup rainbow sprinkles
Instructions
For the Crust
- Use a food processor to process the Golden Oreos into fine crumbs. Slowly pour in the melted butter while the processor runs at low speed until the crumbs are well coated.
- Firmly press the Oreo crumbs into the bottom of a 9-inch springform pan, then place the crust in the freezer while you make the filling.
For the Filling
- Blend the cream cheese, powdered sugar, vanilla extract, and heavy whipping cream in a large bowl with an electric mixer until smooth. Mix in the yellow cake mix, then add in the melted white chocolate and continue mixing until the mixture is thick and smooth.
- Fold in the Cool Whip, then add the sprinkles and stir until they are evenly distributed in the filling.
- Spoon the cheesecake filling over the cookie crumb crust, and smooth it out evenly.
- Cover the cheesecake with plastic wrap and chill in the refrigerator for at least 4 hours, but overnight is best.
Notes
- For safety concerns, you may want to heat treat the cake mix, using our guide on how to heat treat flour. It only takes 5 minutes!
- I recommend using nonpareils or jimmies to keep the colors from melting in the cheesecake.
- Refrigerator: Use plastic wrap to cover the cheesecake, and store it in the refrigerator for up to 4 days.
- Freezer: Freeze for up to 2 months! Cover the cheesecake with both plastic wrap and foil to prevent freezer burn, then store it in the freezer. Before serving, thaw the cheesecake overnight in the refrigerator.
- See blog post for more recipe tips and tricks.

I am happy to see the cake mix being heat treated! There have been too many episodes of bacteria in flour now to be safe. I will be making this as soon as I get some cream cheese. It looks delicious.
Thank you, enjoy!