
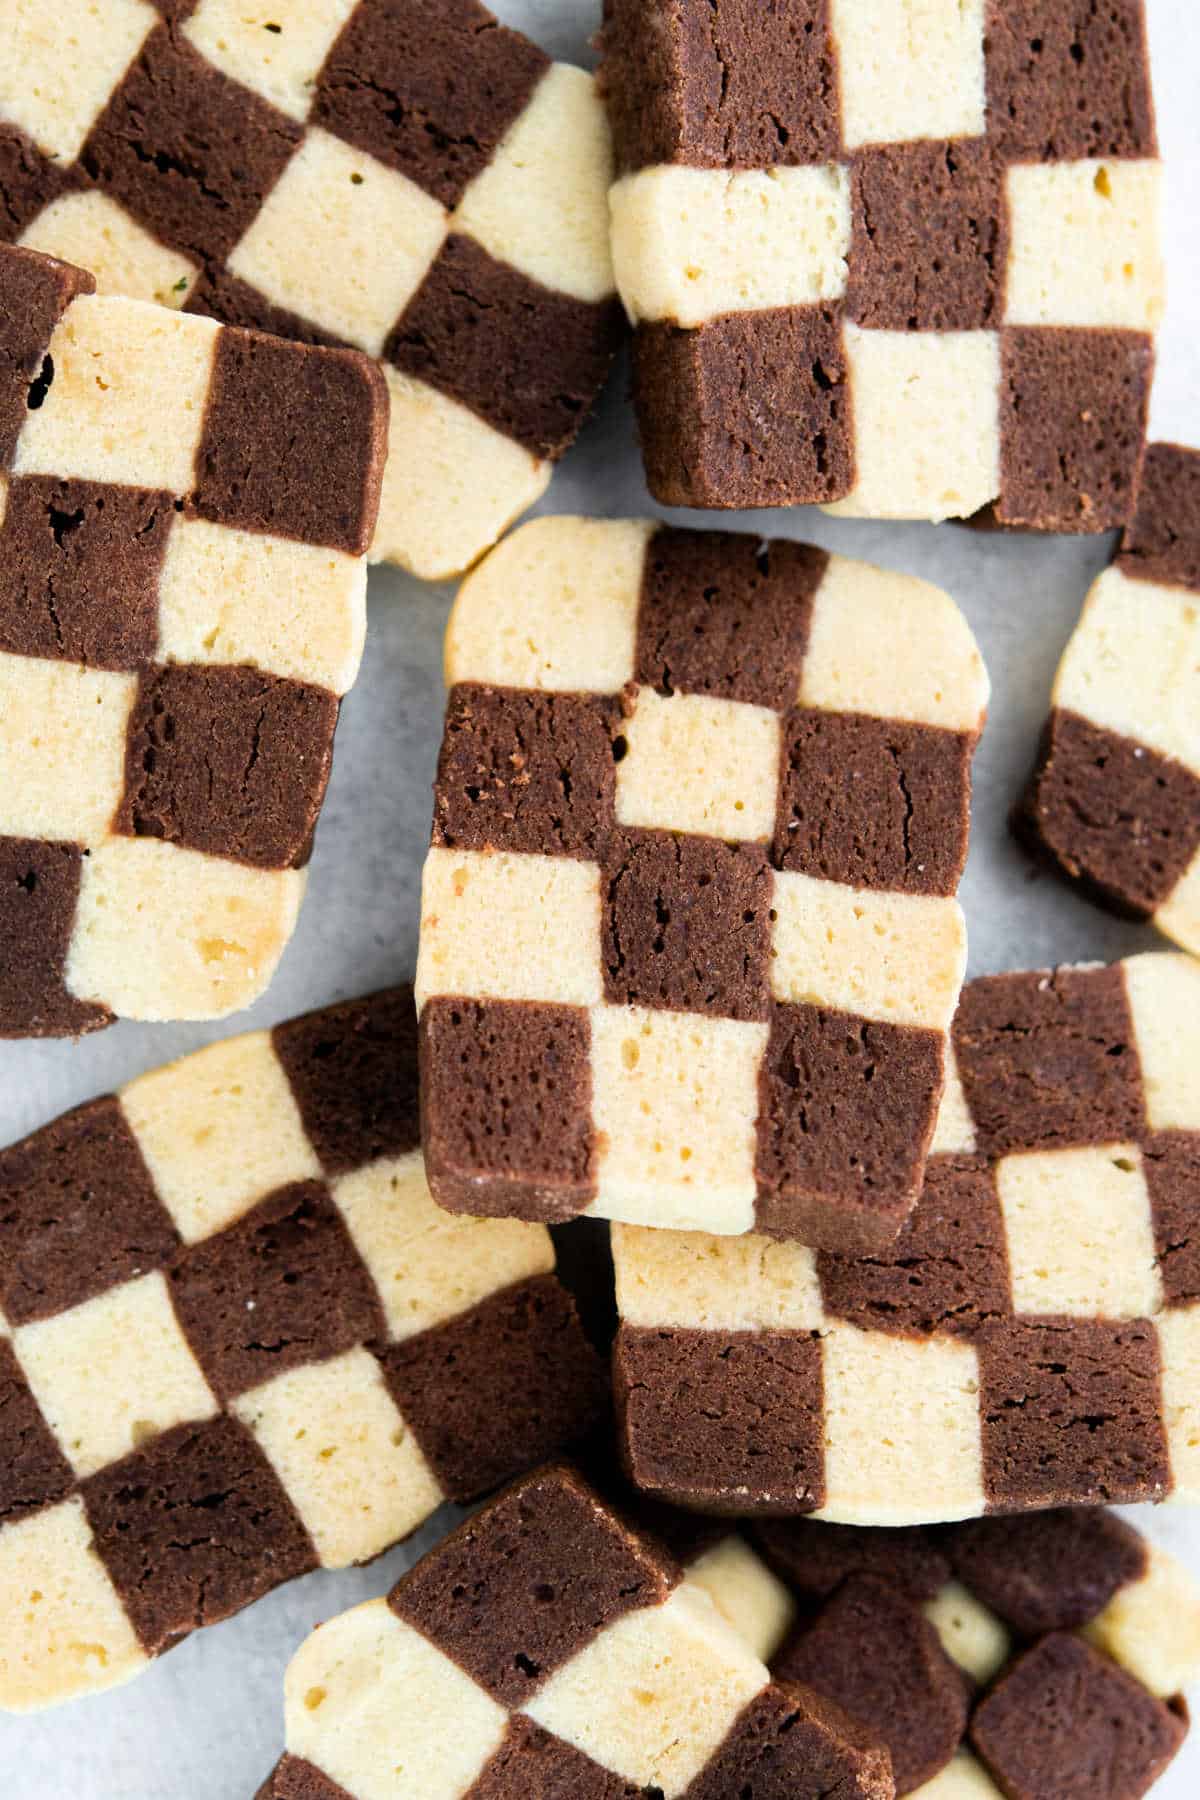
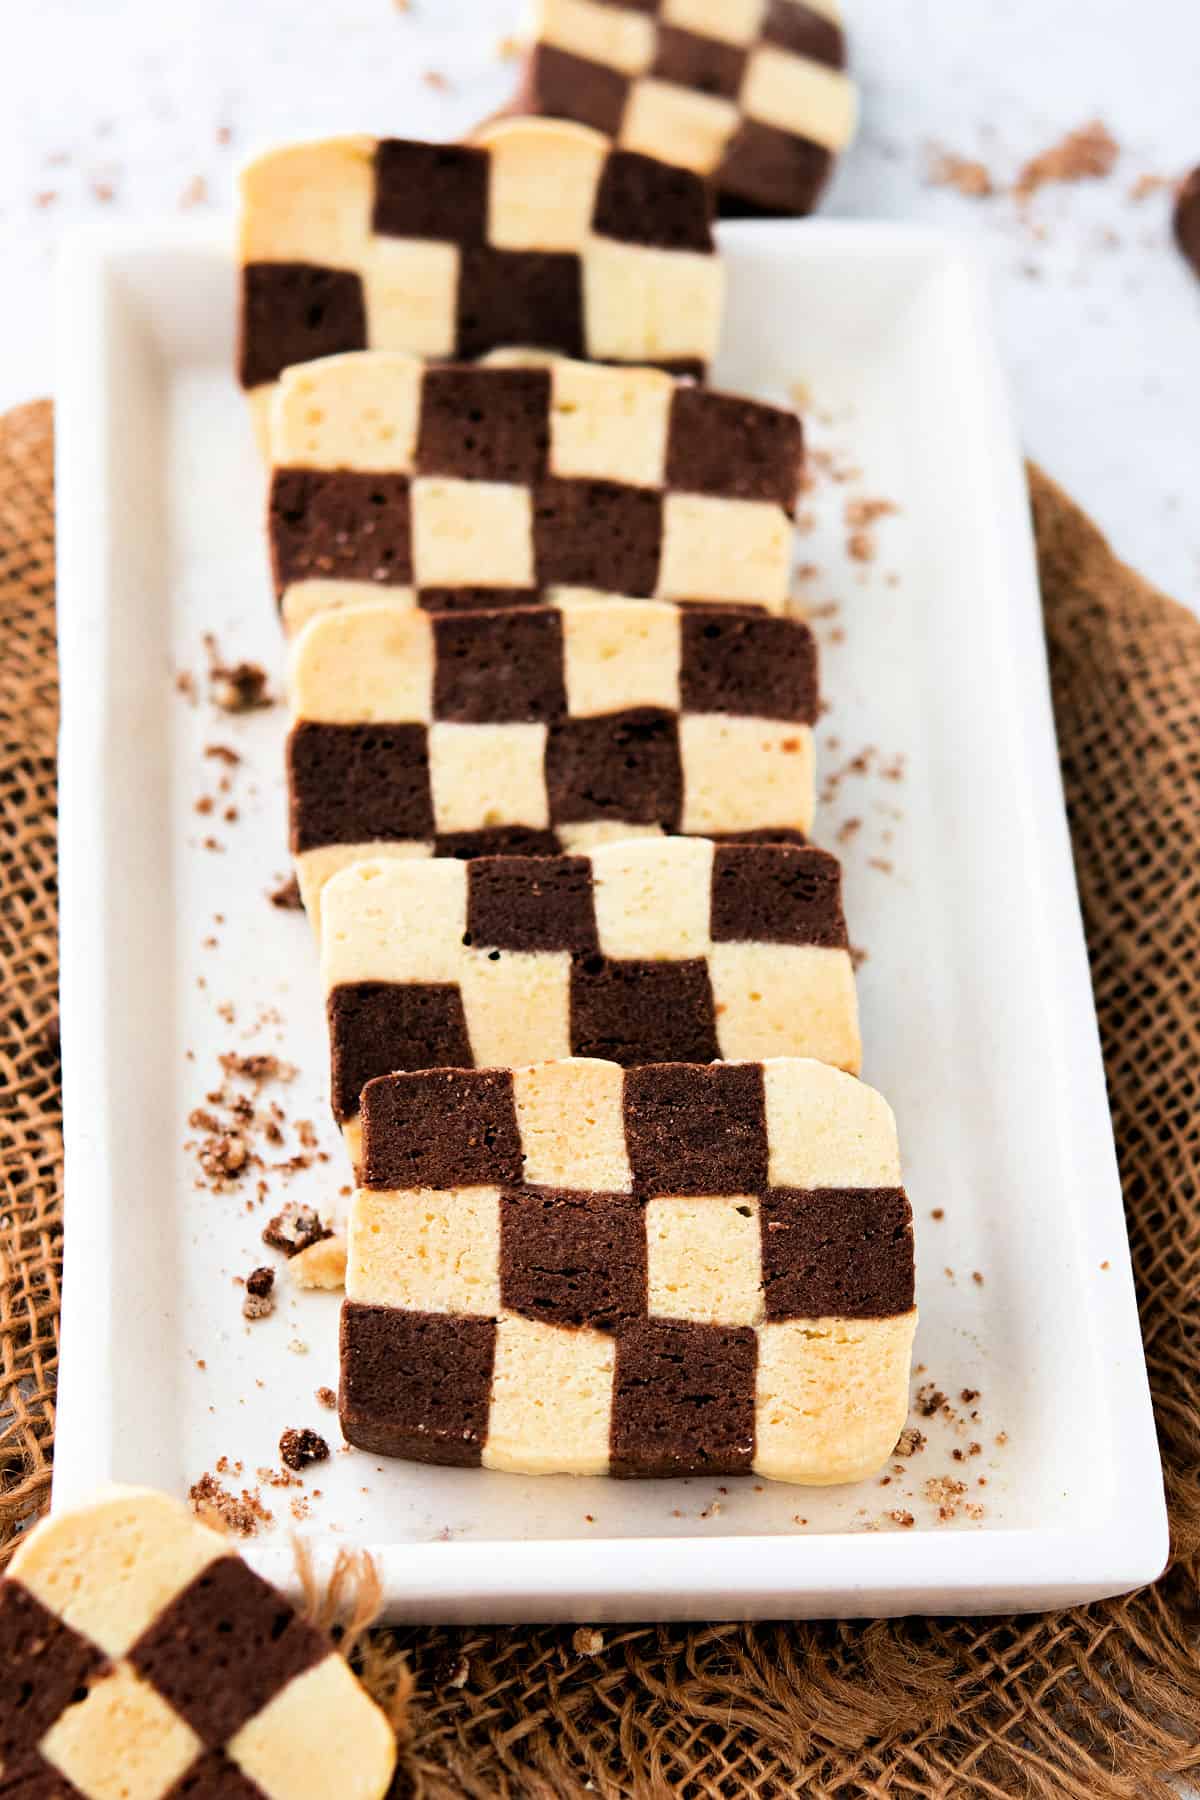
Besides offering a beautiful pattern, these Checkerboard Cookies give both vanilla and chocolate cookie in one. They’re soft butter cookies with a fun and festive look.
Why Checkerboard Cookies Work
I love making Checkerboard Cookies when a friend is dropping in for coffee and a catch-up. The pattern adds a level of “sophistication” to the experience, even though they aren’t very difficult to make.
- Make the dough ahead of time. You can make and freeze the dough at the start of the month, and all you have to do is pop it in the oven before guests arrive.
- Decorative and snackable. This recipe can be as much decor as it is delicious. It’s got the perfect combo of soft chocolate and vanilla, so put it on a nice plate because they’ll be gone before you know it.
- It’s fun to make with kids. This recipe is a great way to squeeze in quality time with your kids. Besides getting their hands dirty, I’ve found that kids love the way the pattern comes together.
If you love butter cookies and shortbread cookies, you’re going to LOVE checkerboard cookies!
Ingredient Notes
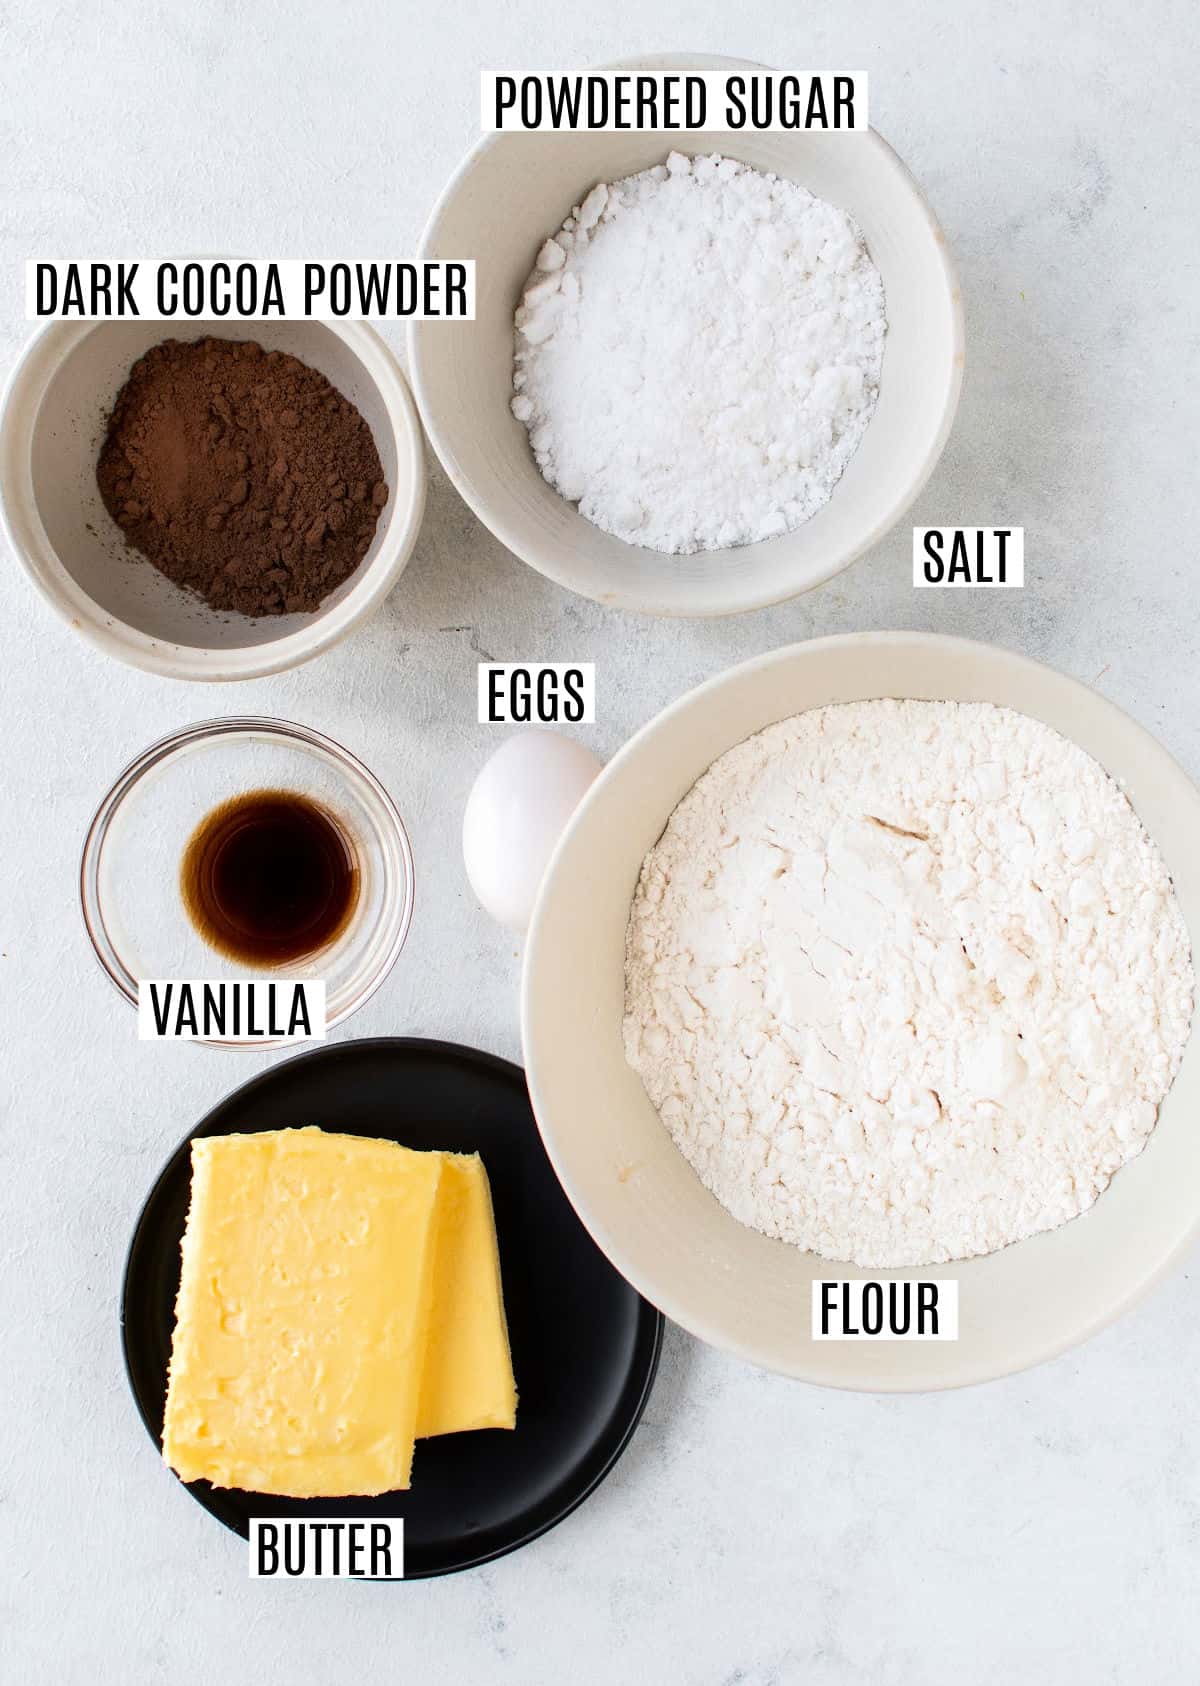
- Unsalted Butter – This recipe uses soft, room-temperature butter as it makes the creaming process quicker. If you forgot to set the butter out in advance, check out my tips on how to soften butter quickly.
- Powdered Sugar – creates a sweetness, without gritty texture.
- Eggs – binds the dough!
- Vanilla Extract – It’s the main flavor for the white part of the cookies. Use “pure” vanilla extract for the best flavor. You can make your own using my homemade vanilla extract recipe.
- Flour – All-purpose flour works best in this recipe and delivers the ultimate butter cookie consistency.
- Cocoa Powder – Use unsweetened and dark cocoa powder for an intensely rich chocolate flavor.
- Egg White – Use a room-temperature egg white as it helps the dough stick properly. This prevents the cookies from separating while baking. Save the egg yolk for homemade lemon curd.
Easy Instructions
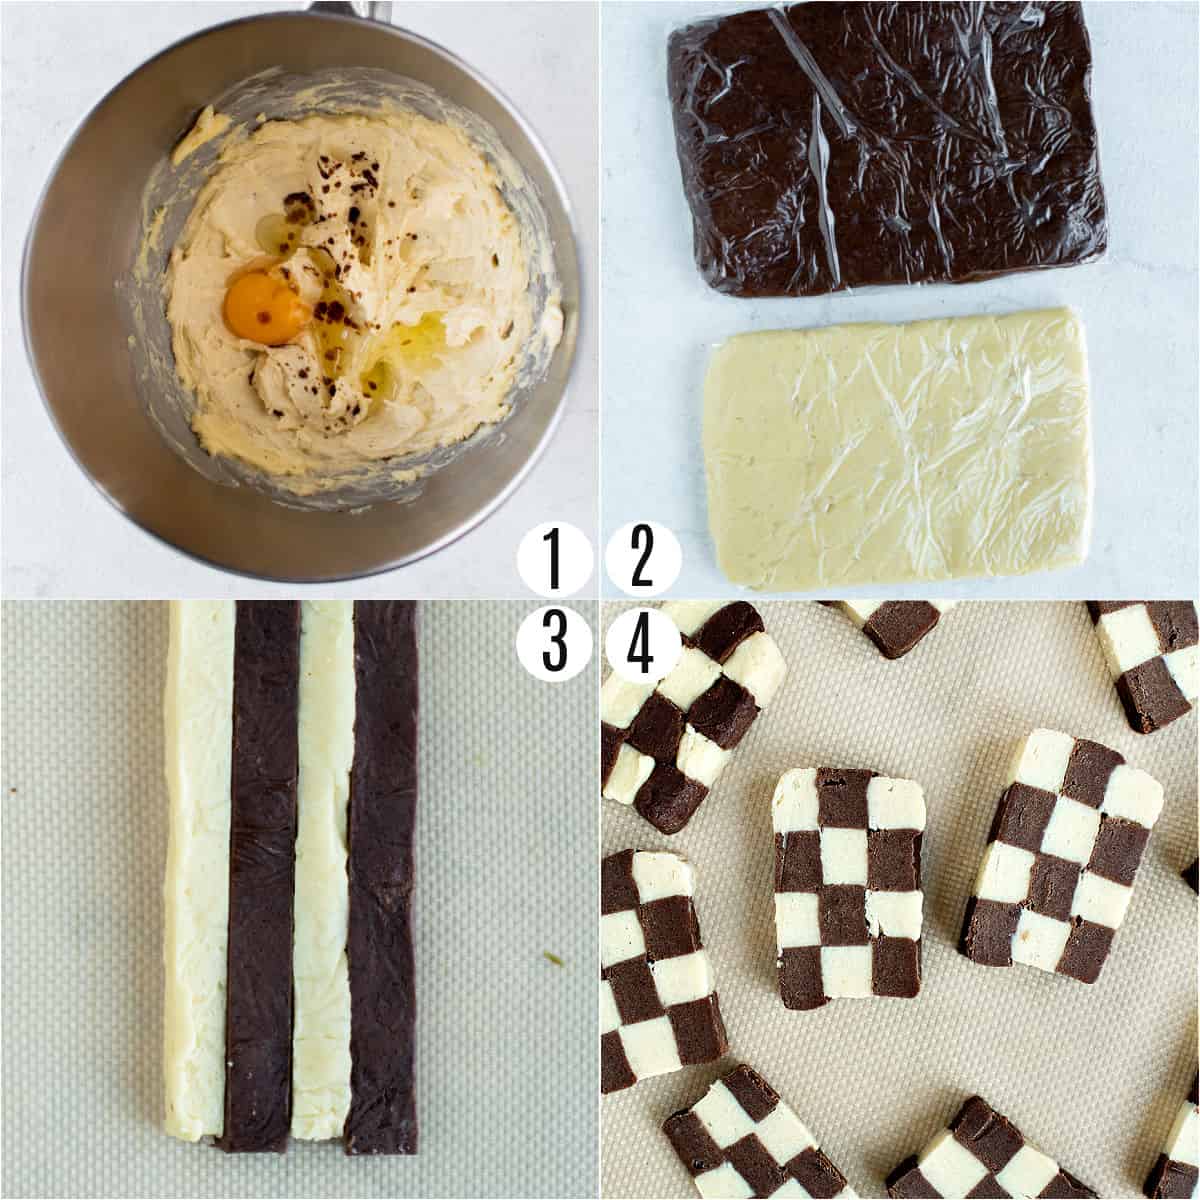
- Mix the dough. Cream the butter and sugar before adding eggs and vanilla. Then divide the mixture into two bowls. Add half the dry ingredients to one bowl. Then add the other half to the second bowl along with the cocoa powder. Mix until you get two sets of dough.
- Shape the cookies. Individually plastic wrap the two doughs. Press and shape them into rectangles and refrigerate. Once it’s cool, cut it into strips and assemble into a checked pattern. Using egg white will help them stick together. Wrap again and refrigerate.
- Cut the cookies. Unwrap the dough and cut it into ½-inch thick slices.
- Bake and cool. Bake at 350°F for 13-15 minutes. Then cool them on the cookie sheet for a few minutes and transfer them onto a wire rack.
Tips and Tricks
- Don’t overbake the cookies. The vanilla part of the cookies will get lightly browned. But don’t let the edges get too dark, or the cookies will lose their beautiful contrasting checks.
- Use a sharp knife to cut the cookie dough. Using a dull knife can compress the layers and blur the checkerboard pattern of the cookies. For a clear checkerboard pattern, use a sharp knife.
- Use a mixer. Creaming the butter and sugar by hand can be tedious and time-consuming. Use a hand or stand mixer to save time and aerate it properly.
- Chill the dough fully. Don’t be impatient while chilling the cookie dough. If you want a neat checkerboard pattern, this step is essential. It will also prevent the cookies from losing shape while baking.
- Use a ruler. Both doughs must be equal in shape and size. A ruler will help you get a neat checkerboard pattern. Measure out even strips.
Recipe FAQs
Once the cookies are baked, you can store them in an airtight container at room temperature for up to 5 days.
I wouldn’t recommend freezing the unshaped cookie dough. But you can wrap the assembled cookie dough logs in plastic and then in foil and freeze them for up to 30 days. This is a great way to keep cookies on standby.
The egg white acts as glue for the cookie dough strips. It ensures the strips stick to each other while baking and prevents the cookies from breaking.
Yes. You can make and assemble the cookie dough strips and tightly wrap them in plastic wrap. Then store them in the refrigerator for up to 2 days before baking.
Easy Dessert Recipes
- Baking cookies is my favorite past time. Readers love our lofthouse cookies, chocolate chip cookies, and easy cake mix cookies.
- Haystacks are an easy snack to make with the whole family! Customize with whatever you have on hand!
- Little Debbie makes them too small, I had to make a whole Twinkie Cake! Packed with a sweet cream filling, these are for my sweet tooths!
- This copycat Ding Dong Cake is rich and decadent with the chocolate ganache topping and cream filling!
- A creamy Cheesecake Dip is what you need for any stay home date night! Dip with fruit, crackers, or pretzels!
- Salted Caramel Brownies are proof its okay to be a little salty sometimes! Drizzles of caramel on a fudgy brownie sounds like my type of night!
Best Cookie Recipes
See all Cookies recipes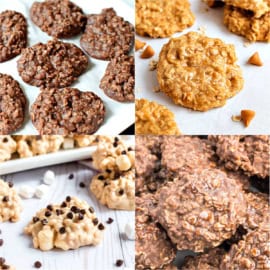

Pin this now to find it later
Pin It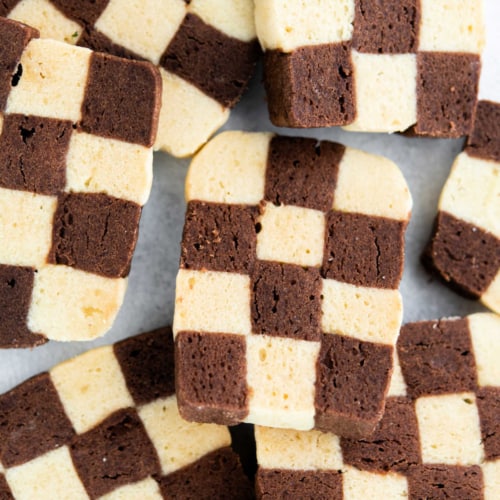
Checkerboard Cookies
Ingredients
- ¾ cup unsalted butter softened
- 1 cup powdered sugar
- 2 large eggs
- 2 teaspoons vanilla extract
- 3 ⅓ cups all-purpose flour divided
- 1 teaspoon kosher salt divided
- 3 Tablespoons unsweetened dark cocoa powder
- 1 egg white
Instructions
- In a mixing bowl, add in butter and powdered sugar and beat at medium speed, scraping down the sides of bowl, for about 2-3 minutes (until mixture is creamy).
- Beat in eggs and vanilla. Divide batter into two bowls. To one bowl of batter, add 1 2/3 cup flour, 1/2 teaspoon salt, and all the cocoa powder. To the other bowl add 1 2/3 cup flour and 1/2 teaspoon salt. Mix each until dough forms.
- Drop dough onto counter that's been dusted lightly with foil. Using plastic wrap, shape dough into a rectangle about 1/4–inch thick (see photos in blog post). Repeat with other bowl of cookie dough.
- Refrigerate dough for 30 minutes.
- Once chilled, cut dough into into strips of about 1/2-inch wide using a sharp knife (or pizza cutter).
- Gently beat one egg white. This will be used to stick the dough strips together. Place one strip of plain dough, brush with egg white on the side and attach a strip of chocolate dough next to it. Repeat so there are 4 strips of dough total on the bottom. Repeat on top of this dough, with alternating strips (so you get the checkerboard pattern). You'll create 3 rows of cookie dough stacked upwards.
- Wrap the stacked dough log with plastic wrap for about 2 1/2 hours (or up to 24 hours). Cookie dough can also be wrapped in plastic then in foil and frozen for up to 30 days.
- When ready to bake, preheat oven to 350 degrees F. Line cookie sheet with parchment paper.
- Unwrap chilled dough and slice about 1/2-inch thick. Place cookies on prepared cookie sheet, about 1 inch apart. Bake for 13-15 minutes, until edges are lightly browned. Allow to cool 5 minutes on cookie sheet, then transfer to cooling rack to cool completely before serving.
Notes
- Use a sharp knife to cut the chilled cookie dough. A dull knife can compress the layers and blur the checkerboard pattern of the cookies.
- Baking time may vary with thickness of cookies (and ovens can vary too). Start checking around 13 minutes.
- Store baked cookies in an airtight container at room temperature for up to 5 days, or freeze for up to 3 months.
- See blog post for more recipe tips and tricks.
