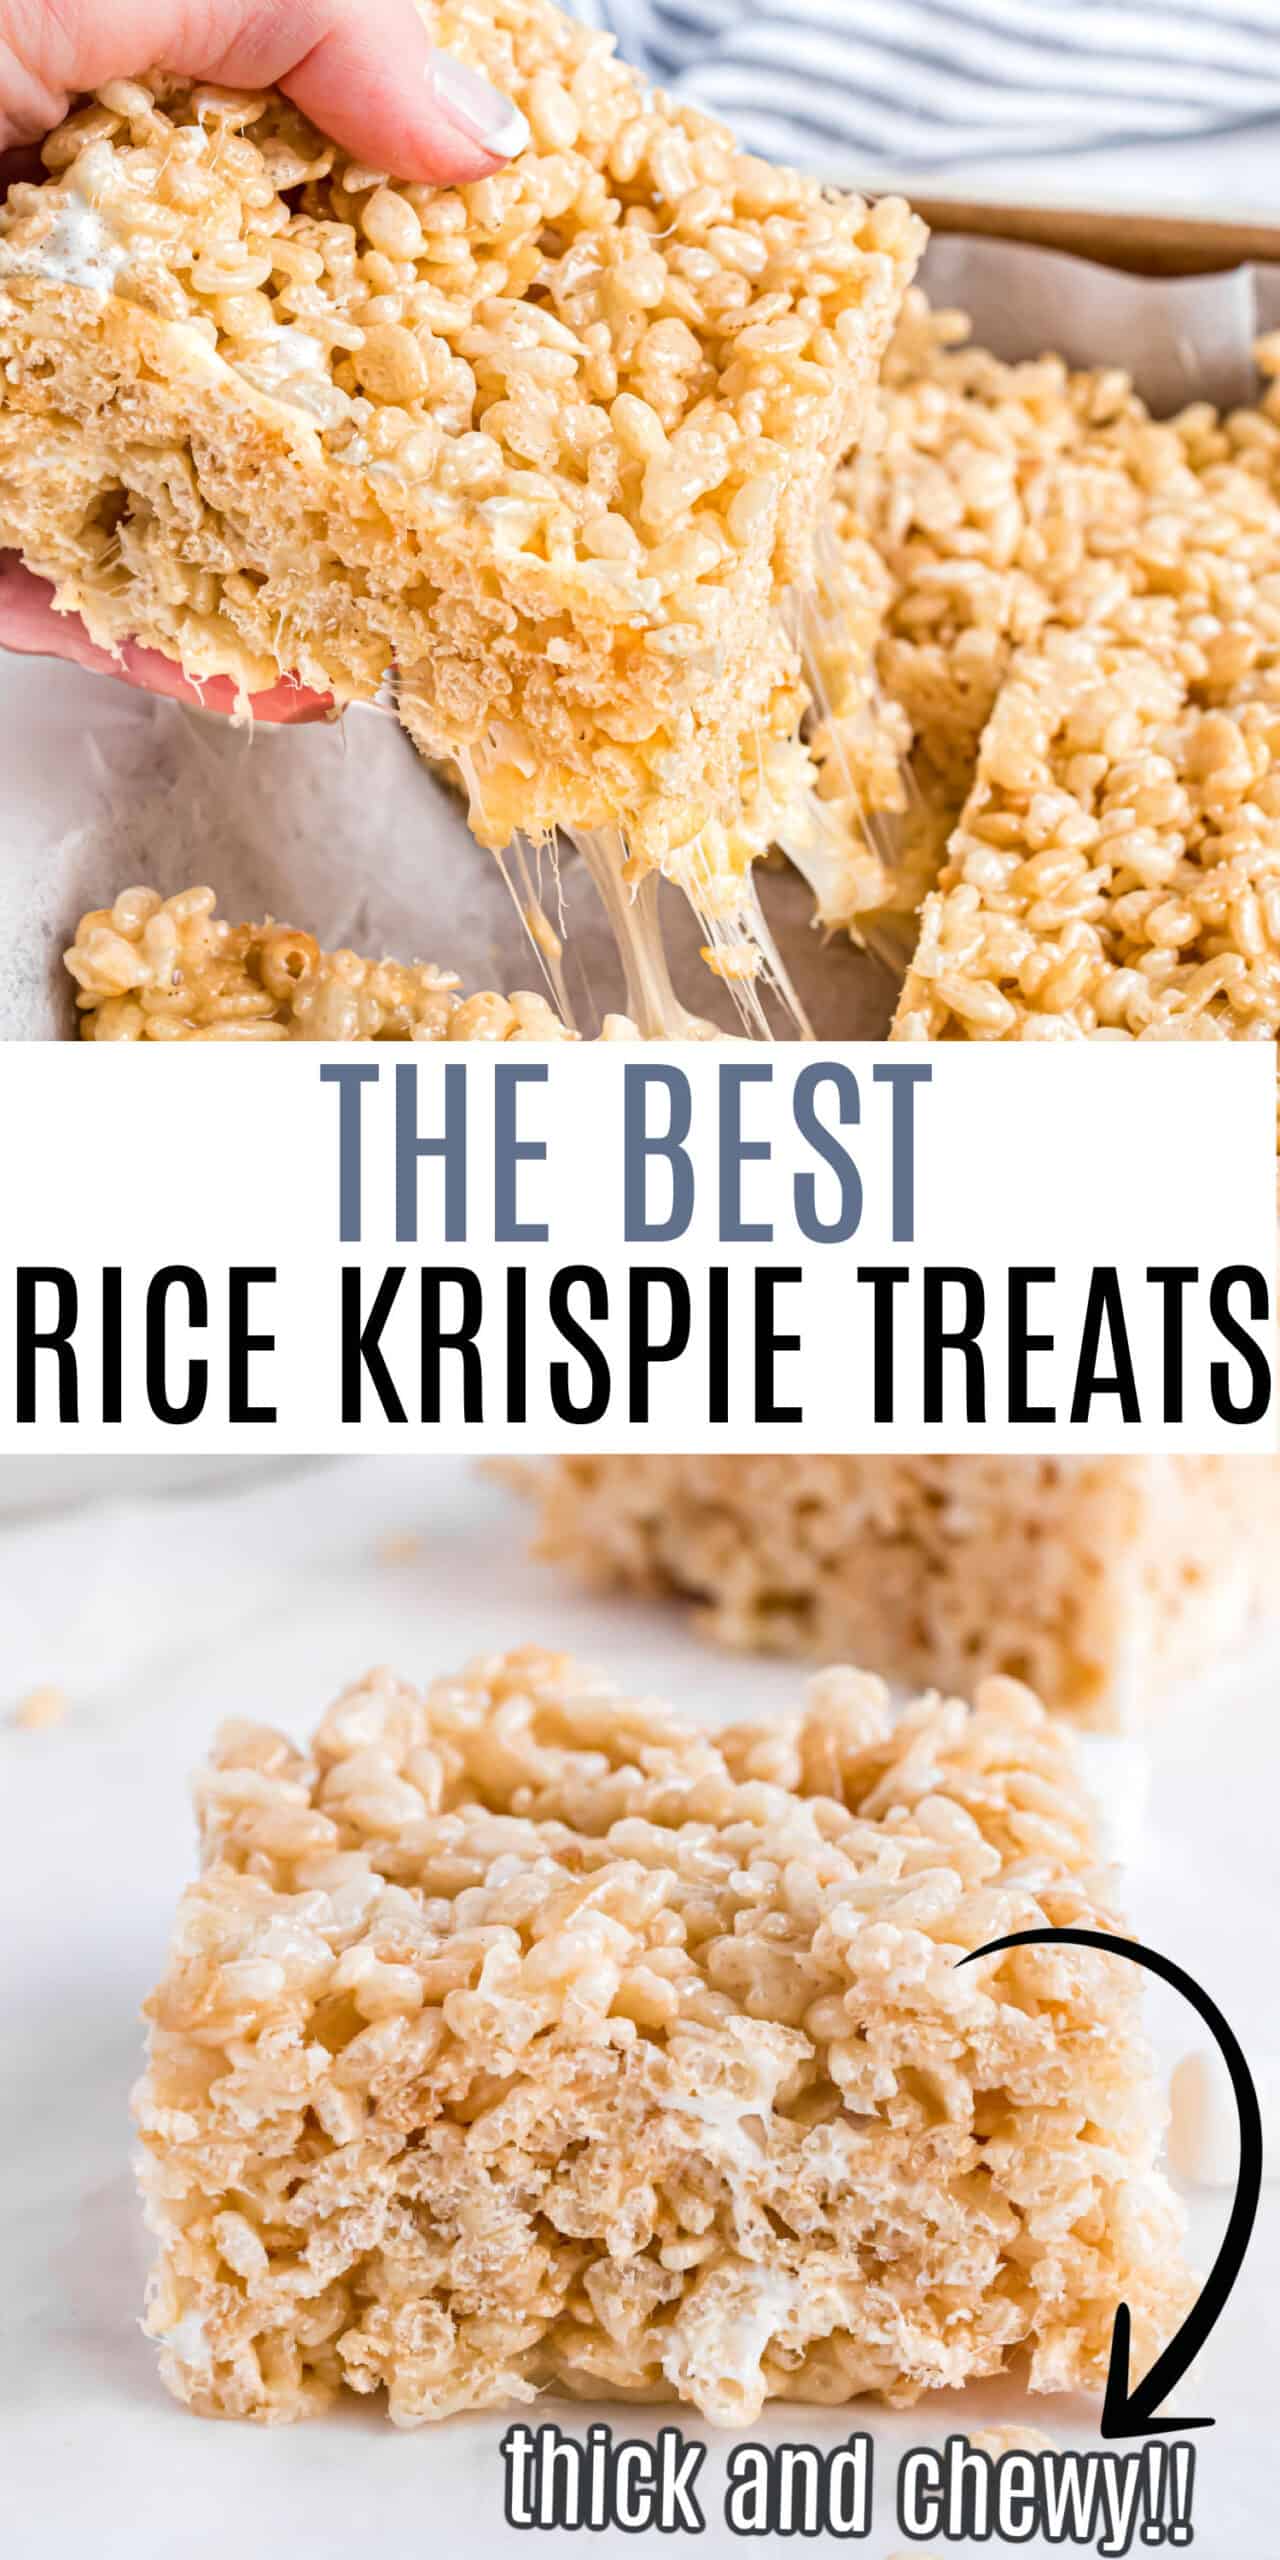
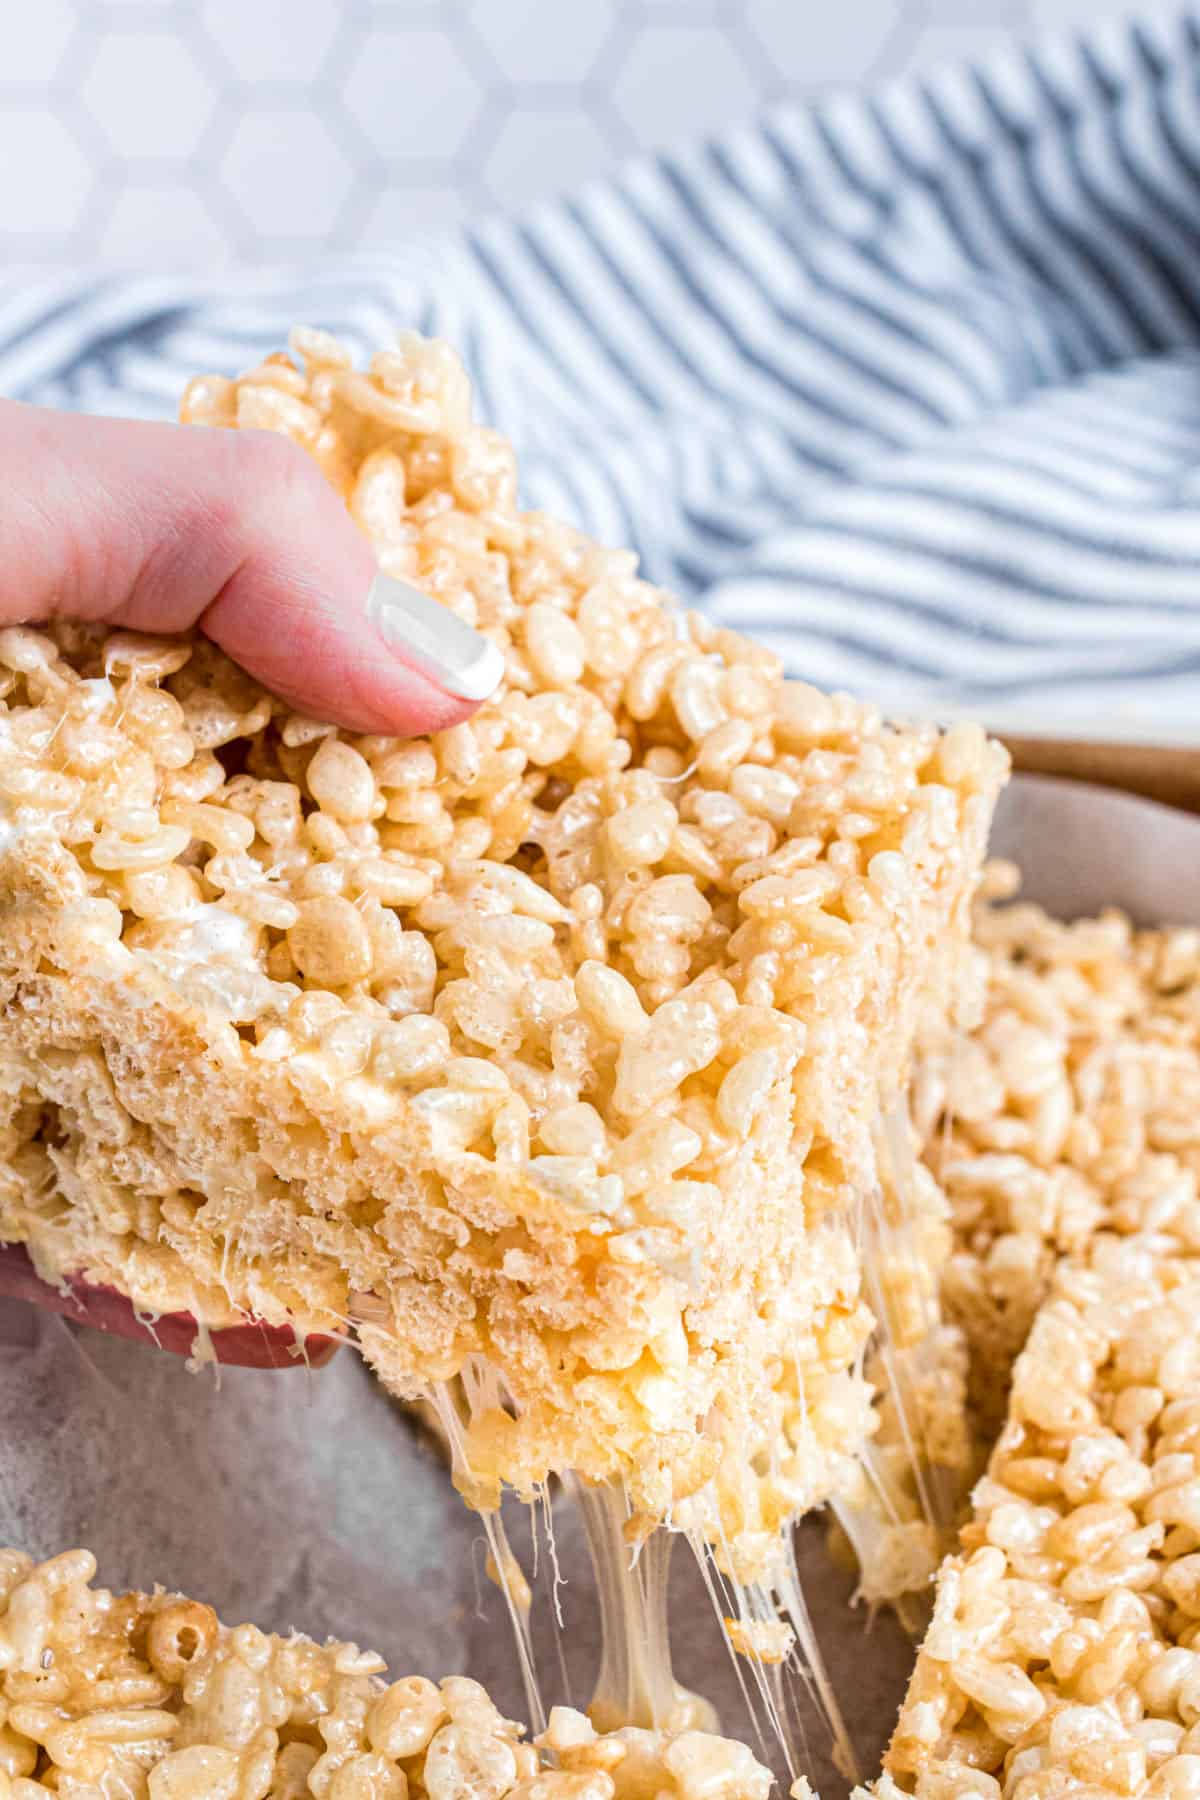
These homemade Rice Krispie Treats are perfectly soft and chewy every time, thanks to one secret ingredient. Ready in minutes with just 4 ingredients!
I’ve become known as the rice krispie treat expert. Once you’ve mastered my original version, get creative with flavors!

This recipe for homemade rice krispie treats was originally published in October 2016. It has been updated with new photos in February 2021 and updated recipe notes in July 2026.
Aimee’s Recipe Notes

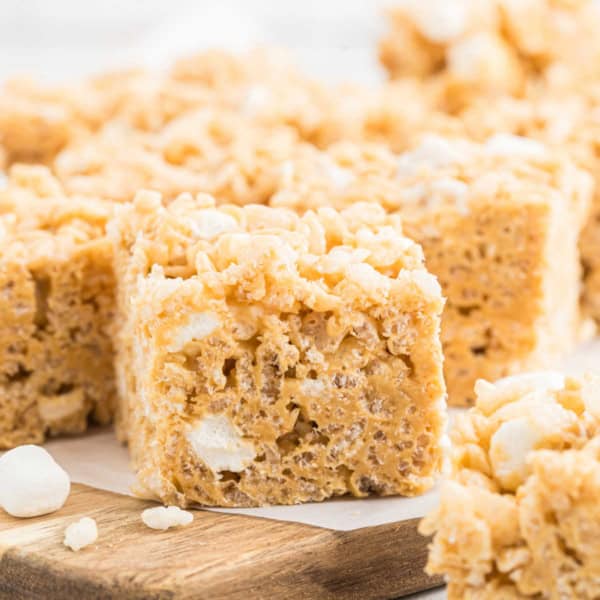
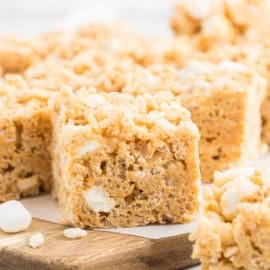
If you’ve been searching for the best rice krispie treat recipe, you’ve landed in the right place. These are buttery, gooey, and just the right amount of chewy. Everything the classic treat should be, with a little bit of a secret that makes them even tastier.
Taste: Sweet, buttery, and vanilla flavored.
Texture: Gooey, and chewy with a light crispiness from the cereal.
Ease to Make: Simple and quick, perfect for beginners or busy bakers.
Cooking Method: Stovetop, no-bake; just melt, mix, and set in a pan.
These are FANTASTIC and worth the time to refresh your rice Krispy teat skills.
-Sew
Homemade Rice Crispy Treats Ingredients
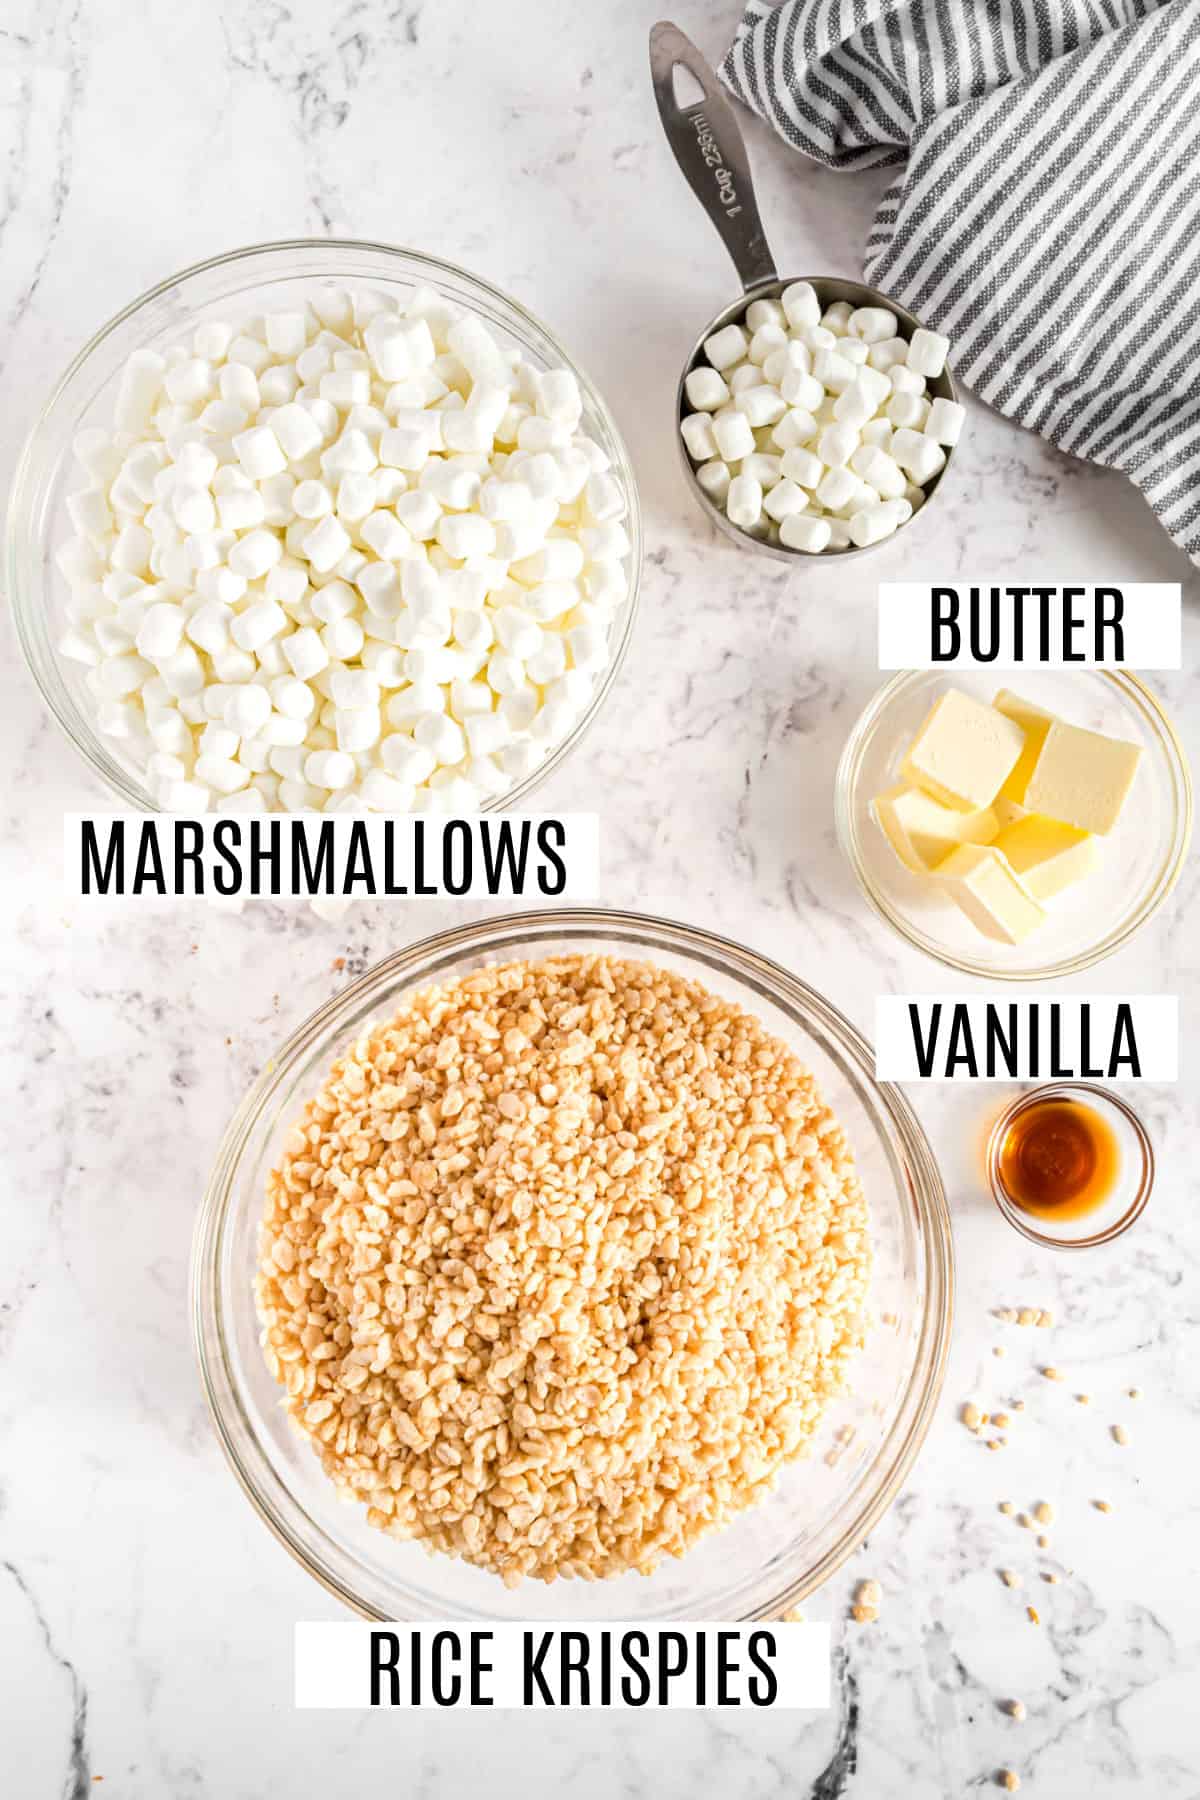
My recipes for rice crispy treats is so easy. Scroll down to the recipe card for full ingredient list and measurements.
- Butter- use salted butter for this recipe. Just trust me! Don’t have any on hand? Use unsalted butter and a pinch of salt while melting. DO NOT use margarine.
- Marshmallows- you’ll need 8-9 cups of mini marshmallows, keeping about 1 cup aside to add in at the end!
- Rice Krispies Cereal- any brand of crispy rice cereal will work, just make sure it’s FRESH.
Aimee’s Secret Ingredient
Adding my homemade vanilla extract or any pure vanilla extract takes this recipe over the top. Or make it lemon flavored using our easy lemon rice krispie treat recipe.
How to Make Rice Krispie Treats
Scroll down after the recipe card to see more tips and tricks as well as variations that I’ve created off this classic rice krispie treat recipe.
Quick Tips for the Best Rice Krispie Treat Recipe
- Use fresh marshmallows. Using stale marshmallows will result in stale treats. Trust me, I’ve learned the hard way.
- Brown the butter. Learn how to brown butter and make a batch of my flavorful brown butter rice krispie treats next!
- Add my secret ingredient. VANILLA EXTRACT. Not imitation vanilla, but Pure Vanilla extract. It makes a difference in creating the illusion that you’re using homemade marshmallows.
- Kelloggs is wrong. DO NOT press these bars into your pan firmly. Using your fingertips and gentlypress them in just until they are spread out. The harder you pack them in, the harder they are when it’s time to eat them!
- The trick to pressing them in your pan without sticking to your hands is to run your fingers in water. Dip in water, shake off the excess, and press. Voila. No sticking!
- Store in an airtight container for two days. If they last that long, I’d be shocked!
- Make these gluten free by choosing a crispy rice cereal labeled Gluten Free (and check your marshmallow labels too just in case).
Why are my rice crispy treats hard?
As mentioned above, you’ll get hard rice krispie treats a number of ways.
- Using stale ingredients will results in stale, hard treats. So always use fresh marshmallows and fresh cereal too.
- Avoid pressing your bars too firmly into the pan. The harder you press, the more firm the rice krispies treats will be.
Storing Leftovers
Rarely is this the case in my house, as we all know I can eat an entire pan of homemade rice krispie treats. But, should you find yourself with leftovers, you can store them in an airtight container at room temperature. I usually just slide them into a ziploc bag.
Or you can freeze rice krispie treats. I was skeptical for a long time, and finally tried it out. I slide my leftovers into a ziploc freezer bag and placed them in the freezer.
Surprisingly, they thaw pretty quickly on the counter and they taste super fresh too!
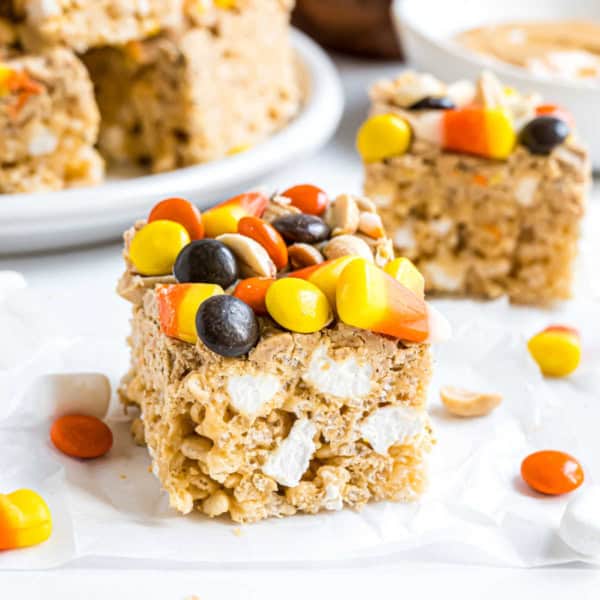
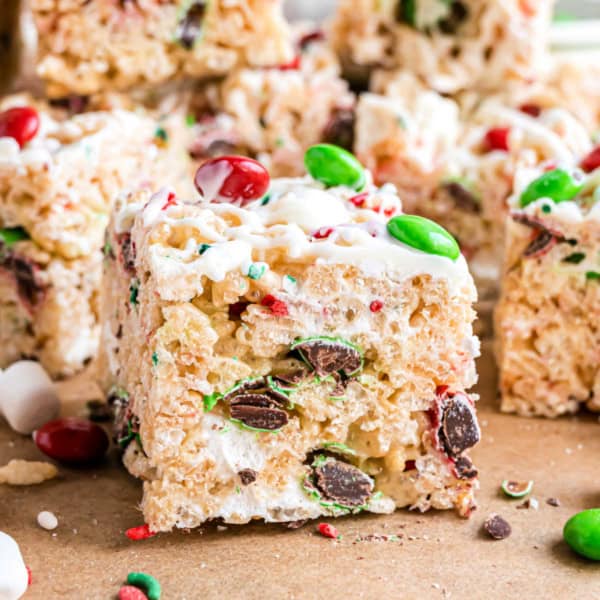
More Rice Krispie Treat Flavors
Add in some flavored gelatin (or pudding mix) to the melted marshmallow for a unique twist! Cherry Krispie Treats!
Make Lucky Charms Treats for a St.Paddy’s Day dessert idea.
- For best results, name brand cereal stays fresher longer and can hold up to the melted butter and marshmallows better
- Always start with fresh marshmallows. If you use stale marshmallows in hopes that melting them will give you good results, you’ll be disappointed!
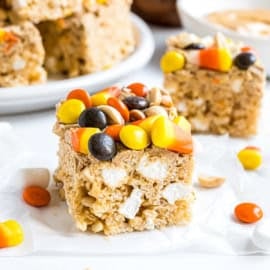
- More mix-ins: fold in some m&m’s or Reese’s peanut butter cups for a delicious dessert idea.
There are thousands of recipes for showing how to make rice crispy treats, and I’m putting it out there that my recipe is BEST. You may see some similar nowadays, but they all stem from my original add-ins.
- Only 4 ingredients
- Thick and chewy
- Vanilla flavor
- Perfect ratio of cereal to marshmallows
We love that this classic treat can be changed up using different cereals too!
- Chocolate– Cocoa Krispie Treats
- Fruity– Fruity Pebbles Treats
- S’mores– Golden Grahams Treats
- Cheerios– Cheerio Treats
Basic, original, homemade rice krispie treats that captures my taste buds.
The biggest question is how to spell it. Some people say Rice Crispy treat, Some say Crispy Rice, some say Rice Crispies. Either way, you get the point! This rice crispy treats recipe is the best you’ll find.
Best Rice Krispie Treats Recipe

Pin this now to find it later
Pin It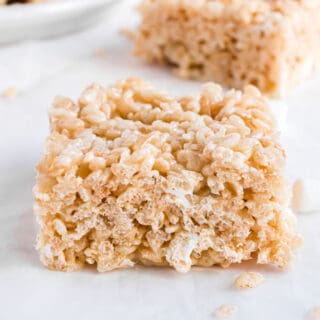
Rice Krispie Treats Recipe
Ingredients
- 6 Tablespoons salted butter
- 16 ounce bag mini marshmallows divided
- 1 teaspoon pure vanilla extract
- 6 cups rice krispies cereal
Instructions
- Line a 9-inch square baking dish with parchment paper. Set aside.
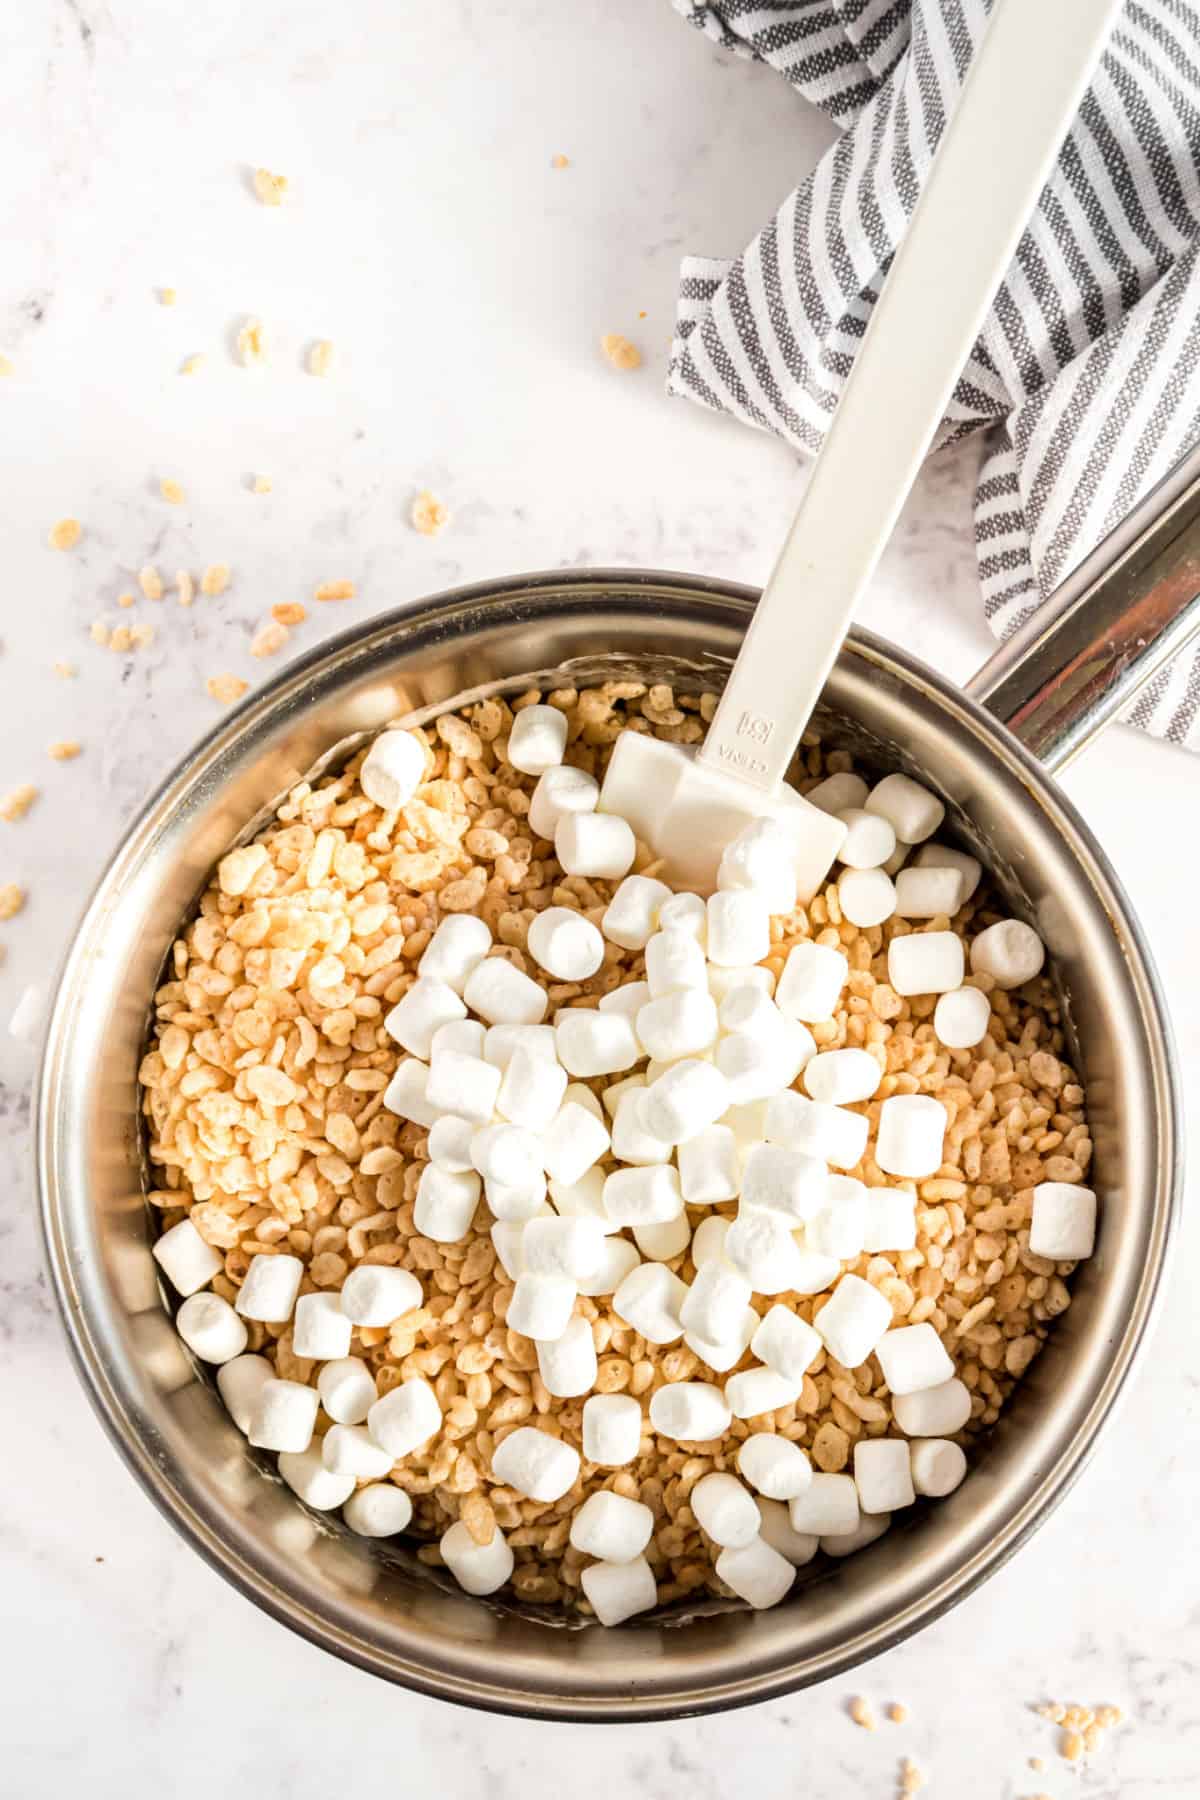
- In a large saucepan, melt butter over medium heat. Once melted, add in all but 1 cup of the marshmallows. Reduce heat to low and continue stirring until completely melted.
- Remove from heat and stir in the vanilla. Add the cereal and the remaining 1 cup of marshmallows and gently stir until combined.
- Pour into the prepared baking dish. Press GENTLY with your fingertips just until completely spread out (the harder you pack them in, the harder they are to eat).
- Allow to set, about 1 hour. Cut and enjoy!
Notes
- How many marshmallows do I need? One 16 ounce bag of marshmallows is about 8-9 cups. You’ll melt all but one cup of the marshmallows in the butter, reserving the last cup for adding with the cereal.
- Line a 9-inch square baking dish with parchment paper. This way you don’t have to worry about extra butter on your fingertips, or the other extreme of your bars sticking to the pan! Use binder clips to help the parchment paper stay in place.
- Use fresh marshmallows. Seriously, they make a difference. Don’t grab that bag that’s been in your pantry for months and months thinking it will be okay since you are melting them. It won’t be okay.
- Add my secret ingredient. VANILLA EXTRACT. Not imitation vanilla, but PURE VANILLA extract. It makes a difference in creating the illusion that you’re using homemade marshmallows.
- DO NOT (I repeat) DO NOT press these bars into your pan firmly. Using your fingertips, GENTLY press them in just until they are spread out. The harder you pack them in, the harder they are when it’s time to eat them!
- The trick to pressing them in your pan without sticking to your hands is to run your fingers in water, shake off the excess, and press. Voila. No sticking!
- Store in an airtight container for two days. If they last that long, I’d be shocked!
- Make these gluten free by choosing a crispy rice cereal labeled Gluten Free (and check your marshmallow labels too just in case).
- Can you freeze rice krispie treats? YES! I slide them on a parchment paper lined sheet into a ziploc freezer bag. Thaw on counter until soft again!
Video
Nutrition
Original Rice Krispie Treats recipe with all the tips and tricks for making them thick and chewy!


No Rice Krispies, but did have air toasted Kinua, no small marshmellows, so chopped up a bag of large colored ones we found…diferent grain taste, but same love at first bite and of course they were short lived…didn’t know how, or even had the recipe for them, THANK YOU FROM CAJAMARCA, PERU in High Andes.
Add butterscotch chips. They make them to die for!
Perfect treats for kids, rice krispie. I think it is familiar to kids, but with this recipe it makes more fun to eat. Thanks Aimee for this great treat recipe of yours.
I ‘ve used the gooey concoction (no Rice Krispies added) over freshly popped corn for my 4 kids when they were little…now aged 49-59…loved getting to the bottom of the bowl where all the excess goodies remained!!!!!! Great Grandma Marty now
Rice Krispie is great, they look really attractive. I like the color as well as its taste, great. Thanks for your sharing
It looks so yummy! I love the step-by-step instructions, making it an easy recipe to follow!
I went with chocolate krispies 1.5 tap orange extract .5 tap vanilla perfection! Thanks for the base recipe (from your Midwestern modern man!)
Sounds delicious!
This sounds yummy! I would definitely make it again! Thanks for sharing the recipe
Aimee, this looks really good! I think I need to make these for myself and the kids. Love this idea!
Try adding 1/2 tsp of butter flavoring! Yum!!
I mixed in some Reese’s Pieces. Loved it.
I just made these for my son’s but used the new strawberry Rice Krispies – holy cow they are a hit! Thanks for the great recipe!
I had no idea that was a thing?!?. I must go find them now!
My grandkids love Rice Krispy treats, and they are easy and safe for our peanut allergy and gluten-Free diets. I microwave all ingredients (plus gel food coloring, if using), except the cereal, for 60-90 seconds (stir); microwave longer, if needed. Quicker that way and no burning! Make several batches in different colors, and layer; the combinations are endless. (Red and white; Santa hat. Blue and gold; Super Bowl).
Great tips 🙂
LOVE these tips!!!! I’m totally due to make some rice krispie treats too!
I add chopped pecans and dried cranberry’s yummy.
Great twist!!
I add fruity pebbles to my Rice Krispies. They are delicious.
My sons and I made this recipe yesterday. It was very easy to make with children. We added sprinkles to give a decorative look.
So fast and very easy to make this. I love krispie rice so much. Thank you for your instruction to make this treat!
These came out perfect!! My son lovessss them thank you. Ps..this was my first time ever making these..make sure will make it again again!!Thanks so much,
Hello, this recipe looks amazing. I was going to try and make a larger batch for work so I have a newbie baking question.. I don’t cook/bake often, so if I want to use a 9×13 like other people have said, would I double the amount of EVERY ingredient? Like, 12 cups krispies, 2 tsp extract, 32 oz marshmallows, 12 tbsp. butter? Would this be correct? Thank you in advance.
You could, if you like them super thick. Or, you can keep the same amount and they would be thinner. Personally, I would go a different route and make 1 1/2 times 🙂 LOL.